Hatching and Brooding Chicks
Planning to start hatching? You got your first batch of chicks but don& #39;t know what to do next?
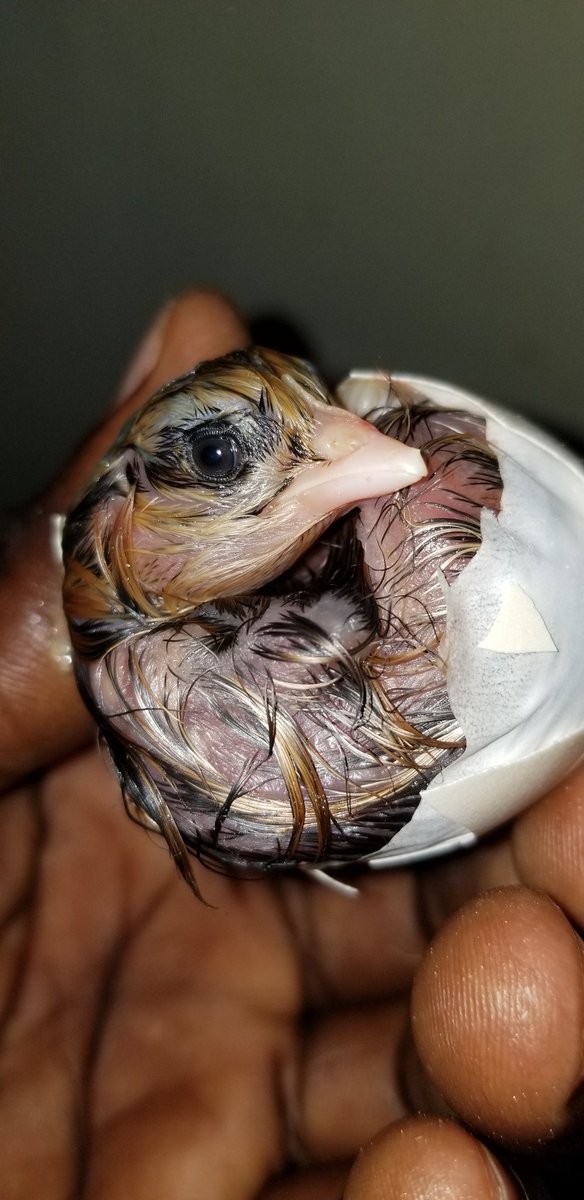
Let me take you through the interesting life of a chick.
Eggs, embryo development, hatching and brooding depends on you 100%. So no buts.
A Thread
Planning to start hatching? You got your first batch of chicks but don& #39;t know what to do next?
Let me take you through the interesting life of a chick.
Eggs, embryo development, hatching and brooding depends on you 100%. So no buts.
A Thread
In the previous thread, I emphasized the need to raise your flock before you invest in an incubator. Calculate your needed capacity and raise hens with cockerels that will ensure you have fertilized eggs in the right quantity as per your capacity requirements. Be patient. Plan.
Don& #39;t depend on others to supply you eggs for incubation.
Reasons:
1. Most farmers are not keen on breeder stocks, lowering quality.
2. Most farmers inbreed leading to poor quality chicks n unexplained deaths while growing.
3. Assured supply on need basis. No excuses.
4. Fresh
Reasons:
1. Most farmers are not keen on breeder stocks, lowering quality.
2. Most farmers inbreed leading to poor quality chicks n unexplained deaths while growing.
3. Assured supply on need basis. No excuses.
4. Fresh
Fresh eggs are important. Most egg sellers are not keen on selling eggs within the best age of 7 to 10 days. Especially those with few layers, they will keep eggs for long to get the needed quantity.
5. Low cost. Buying eggs will increase your costs of getting chicks.
6. Timely
5. Low cost. Buying eggs will increase your costs of getting chicks.
6. Timely
I must emphasize the need to avoid inbreeding. Ensure once you have established your hens, get the best quality cockerels from another farmer or hatchery. Don& #39;t raise and use cockerels from the same batch and hatchery. The number of cocks to hens should be 1:5~10. Keep clean eggs
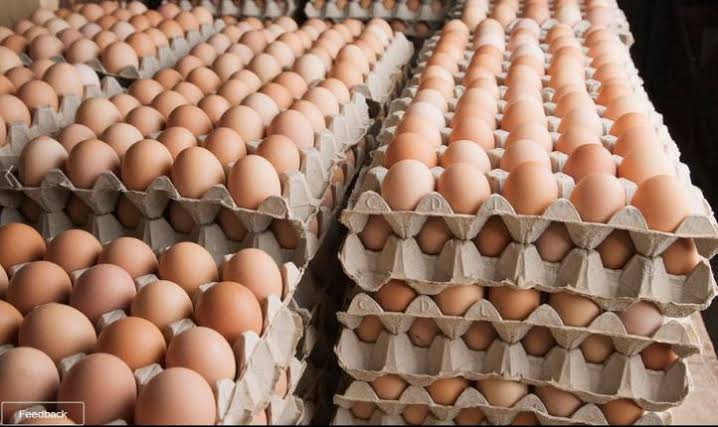
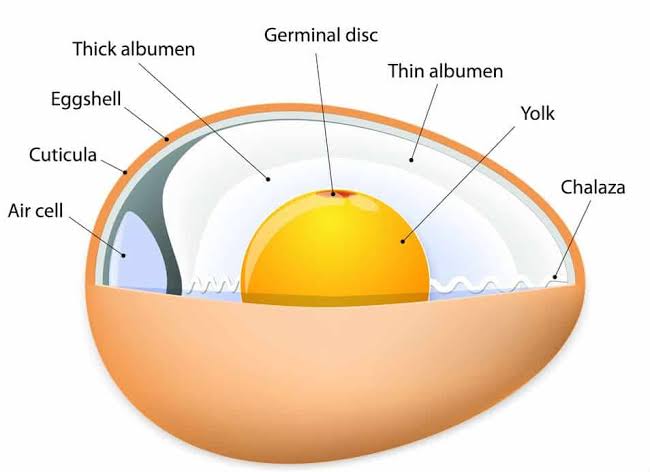
As you collect eggs for hatching, store them in a cool, dry, aerated and dark place. Light reduces hatching rate. Place them on trays sharp end facing down as the air sac is at the blunt side.
Incubation eggs should be between 1 to 12 days old for best hatching.
Incubation eggs should be between 1 to 12 days old for best hatching.
However, eggs past 12 days will still hatch but the rate will reduce drastically. Have enough layers so that you can maintain 1 to 5 days. Sell the rest.
Any incubator will work as long as it has stable settings and can moderate temperatures and humidity consistently.
Any incubator will work as long as it has stable settings and can moderate temperatures and humidity consistently.
Set your incubator and let it run at least 12 to 24 hours before loading the eggs. No rush.
Once you are sure its stable and your backup power is in order, load your eggs. For small incubators, solar backup systems are good. For larger ones, combine solar and generator backup.
Once you are sure its stable and your backup power is in order, load your eggs. For small incubators, solar backup systems are good. For larger ones, combine solar and generator backup.
Temperature, humidity and turning
Key aspects in hatching.
Temperatures:
Day 1 to 7: set at 38.2~38
Day 8 to 12: set at 37.9~37.8
Day 13 to 18: set at 37.6~37.5
Day 19 to 21/23: set at 37.2
Humidity
Day 1 to 7: 65~68
Day 8 to 12: 60~55
Day 13 to 18: 60~65
Day 19 to 23: 70~75
Key aspects in hatching.
Temperatures:
Day 1 to 7: set at 38.2~38
Day 8 to 12: set at 37.9~37.8
Day 13 to 18: set at 37.6~37.5
Day 19 to 21/23: set at 37.2
Humidity
Day 1 to 7: 65~68
Day 8 to 12: 60~55
Day 13 to 18: 60~65
Day 19 to 23: 70~75
Turning:
Set turning to 90mins interval at 20 seconds from day 1 to day 18th.
0 turning from day 19th to 23rd.
If manual incubator, turn eggs manually at 2 to 3 times daily up to day 18th then stop on 19th to 23rd.
The high temperatures/humidity in day 1 to 7 are important.
Set turning to 90mins interval at 20 seconds from day 1 to day 18th.
0 turning from day 19th to 23rd.
If manual incubator, turn eggs manually at 2 to 3 times daily up to day 18th then stop on 19th to 23rd.
The high temperatures/humidity in day 1 to 7 are important.
This helps break dormancy and initiate embryo development.
Candling should be done on the 7th day to eliminate eggs without embryo or unfertilized. Checking fertility can also be done before incubation but don& #39;t try this if you are not an expert.
Candling should be done on the 7th day to eliminate eggs without embryo or unfertilized. Checking fertility can also be done before incubation but don& #39;t try this if you are not an expert.
You can load more eggs so that by day 7 when candling you remain with full capacity of developing eggs after removing the bad ones.
I use this trick often. Eg instead of 500 load 600. Candle on day 7 n remain with about 510 good ones to reduce losses incurred from underload.
I use this trick often. Eg instead of 500 load 600. Candle on day 7 n remain with about 510 good ones to reduce losses incurred from underload.
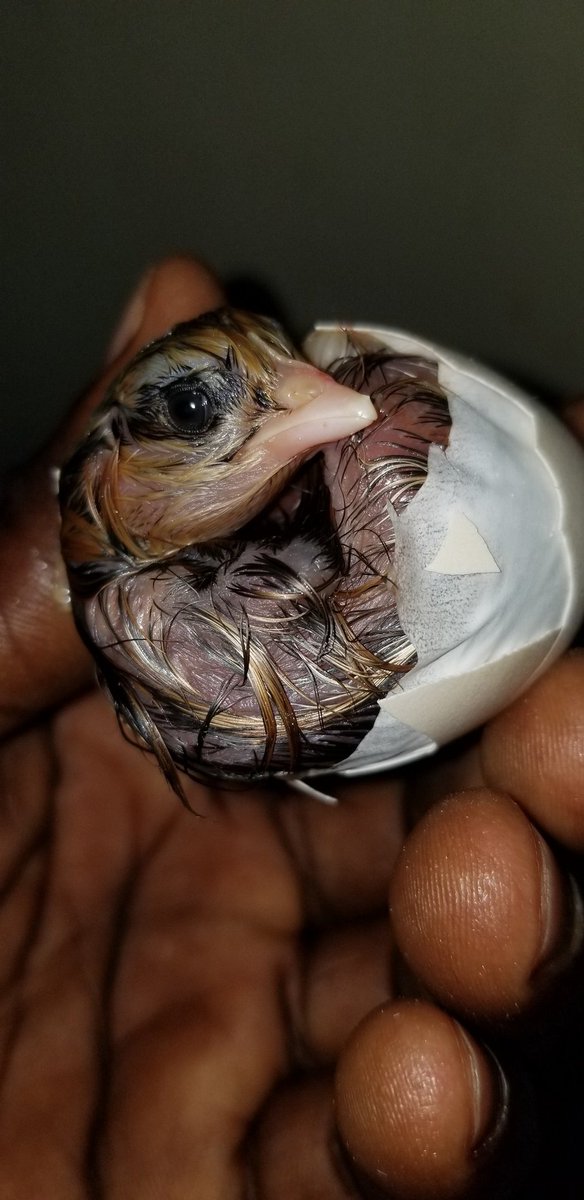
On day 19th the chick is mature and has all features. So it needs more air and humidity. Ensure the incubator vent is fully open and aeration is good.Optimal humidity ensures the chick doesn& #39;t stick on the shell.
Leave the eggs still. No touching. Turning interferes with hatching
Leave the eggs still. No touching. Turning interferes with hatching
Turning or touching eggs from 19th day confuses the chick and messes with the shell cracking signals and points. You MUST know that hatching is similar to child labour during delivery. Chicks undergo stress, fatigue/exhaustion. Touching eggs means more labour hours hence death.
Thats why you get fully developed chicks but dead in the egg shells. Remember air is not sufficient in the shell so it must get out within time.
Don& #39;t be in a rush to crack the shells to remove the chicks unless it cracked open and stayed over 20 hours without getting out.
Don& #39;t be in a rush to crack the shells to remove the chicks unless it cracked open and stayed over 20 hours without getting out.
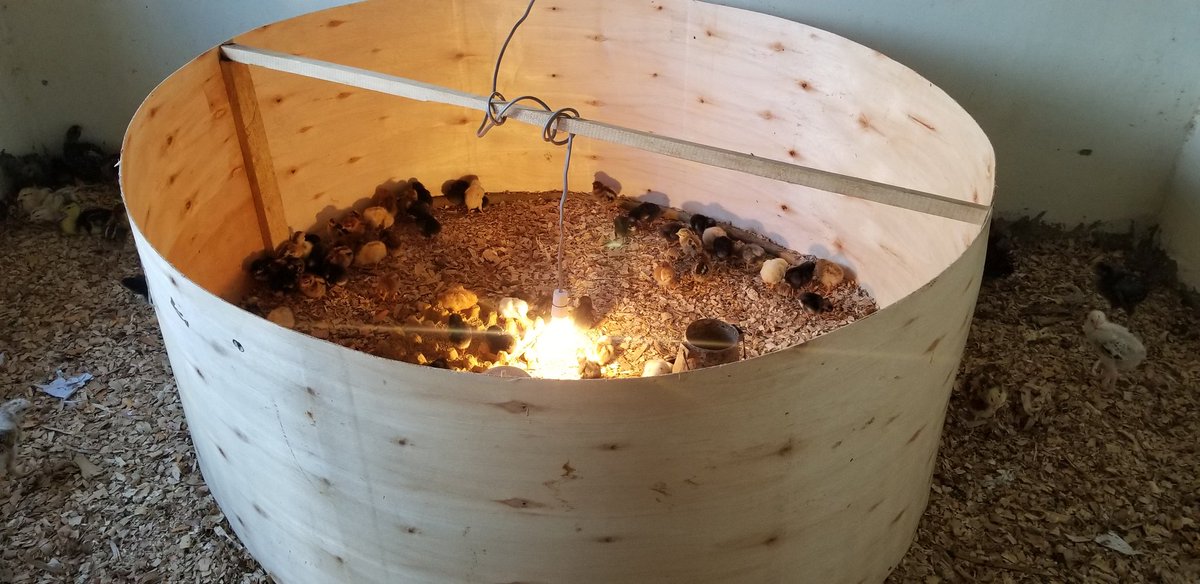
From 19th day, set up your brooder. You will need a circular brooding unit with light and heat. Use normal bulbs of 60 to 100 watts. The number of bulbs depends on size of enclosure and number of chicks. Set your drinkers and feeders and get the best feeds and treatment.
Ensure the floor has wood shavings. Avoid saw dust as the chicks cannot differentiate them from feeds on day 1 to 3. Feeding on these dusts interfere with digestion, https://abs.twimg.com/emoji/v2/... draggable="false" alt="👉" title="Rückhand Zeigefinger nach rechts" aria-label="Emoji: Rückhand Zeigefinger nach rechts"> death. Use old newspaper to cover the shavings from day 1 to 3. Use trays for feeding day 1 to 3 then feeders.
Remove the chicks that have stayed for 24hours in the incubator after hatching. Don& #39;t rush. Also eggs can hatch as early as 18 days and as late as 25days, coz of temperature and humidity variations.
So just remove the hatched chicks and leave the incubator running until day 25.
So just remove the hatched chicks and leave the incubator running until day 25.
Ensure the brooder is circular and just enough.
Day 1 in the brooder, temperatures should be 36 to 38° for the first week. However, 32 to 34 or even room temperatures won& #39;t kill. Too low or too high temperatures are bad and would interfere with growth and cause pasty butts.
Day 1 in the brooder, temperatures should be 36 to 38° for the first week. However, 32 to 34 or even room temperatures won& #39;t kill. Too low or too high temperatures are bad and would interfere with growth and cause pasty butts.
Immediately you introduce chicks in the brooder, prepare their drinking solution: mix lukewarm water with chick start, poultry microbes and extra glucose. Once you turn the drinker upside down, add liquid paraffin on top n mix. This helps in digestion n prevents pasty butts.
Do the above for 5 days then withdraw the chick start on the 6th day. Glucose can be withdrawn on the 3rd day. Continue with poultry microbes and liquid paraffin up to 10th day.
Feeding. I prefer starter crumbs from day 1 to 6 weeks when I change to growers mash. You can use mash
Feeding. I prefer starter crumbs from day 1 to 6 weeks when I change to growers mash. You can use mash
For the first 2 weeks, provide feeds and water 24/7 to ensure faster growth, thereafter switch to 12 hours.
Hygiene is CRITICAL. Have boots at the entrance and disinfect before stepping in.
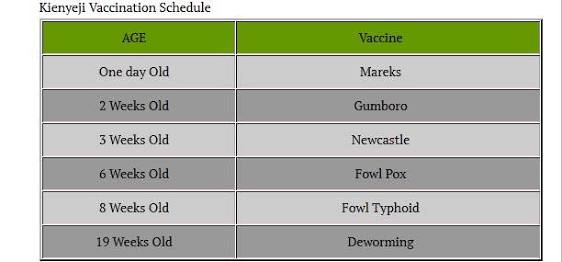
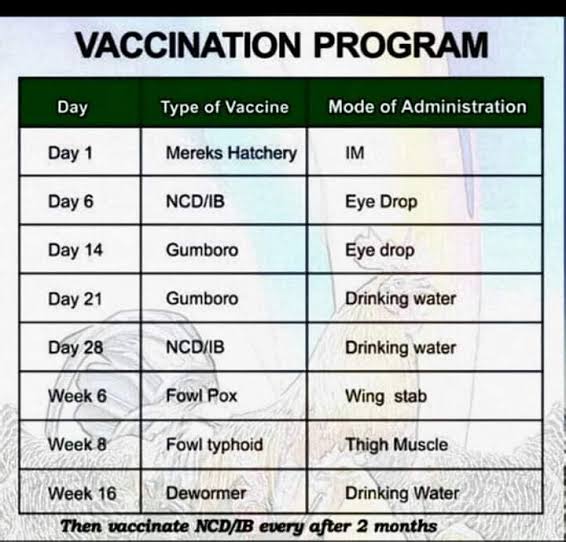
Have a Vaccine schedule:
For Indigenous
Day 1:mareks.
Week 1: Gumboro.
Week 2: NCD.
Hygiene is CRITICAL. Have boots at the entrance and disinfect before stepping in.
Have a Vaccine schedule:
For Indigenous
Day 1:mareks.
Week 1: Gumboro.
Week 2: NCD.
Hybrids have a slightly different vaccinations schedule Starting with mareks then NCD. https://abs.twimg.com/emoji/v2/... draggable="false" alt="👇" title="Rückhand Zeigefinger nach unten" aria-label="Emoji: Rückhand Zeigefinger nach unten">
Be careful with expiry dates of vaccines, feeds, antibiotics and multivitamins. Expired feeds have high afflatoxins and would kill your chicks. Red droppings are a sure sign of contamination.
Be careful with expiry dates of vaccines, feeds, antibiotics and multivitamins. Expired feeds have high afflatoxins and would kill your chicks. Red droppings are a sure sign of contamination.
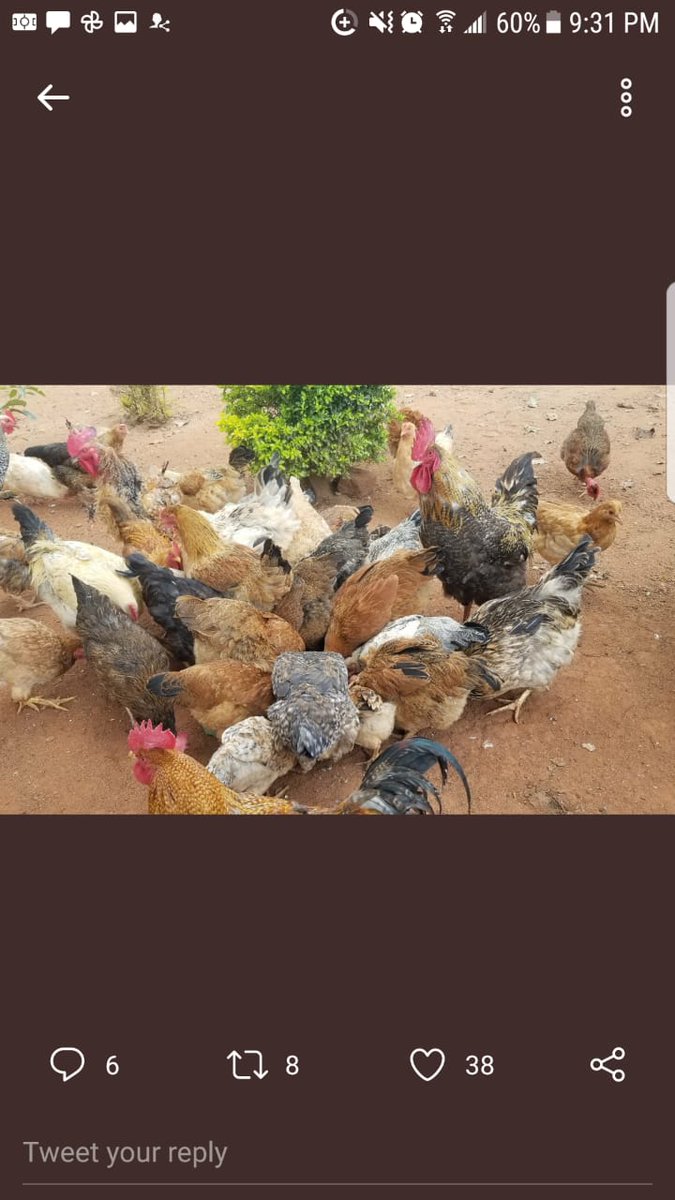
At day 30, ensure that your chicks are as big and healthy as my indigenous below.  https://abs.twimg.com/emoji/v2/... draggable="false" alt="👇" title="Rückhand Zeigefinger nach unten" aria-label="Emoji: Rückhand Zeigefinger nach unten">
Please note: chicks are sensitive to slight changes and so should you.
Noise implies the following:
1. Thirsty, no water.
2. Hungry, no feeds.
3. Intrusion, cat, snake etc
4. Blown bulb.
Please note: chicks are sensitive to slight changes and so should you.
Noise implies the following:
1. Thirsty, no water.
2. Hungry, no feeds.
3. Intrusion, cat, snake etc
4. Blown bulb.
@Yabarati I hope this thread solves your problems. May you encounter success all through in your hatching experience.  https://abs.twimg.com/emoji/v2/... draggable="false" alt="🤗" title="Umarmendes Gesicht" aria-label="Emoji: Umarmendes Gesicht">

 Read on Twitter





 Be careful with expiry dates of vaccines, feeds, antibiotics and multivitamins. Expired feeds have high afflatoxins and would kill your chicks. Red droppings are a sure sign of contamination." title="Hybrids have a slightly different vaccinations schedule Starting with mareks then NCD.https://abs.twimg.com/emoji/v2/... draggable="false" alt="👇" title="Rückhand Zeigefinger nach unten" aria-label="Emoji: Rückhand Zeigefinger nach unten">Be careful with expiry dates of vaccines, feeds, antibiotics and multivitamins. Expired feeds have high afflatoxins and would kill your chicks. Red droppings are a sure sign of contamination." class="img-responsive" style="max-width:100%;"/>
 Please note: chicks are sensitive to slight changes and so should you. Noise implies the following:1. Thirsty, no water. 2. Hungry, no feeds. 3. Intrusion, cat, snake etc4. Blown bulb." title="At day 30, ensure that your chicks are as big and healthy as my indigenous below. https://abs.twimg.com/emoji/v2/... draggable="false" alt="👇" title="Rückhand Zeigefinger nach unten" aria-label="Emoji: Rückhand Zeigefinger nach unten">Please note: chicks are sensitive to slight changes and so should you. Noise implies the following:1. Thirsty, no water. 2. Hungry, no feeds. 3. Intrusion, cat, snake etc4. Blown bulb." class="img-responsive" style="max-width:100%;"/>


