Starting a new thread where I will document my (hopefully successful!) attempt at building a #Galaksija, Yugoslavia& #39;s DIY computer designed by Voja Antonić in 1983. I will document technical challenges, but also my attempt at engaging with my personal and collective history.
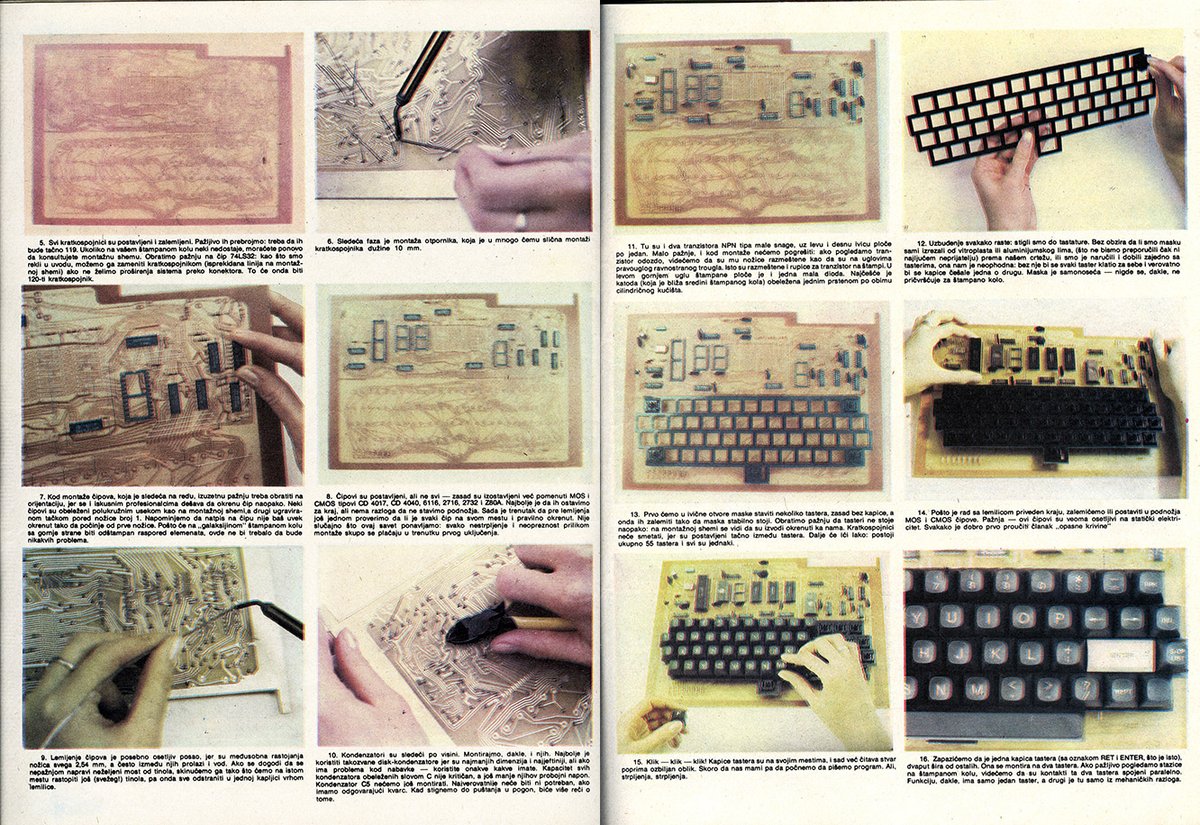
Before we start, some rules I& #39;ve established for myself. I will attempt to build this computer using the same parts folks used back in the 80s. I will primarily use the original DIY guide published in 1983 "Računari u vašoj kući" magazine.
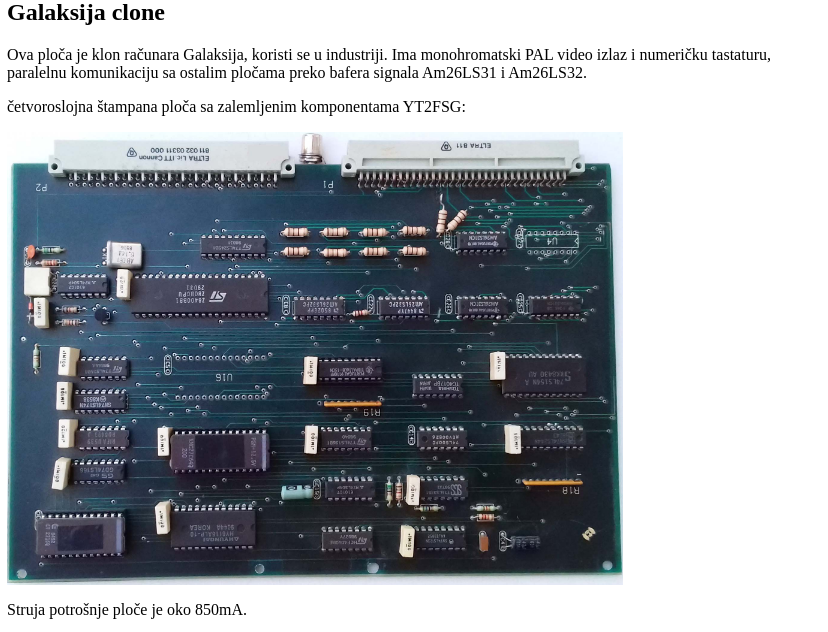
There are many projects and clones of Galaksija using newer parts, some of which follow the same design while providing contemporary functionality like SD card support. These are all amazing, and I& #39;ve used them in my research. But for my first try, I want to build the original.
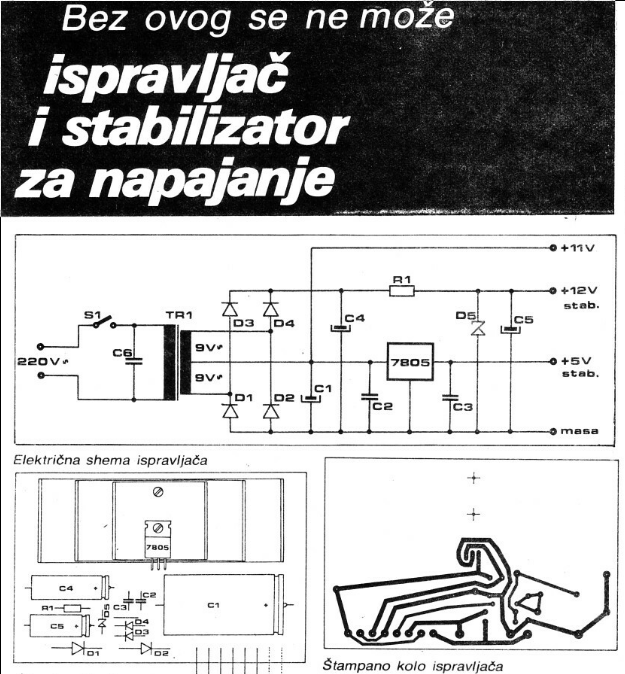
I will not attempt to build the power supply myself. The original guide included instruction on making one, but for my first try I will use a 5V, 2A off the shelf adapter.
There is also a crowdfunding effort underway to fund an upcoming Galaksija documentary, which includes an option to order a Galaksija kit! While I may end up getting one of those, I want to do one myself first. https://twitter.com/mejs/status/1306935154649305092">https://twitter.com/mejs/stat...
So this is my approach. Follow this thread and #galaksija tag for updates. This will be a combination of tech speak with reflections on history, my own as well as that of my former country where this machine was originally built. Hopefully we get to build a computer!
My recent interest and rediscovery of Galaksija were primarily inspired by this thread, and the @jacobinmag article it references https://twitter.com/doctorow/status/1289932294023610370">https://twitter.com/doctorow/...
But I really got interested in the topic and decided to make one myself after visiting @PEEKANDPOKE computer museum in Rijeka. https://blog.vladovince.com/exploring-old-computer-tech-from-yugoslavia/">https://blog.vladovince.com/exploring...
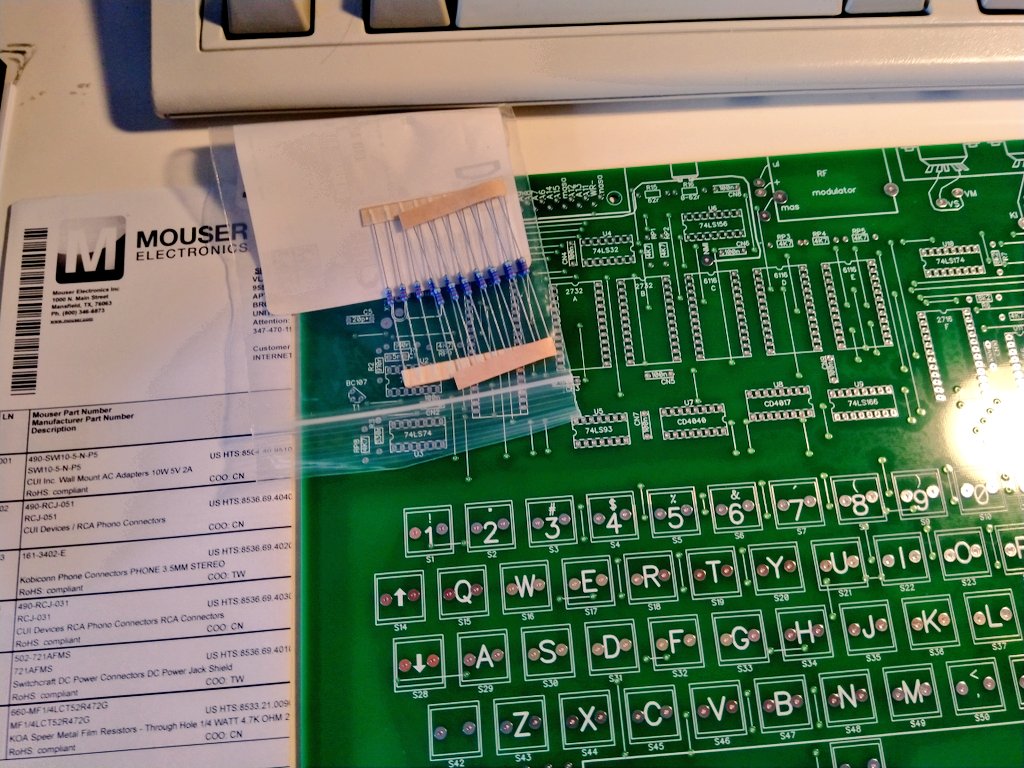
So let& #39;s talk parts. This photo includes most of the parts necessary to assemble a Galaksija, sans the keyboard switches and caps! We& #39;ve got the PCB, Z80 CPU, EPROMs, 7400-series logic chips, a bunch of resistors and capacitors, and that& #39;s pretty much all you need!
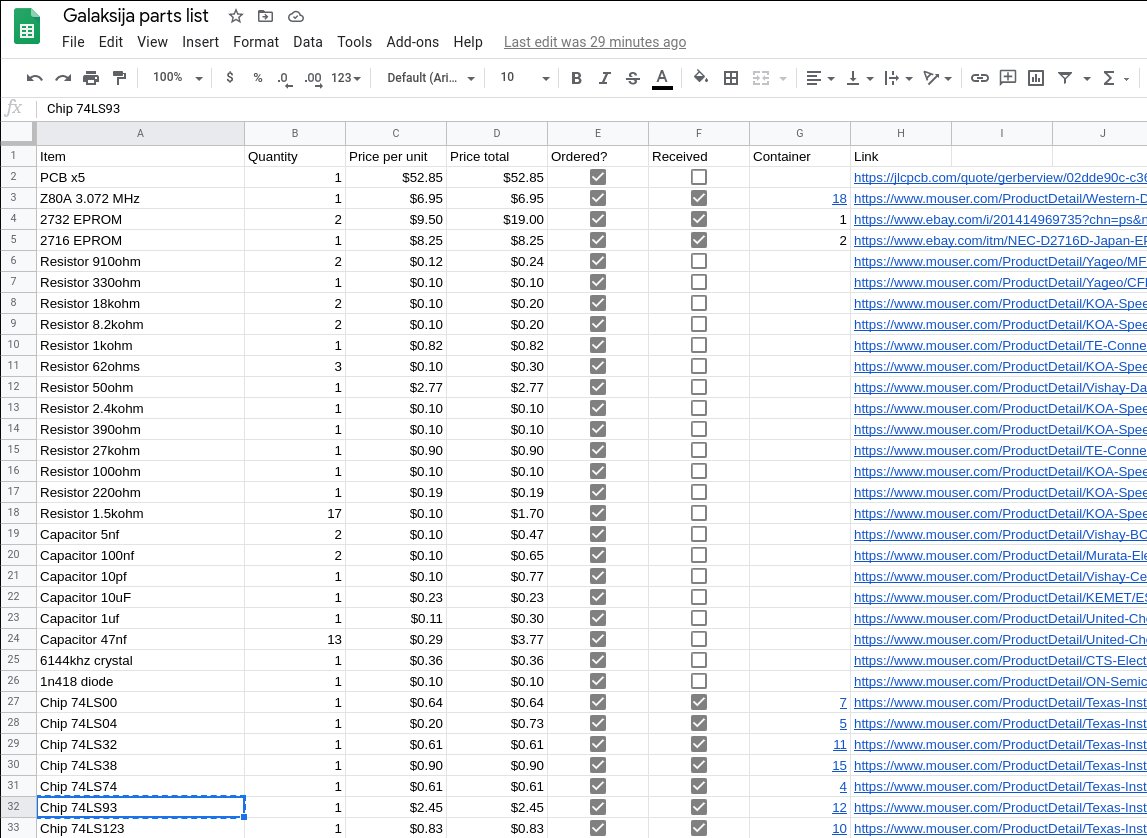
I put together a spreasheet with all the parts necessary, including prices and links to purchase (if you& #39;re US based). Most of these should be easily available worldwide, or wherever @MouserElec delivers. https://docs.google.com/spreadsheets/d/1QJcyFRXi8k8qUmd-SudMwjSTcvY0Hddc_G902Sn-lK0/edit?usp=sharing">https://docs.google.com/spreadshe...
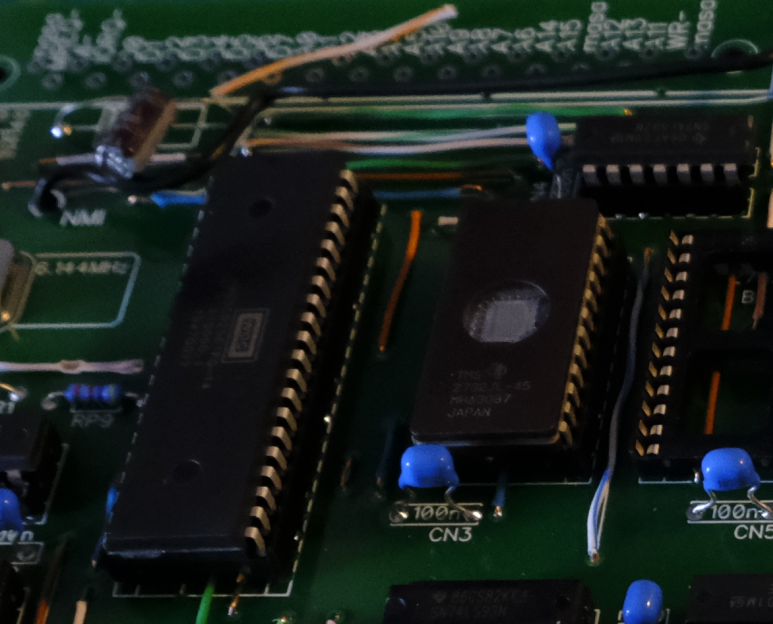
Two things to note: the 2732 and 2716 EPROMs are becoming more difficult to find, and they& #39;re the only things I had to get on eBay, used. We& #39;ll see how well they& #39;re holding up. Secondly, I& #39;m also getting an EPROM programmer to load the ROMs.
Folks in the 80s didn& #39;t have this cost because they would send their EPROMs to Računari u vašoj kući who would program them. The good folks currently running the Galaksija crowdfunding effort will also program the ROMs for supporters who order kits. https://www.crowdsupply.com/rcc-productions/galaksija">https://www.crowdsupply.com/rcc-produ...
Thirdly (ha), I also ordered the PCBs (more on the files and where I got them later) from @JLCPCB. Their minimum order is 5 PCBs, so I& #39;ve got 4 extras. This increased the price, but if you decide to build a #Galaksija, DM me and you can have one PCB for free (just pay shipping)
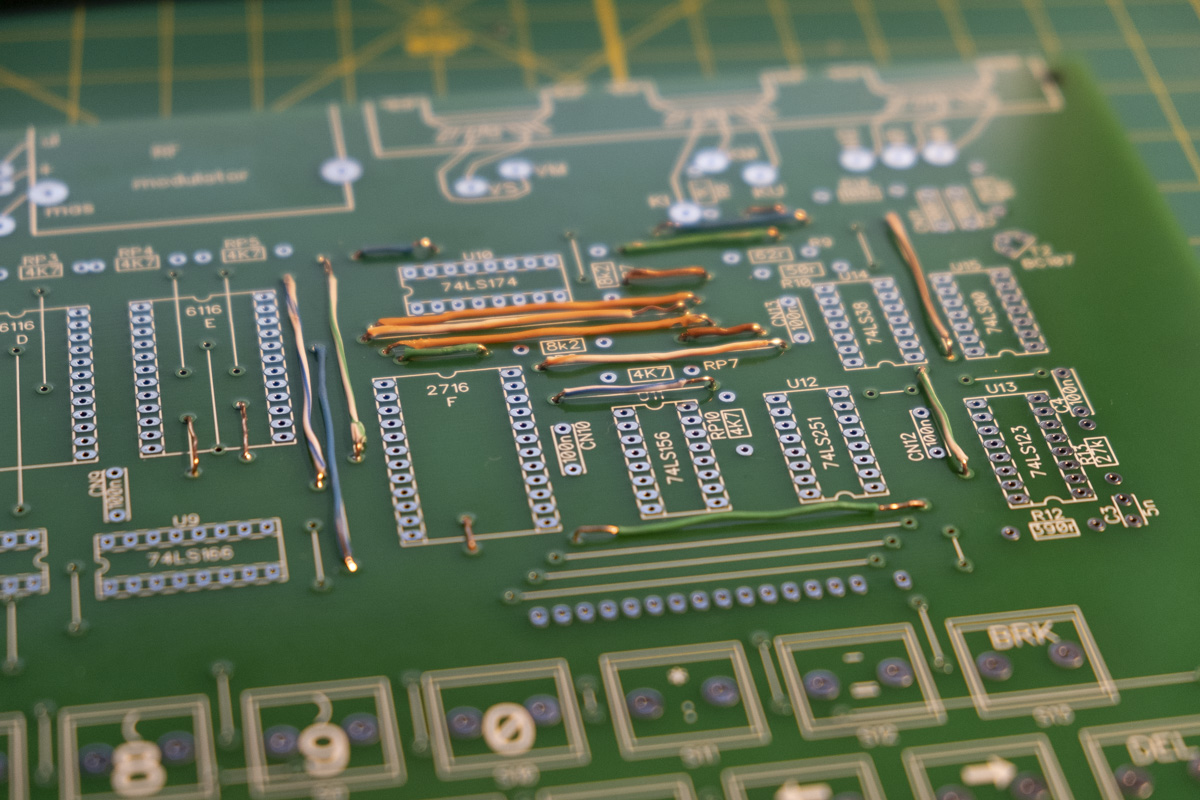
I& #39;m starting by soldering 119 (!) jumper wires. I& #39;m re-using an ethernet cable to make jumper wires, stripping down the 4 pairs. In 1983. Voja Antonić suggested using phone wire -- so I& #39;m doing the same thing basically, except with 4 times more wire :)
this is my soundtrack tonight  https://abs.twimg.com/emoji/v2/... draggable="false" alt="🙃" title="Auf den Kopf gestelltes Gesicht" aria-label="Emoji: Auf den Kopf gestelltes Gesicht"> https://www.youtube.com/watch?v=pldDuqnPP1s">https://www.youtube.com/watch...
I only got 26 out of 119 jumpers tonight  https://abs.twimg.com/emoji/v2/... draggable="false" alt="😩" title="Mattes Gesicht" aria-label="Emoji: Mattes Gesicht"> but I& #39;m slowly getting better and faster :)
Phew, after many hours of work, all 119 jumpers are soldered and tested! This was much more difficult than I imagined. I ended up drawing the different jumper lengths (in mm) on a paper, but cutting and stripping category pairs was not fun. Tomorrow I start soldering resistors!
Oh no this fell off the thread https://twitter.com/mejs/status/1311423460195872772">https://twitter.com/mejs/stat...
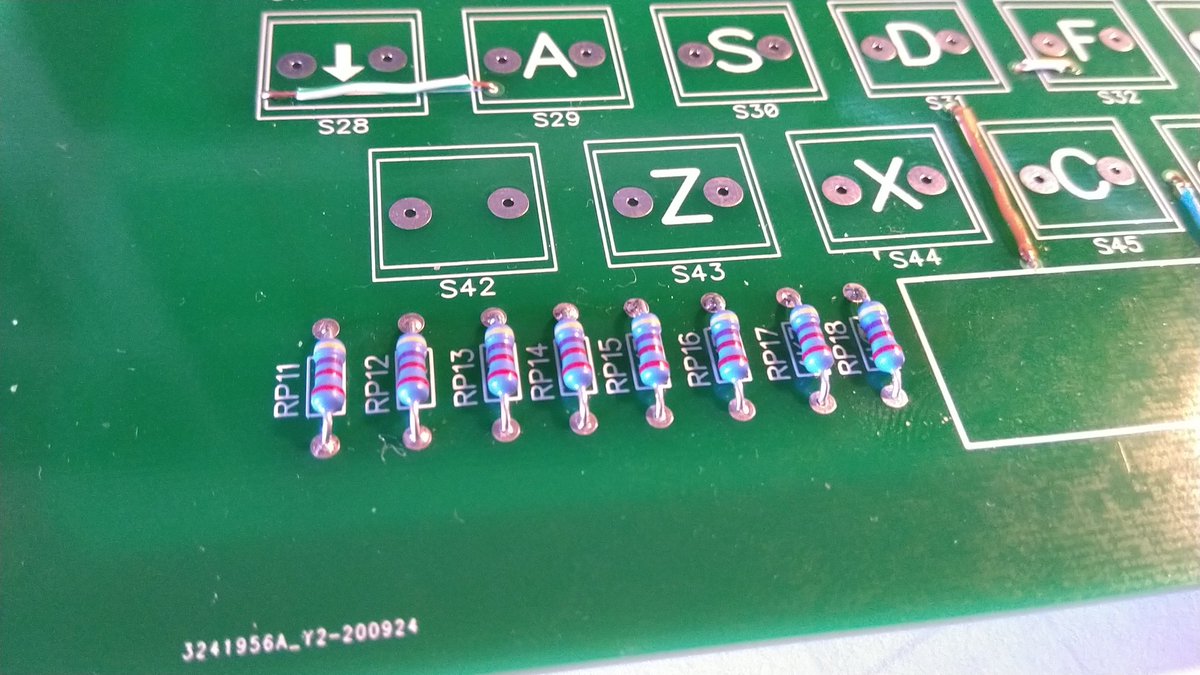
This is why you should consult the schematic and pay more attention when ordering. I got electrolytic capacitors which are polarized, instead of unpolarized ceramic ones. While *I think* it should be possible to use them, I will use the luxury of Mouser and get another order in.
Well, I got all the other capacitors in, and I& #39;m kind of blocked until Mouser delivers new ones + remaining IC sockets. I& #39;m thinking of tackling the key switches in the meantime...
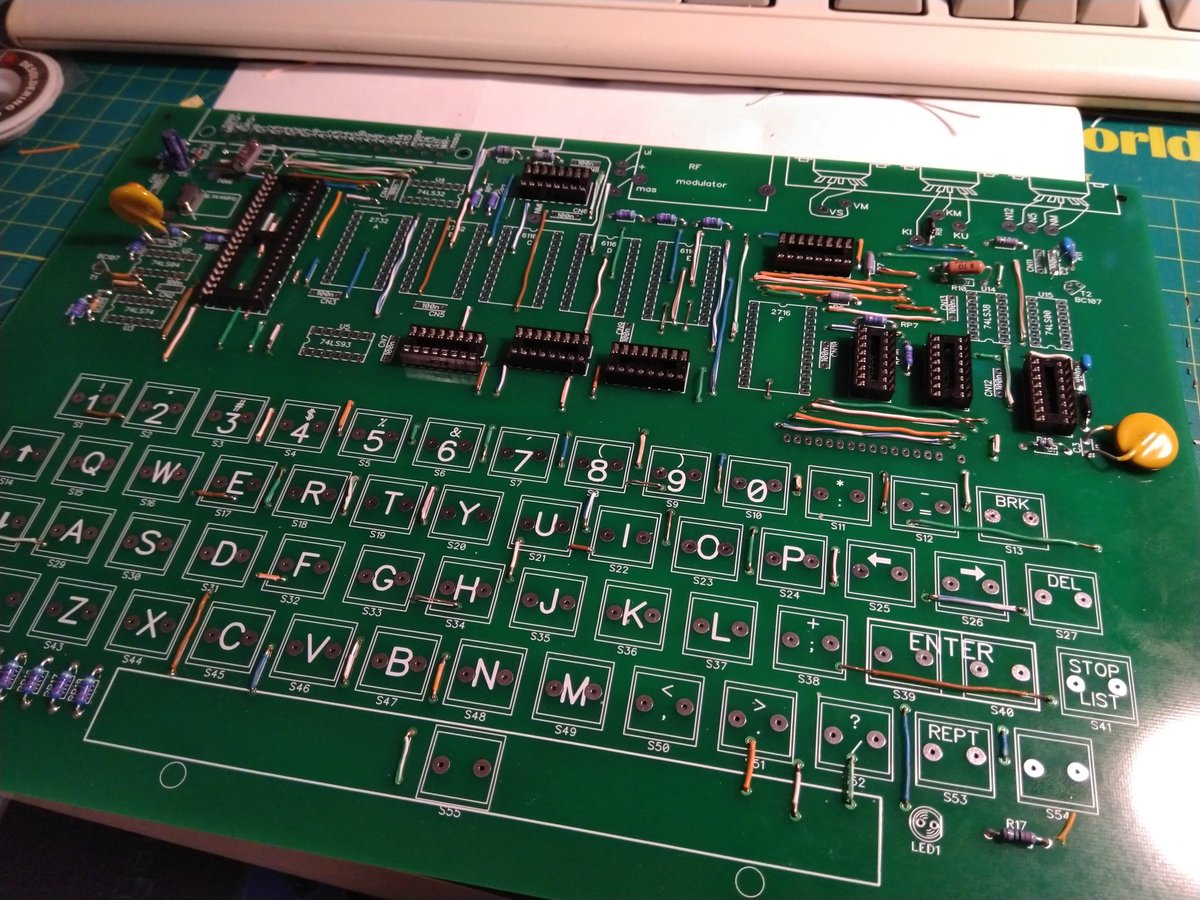
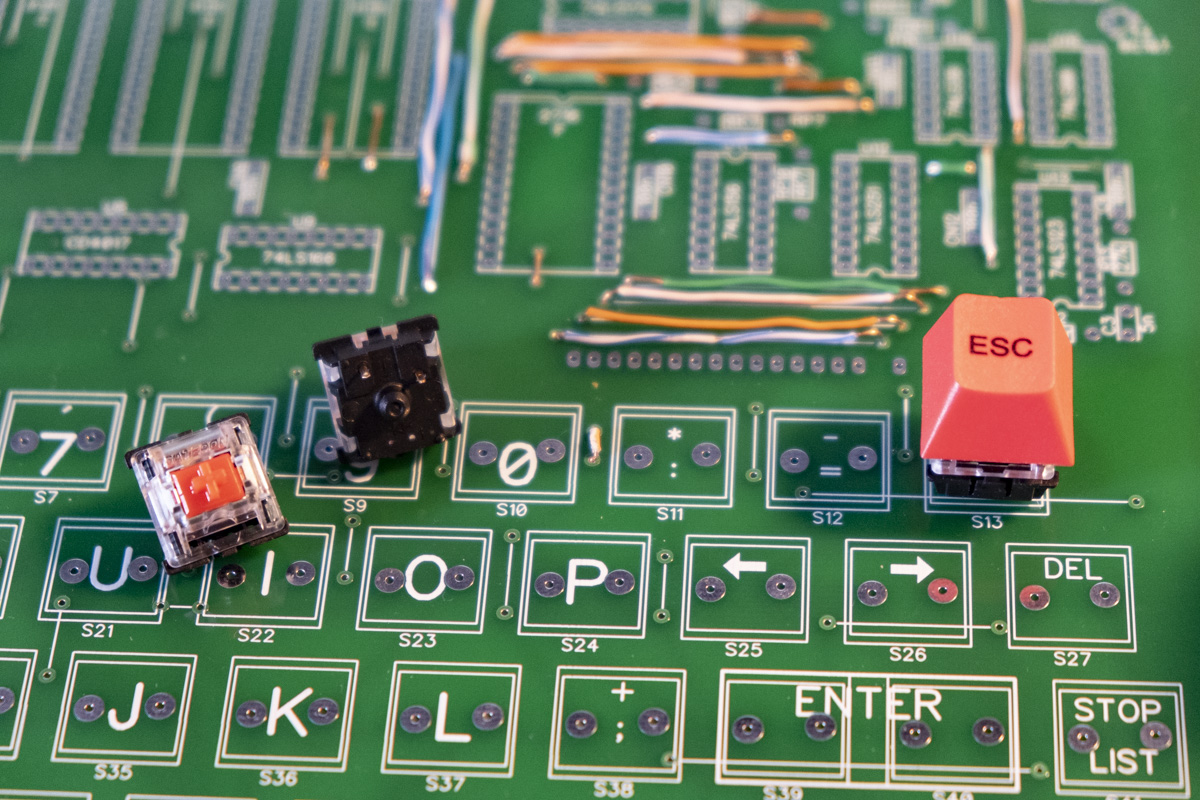
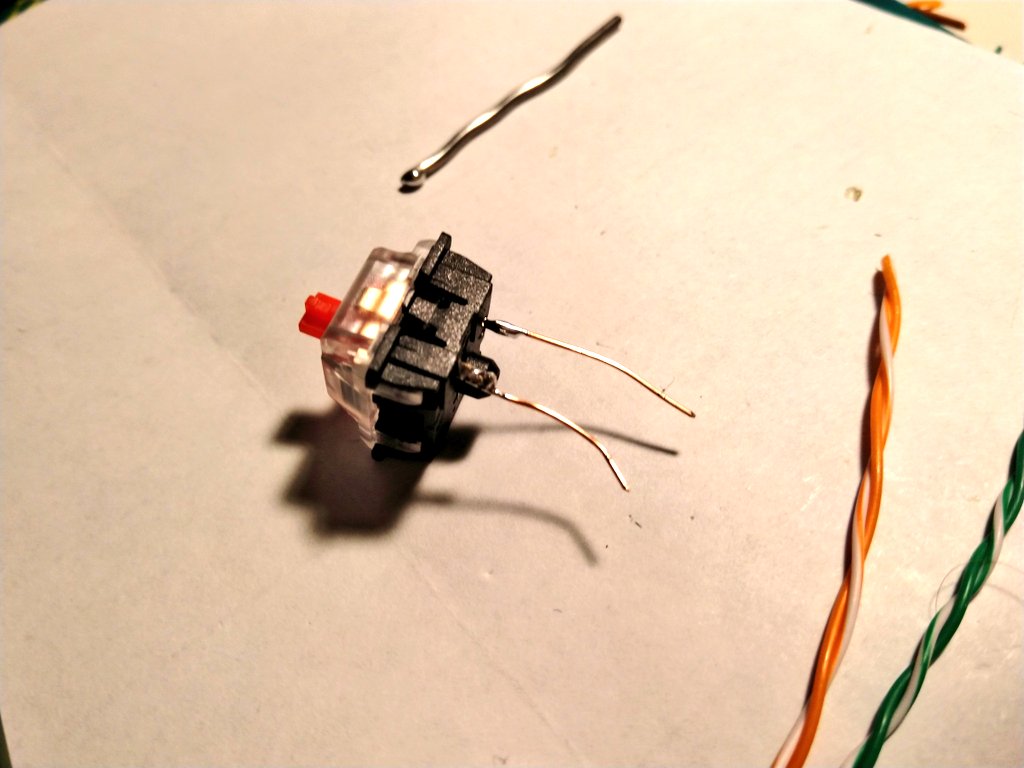
So here& #39;s the problem. I got these Gateron switches, but their connectors are slightly different from what& #39;s on the PCB, so they don& #39;t fit nicely. I& #39;m experimenting with soldering some extra copper wire to get around this, but I& #39;m not sure if it& #39;s wise.
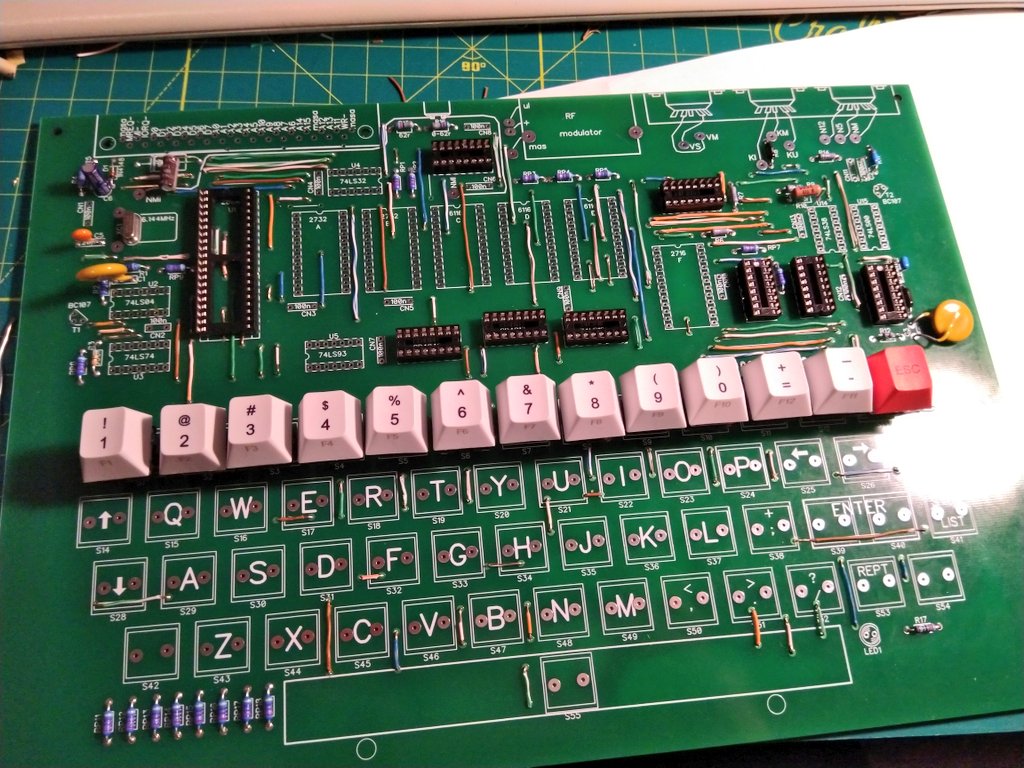
The top row with number keys is soldered! Because the switches are incompatible with the PCB, I& #39;m soldering some wire from CAT cables to make the connection. It seems to work ok.
The original DIY guide in Računari included instructions for making a keyboard frame to hold the keys in place solidly. I didn& #39;t plan on making one and I will try to get by without it. While I& #39;m excited to use the Galaksija once it& #39;s complete, I don& #39;t expect to do crazy typing.
Mouser order is in! Remaining ceramic capacitors, the 2 transistors and IC sockets installed! Most logic chips installed too -- waiting on adding the CPU, RAM, EPROMs and 4017 and 4040 logic chips per the instructions in Računari.
I also got the EPROM programmer! 2716 EPROM chip is programmed (the one used for storing characters), but I& #39;m having issues with 2732 chips. Turns out they are programmed at 21V, and this $50 programmer tops out at 18V  https://abs.twimg.com/emoji/v2/... draggable="false" alt="😩" title="Mattes Gesicht" aria-label="Emoji: Mattes Gesicht"> I have a plan how to get around this, but let& #39;s talk ROMs
So, Galaksija uses EPROMs for system (OS) storage. EPROMs are Erasable-Programmable ROMs. You need a special EPROM programmer to "burn in" your code, and you can erase them by exposing their little window to UV light. Once you program them, you cover the window. Very cool stuff!
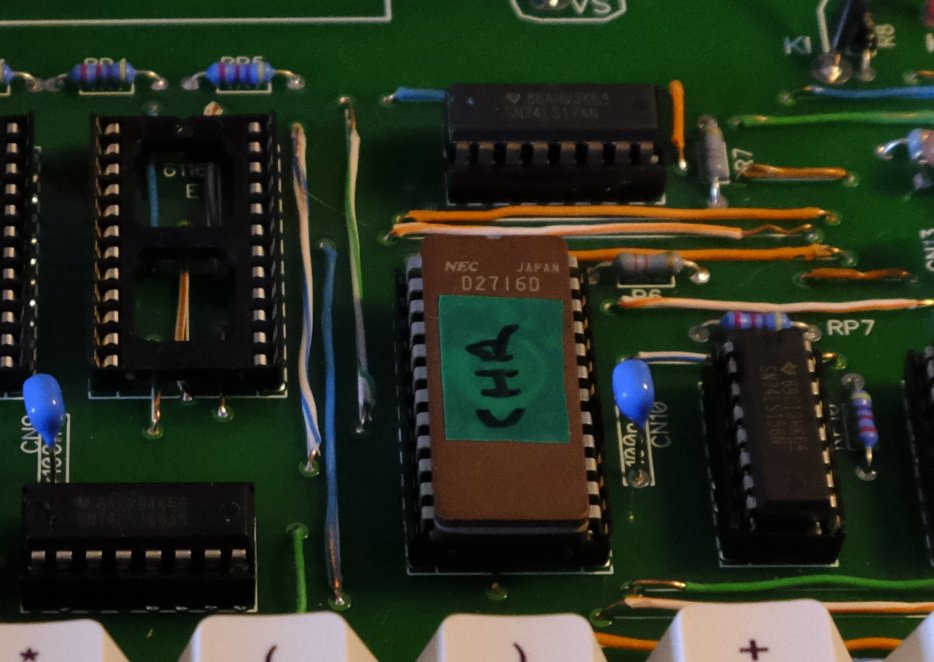
Voja Antonić wrote 3 ROMs for #Galaksija: ROM A, featuring the BASIC interpreter, graphics and other essential functions, ROM B with advanced math functions, and CHAR ROM with characters, since the computer had to know how to draw them on the screen!
Why 3 ROMs? Well, ROM A and ROM B were stored on 2372 EPROMs, featuring full 4KB of memory, while the character ROM was on a 2716 EPROM with 2KB. Galaksija was truly an example of doing the most with very little!
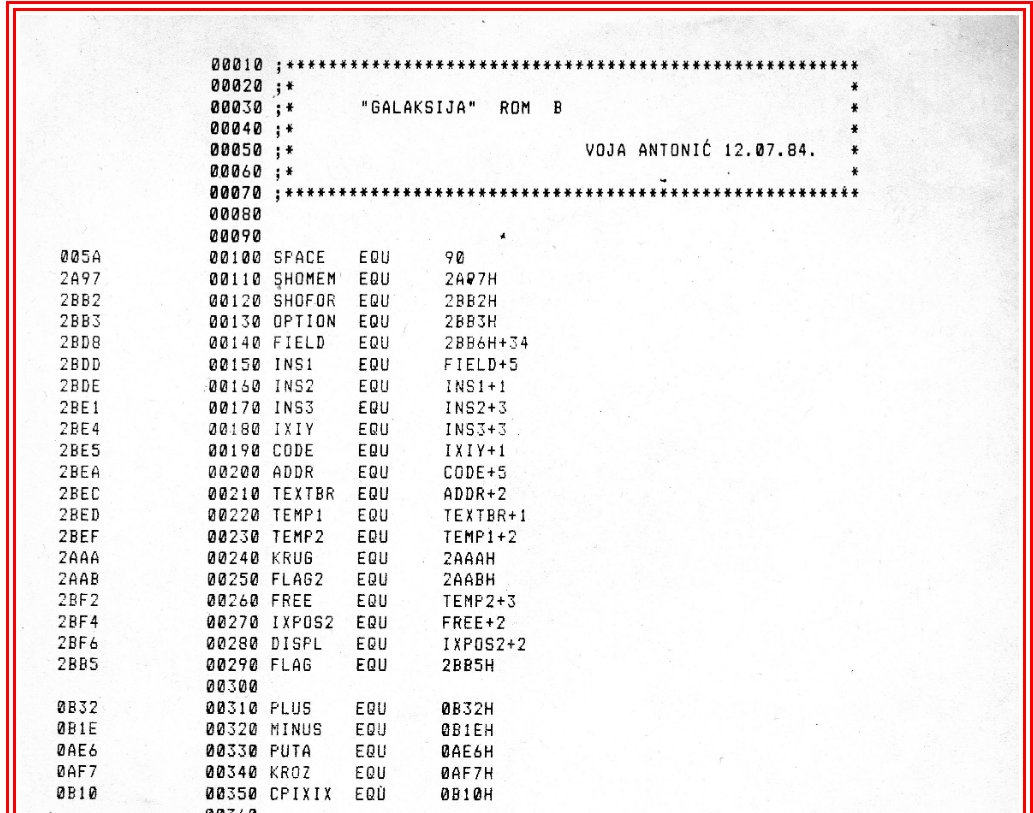
Now, the interesting thing about ROM B: it wasn& #39;t even available in late 1983. Voja Antonić completed it in the summer of 1984, providing the first software upgrade for Galaksija! He hosts the printout on his website: http://www.voja.rs/galaksija/ROM%20B%20Listing%20Scans/ROM_B_listing.htm">https://www.voja.rs/galaksija...
One of the crazy footnotes about this story: Voja& #39;s computer didn& #39;t have enough RAM to type out the whole ROM with comments, so he printed them out separately, glued the comments to the side, and then used a copy machine to combine them  https://abs.twimg.com/emoji/v2/... draggable="false" alt="🤯" title="Explodierender Kopf" aria-label="Emoji: Explodierender Kopf">
ROM B was planned all along, so the schematic included space where it should be installed. Once it was released, you had to run a command to run it after bootup: A=USR(&1000). You could also update your ROM A (if you had an EPROM programmer or sent it in) to do it automatically.
That was the 80s. Where did I get my ROMs? There have been copies floating around for years. One of the best resources for all things Galaksija is @avian2& #39;s website. In the 2000s he reversed engineered the whole computer and even wrote an MA thesis on it! https://www.tablix.org/~avian/blog/archives/2017/04/galaksija_retrospective_and_some_news/">https://www.tablix.org/~avian/bl...
Tomaž also spoke about Galaksija at 2012 Chaos Communication Congress. This is the best English video resource about Galaksija I& #39;ve found so far, the story but also the tech. https://www.youtube.com/watch?v=K2chYqir53U">https://www.youtube.com/watch...
Tomaž made great Galaksija clones, and even wrote new ROMs. His website is a treasure trove of documentation, including a complete disassembly of the ROM, with comments in English. This is so detailed it goes beyond what was originally published! https://www.tablix.org/~avian/galaksija/rom/rom1.html">https://www.tablix.org/~avian/ga...
I got my copies of ROM A and ROM B from MCbx Old Computer Collection. They have one of the rare build logs in English, but also a well documented ROM collection including ROM A that load ROM B automatically. https://oldcomputer.info/8bit/galaksija/buildlog.htm">https://oldcomputer.info/8bit/gala...
I got the CHAR ROM from Spetsialist-MX, also known as the "Russian website about Galaksija". It& #39;s one of the most user friendly resources, and includes English translation too http://www.spetsialist-mx.ru/Galaksija/ ">https://www.spetsialist-mx.ru/Galaksija...
It& #39;s also important to note that Spetsialist-MX is where I got the gerbers files I used to order the PCB! http://www.spetsialist-mx.ru/Galaksija/Soft/GalaksijaGerbers.rar">https://www.spetsialist-mx.ru/Galaksija...
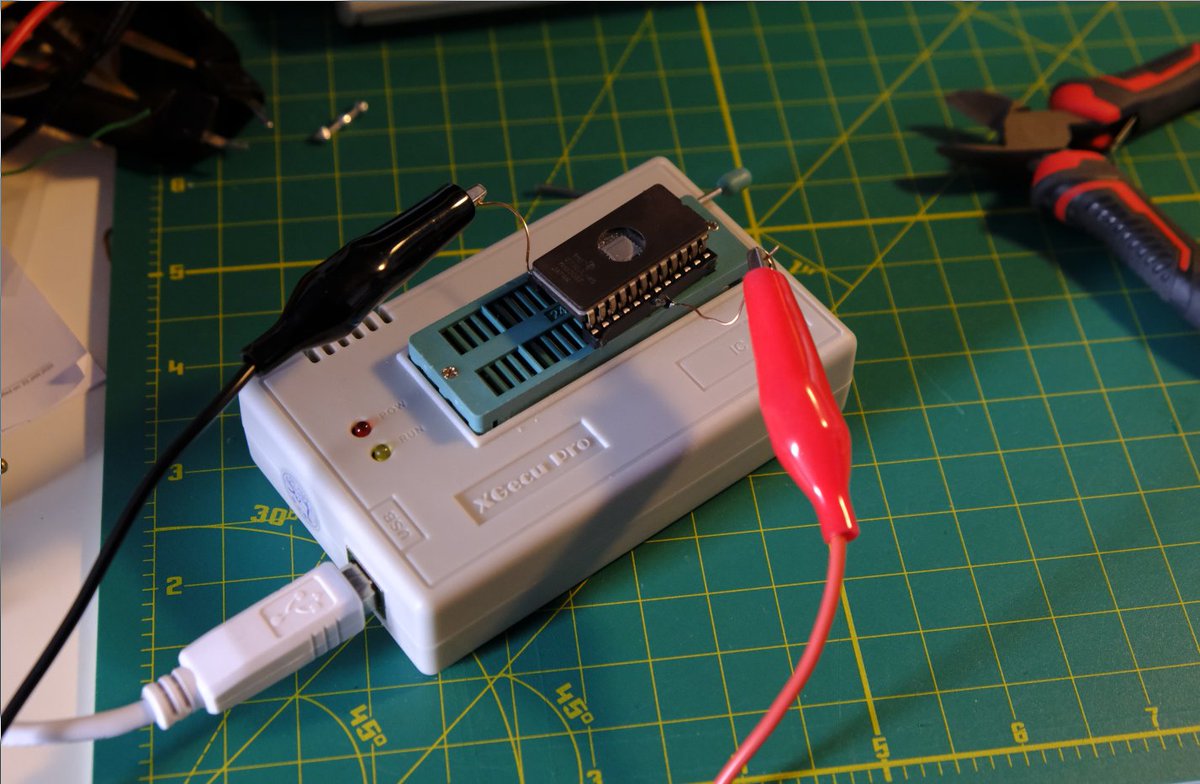
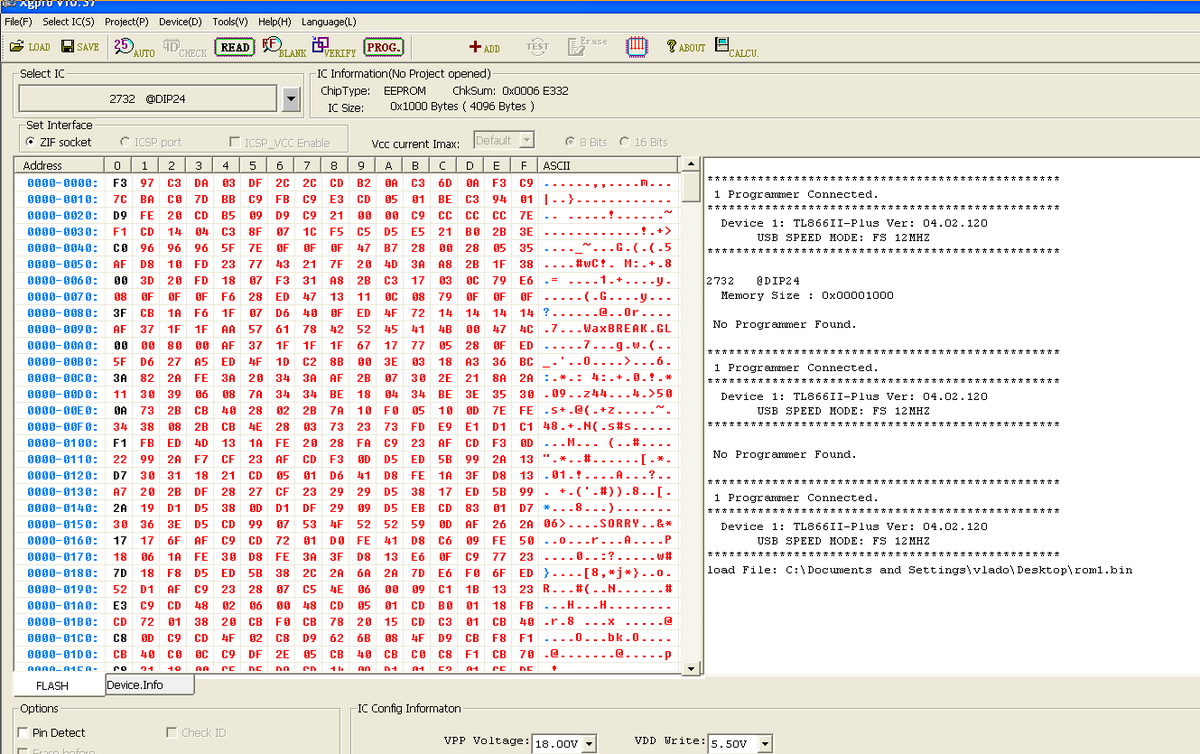
So, once you get your files, your EPROMs and your (hopefully compatible :)) EPROM programmer, you& #39;re ready to burn in your ROMs. TL866Ⅱ Plus Programmer I got comes with pretty good software, that apparently runs the best on Windows XP, so I ran it inside a VM  https://abs.twimg.com/emoji/v2/... draggable="false" alt="😇" title="Lächelndes Gesicht mit Heiligenschein" aria-label="Emoji: Lächelndes Gesicht mit Heiligenschein">
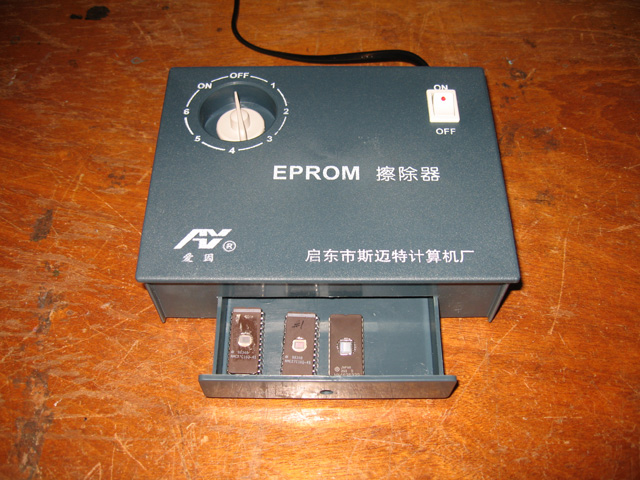
In order to burn it in, EPROM needs to be erased. I have an EPROM eraser ordered, but the photo is from http://classic-computers.org.nz"> http://classic-computers.org.nz which was a great resource for learning about EPROMs and how to program them! https://www.classic-computers.org.nz/blog/2012-10-21-eproms.htm">https://www.classic-computers.org.nz/blog/2012...
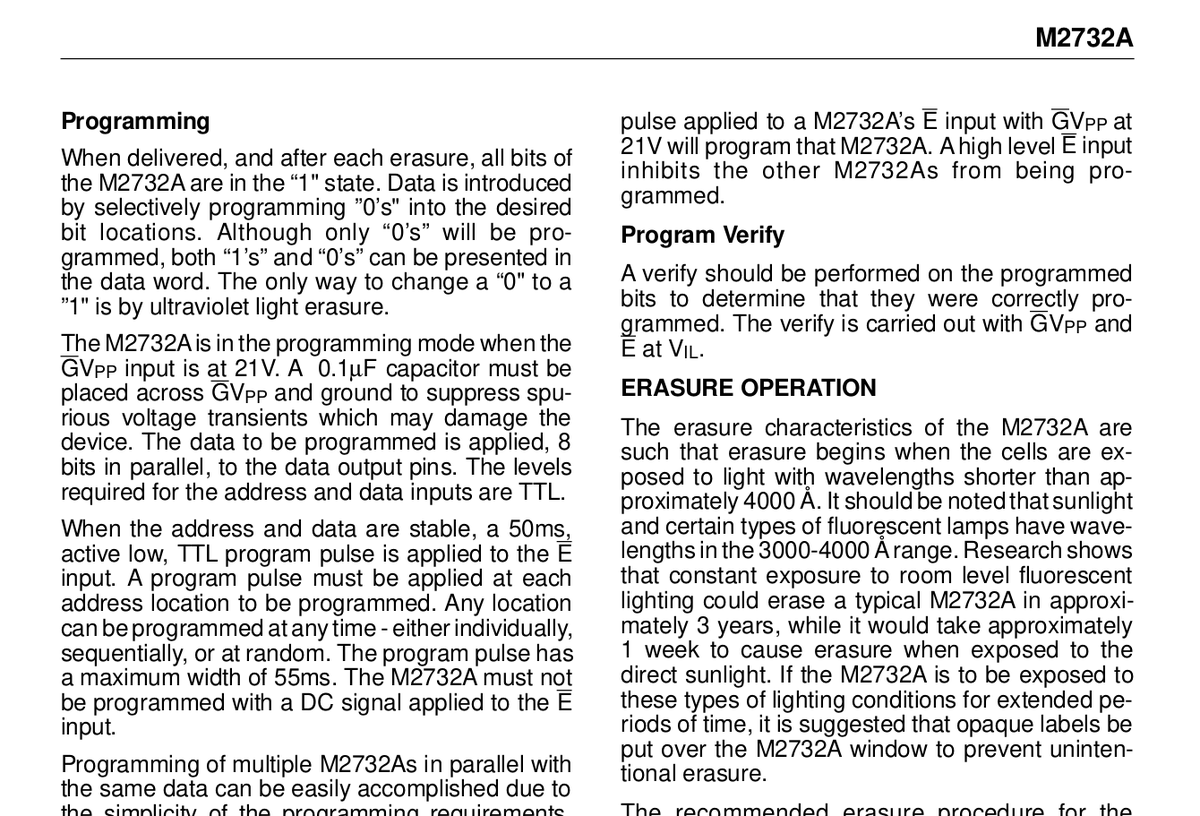
You also need to know your EPROMs Vpp voltage. In order to program your EPROM, this is the programming voltage and your programmer needs to output it to a specific pin. You find this value by checking your EPROMs spec sheet, which is what I failed to do for 2732...
there& #39;s also a great open source program called minipro which supports my EPROM programmer. Unfortunately, it can& #39;t really help if your EPROM programmer has limited voltage. https://gitlab.com/DavidGriffith/minipro/">https://gitlab.com/DavidGrif...
So here& #39;s what I tried to do. Since Vpp voltage doesn& #39;t have to be sent by the programmer itself, I concocted an adapter using an IC socket, leaving wires available to connect 21V and ground from another source. I hooked it up to an old Thinkpad power adapter, measuring 20.8V...
It was actually able to write, but not the whole 4K. And subsequent attempts haven& #39;t been successful at burning in the whole ROM. My guess is the voltage is not precise enough, so the EPROMs was only partially programmed.
I am now waiting for an adjustable power adapter so I can blast 21V from it. It might not work, but at $20 it was cheaper than getting a 21V EPROM programmer (the cheapest I can find is currently $100).
So at the moment I& #39;m still blocked from burning the ROMs, so I continued with the rest of the project. The ceramic capacitors came in, as did the missing IC sockets. I also completed the keyboard! Note how some keycaps are different. Unfortunately some of the keys are rare now.
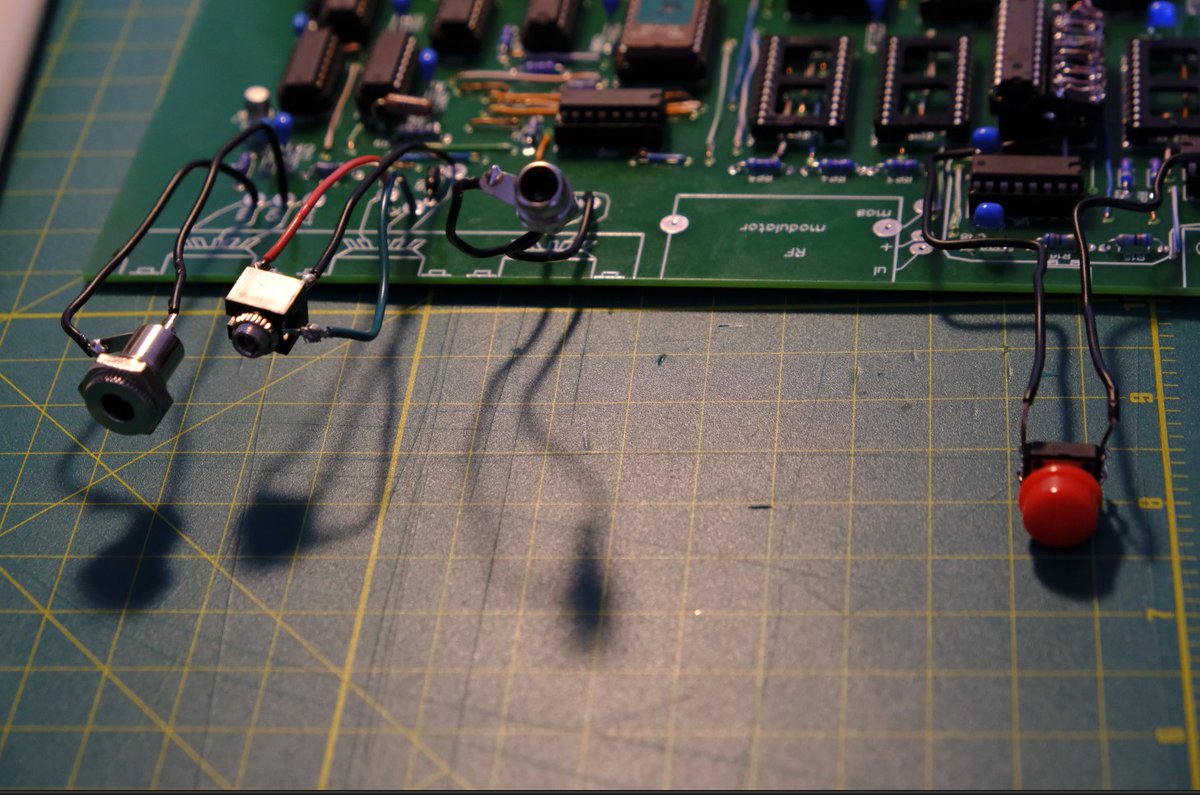
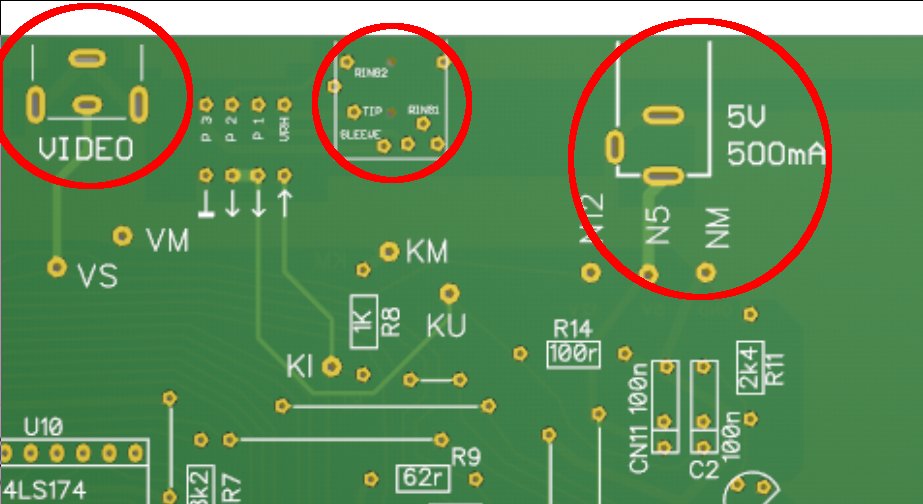
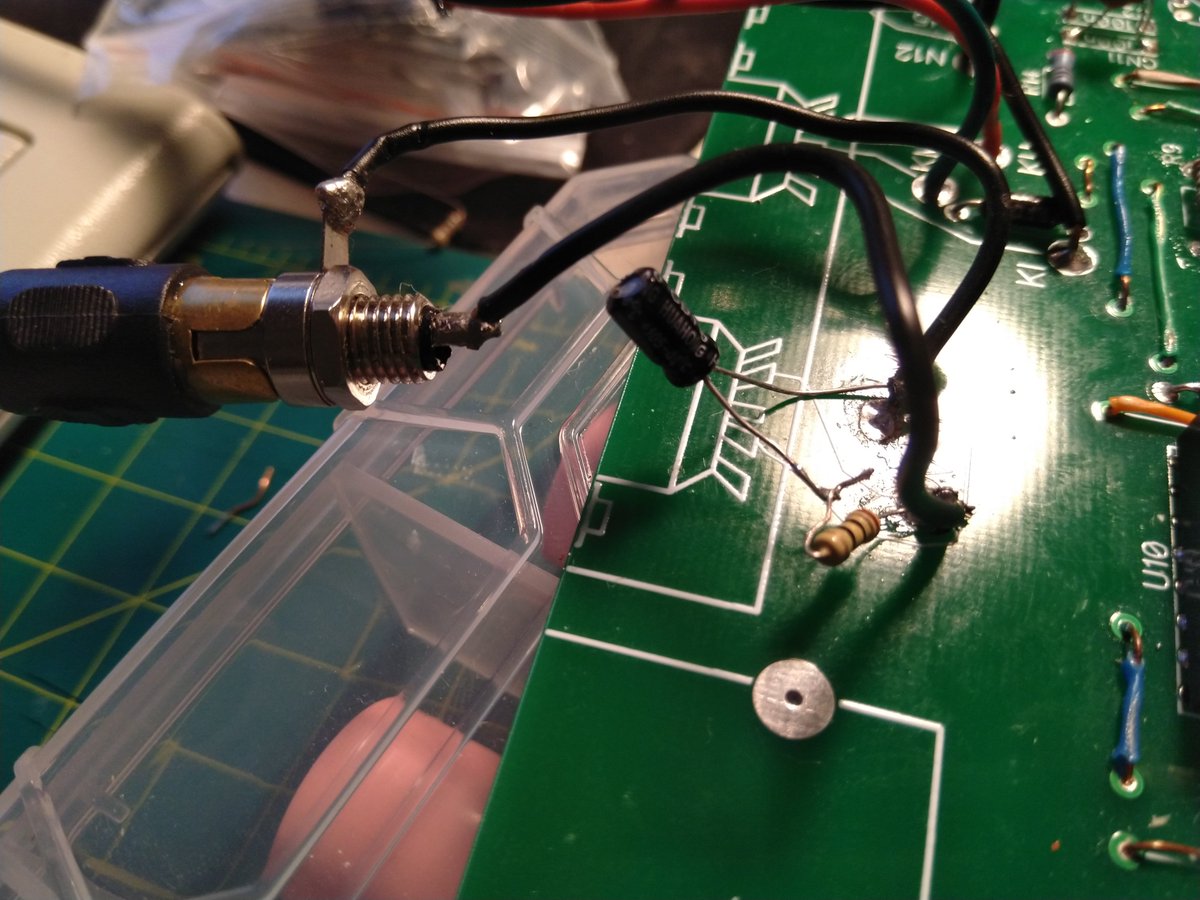
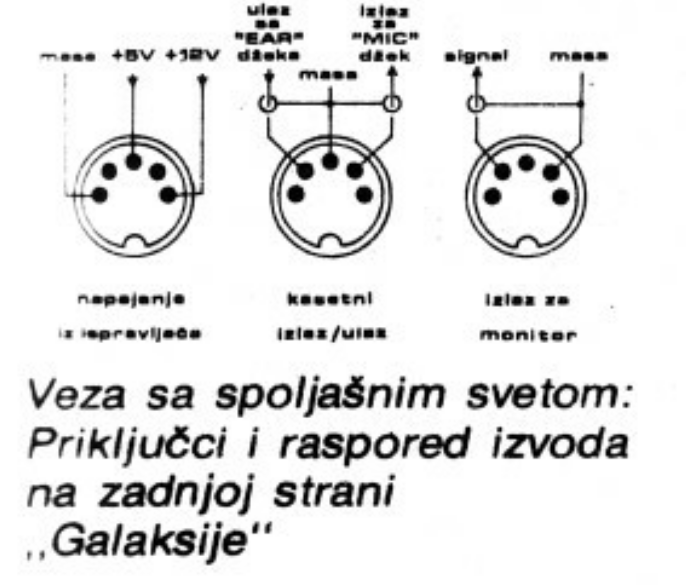
I then installed power, I/O (3.5mm jack for cassette input :)), composite video output and the reset button. Interestingly, in the 80s it was advised to install 5 port DIN connector for all three.
Most folks would also build a TV connector requiring an RF modulator. No need for that now. The RF modulator required 12V, so the instructions included schematics for building your own power supply, with 5V, 12V and ground coming in through the DIN connector.
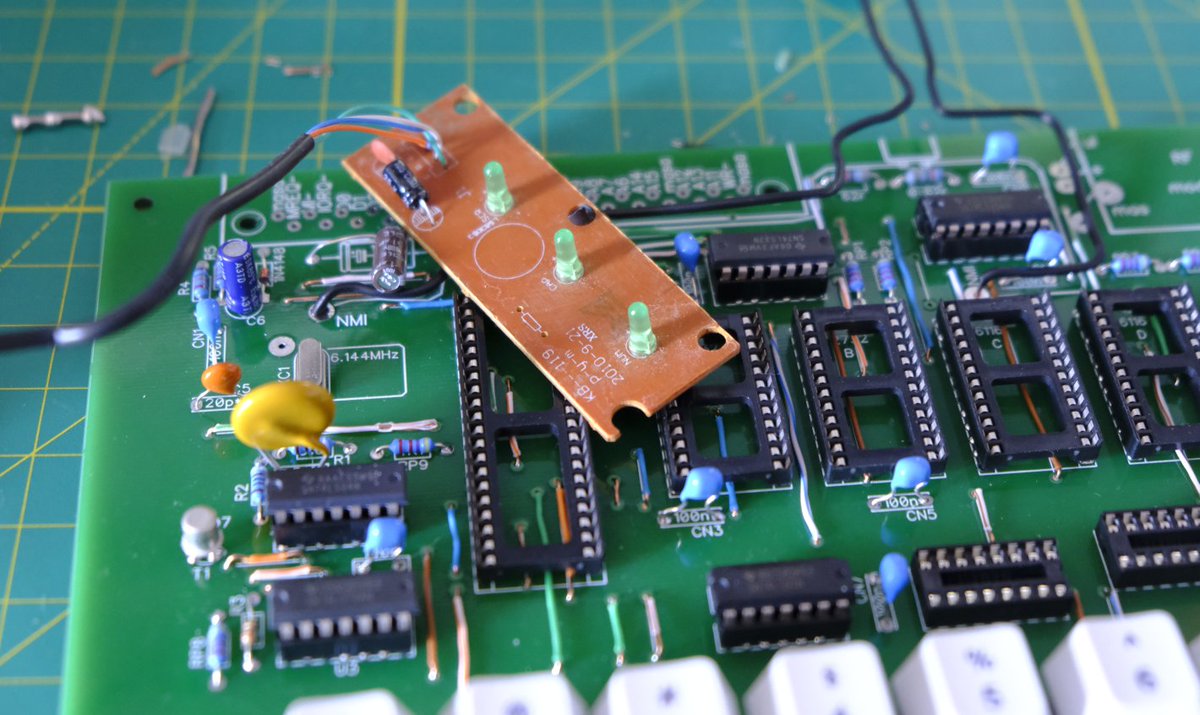
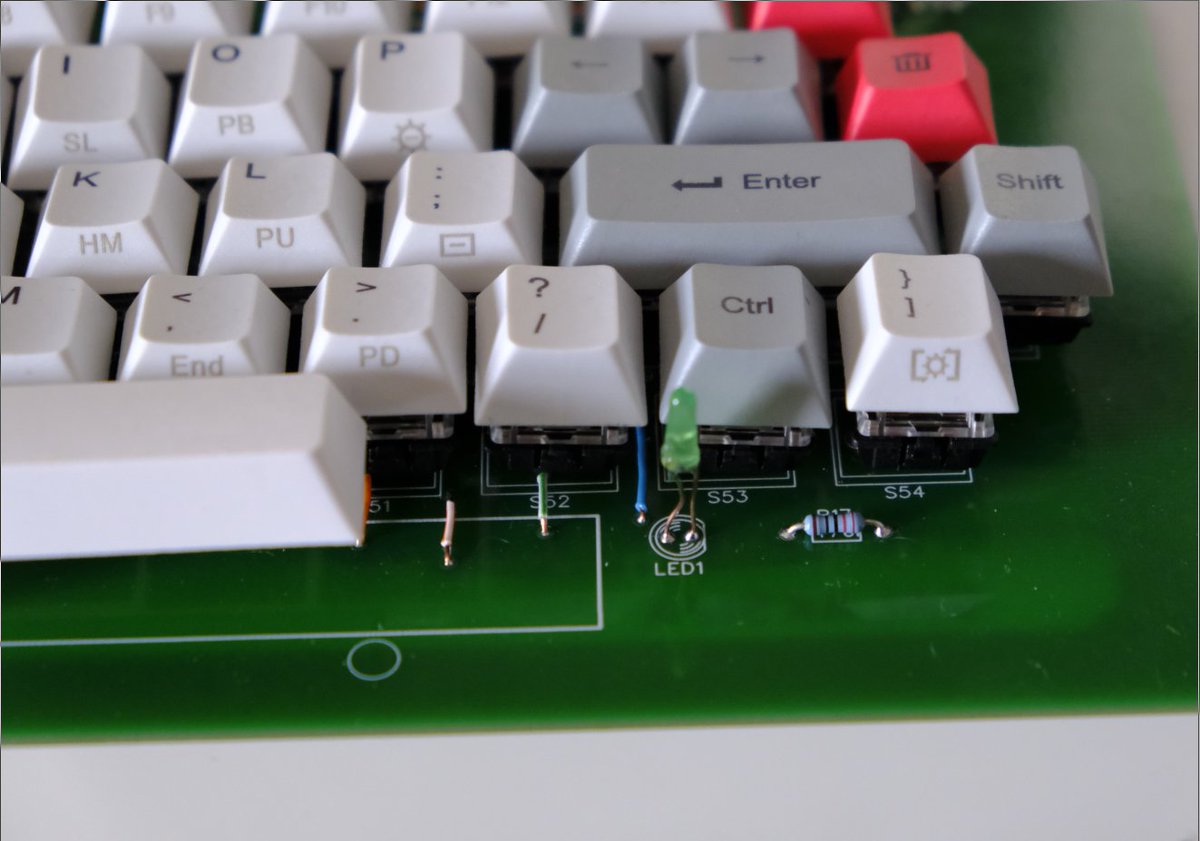
At this point I was trying get as much done before I can program the EPROMs, and I realized I couldn& #39;t find an LED that was required for power indication. Luckily, I had an old cheap keyboard controller and scavenged one green LED :)
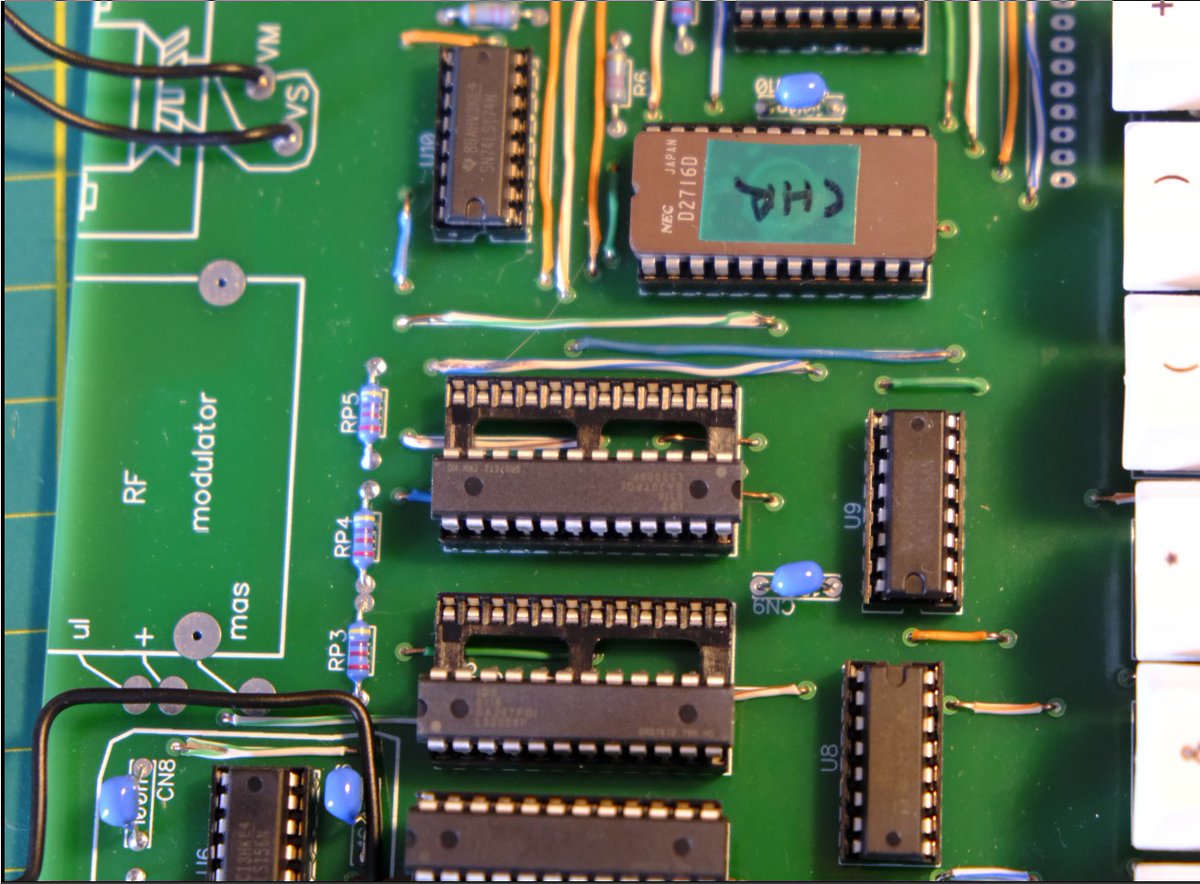
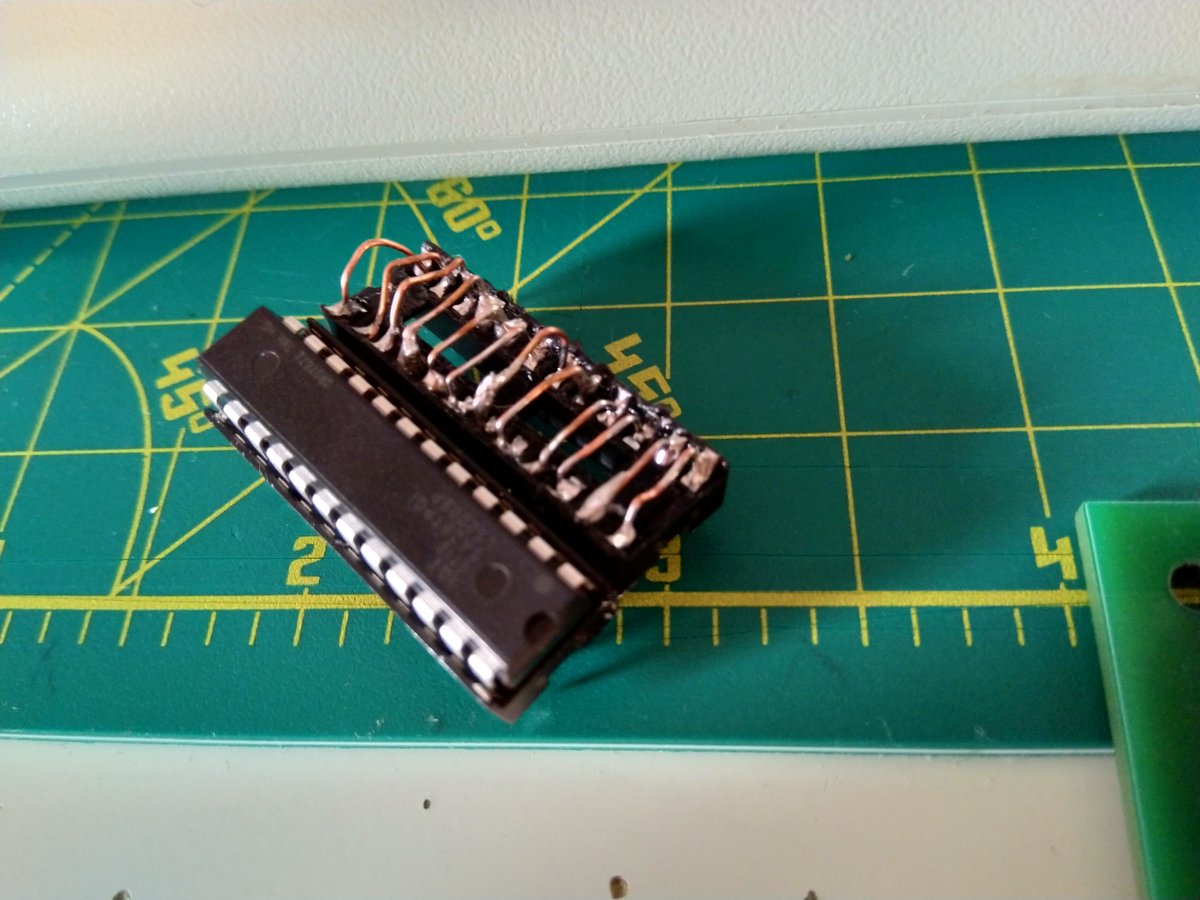
So with most of the work done, I decided to put the rest of the ICs in. And then I realized why my IC sockets were wrong width in the first place: the RAM I got is half the width!!  https://abs.twimg.com/emoji/v2/... draggable="false" alt="😩" title="Mattes Gesicht" aria-label="Emoji: Mattes Gesicht">
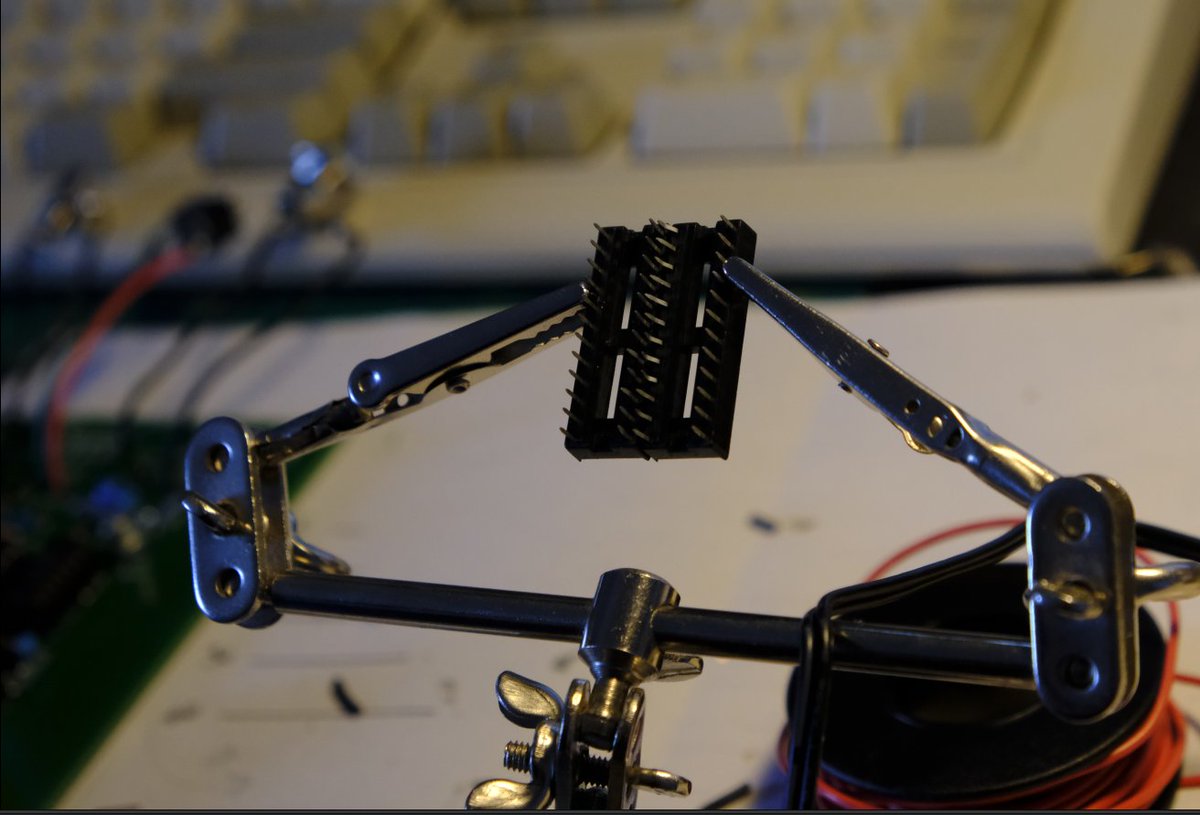
This was incredibly annoying, but I decided not to give up and end up waiting for another Mouser order. I soldered together a socket adapter, just one for now as a proof of concept. It seems to work, at least from what I can test with a multimeter.
I couldn& #39;t resist and I plugged it in. No output to the screen of course, since ROM A is messed up and it& #39;s needed for graphics output. But the LED is on and it looks wonderful! :)
Btw, I don& #39;t have a screen with composite video input, so I got a little RCA to HDMI adapter for $14. It *says* it does both PAL and NTSC, so we& #39;ll see. Galaksija is of course designed to output to PAL, but I& #39;m in America, so even if I find an old TV it will use NTSC.
EPROM programming is going.... Not well. Got the eraser, so that& #39;s helpful, and got the adjustable power adapter, and that& #39;s helpful too. However, I& #39;m still unable to burn 2732.
Here& #39;s what& #39;s happening. I& #39;m 99% sure I& #39;ve got the right voltage (21V). I& #39;m sure it& #39;s stable enough (I even put an 0.1uf capacitor in front to stabilize), I& #39;ve been experimenting with pulse. The shortest one that works is 2000us, but I went up to 50000us (50ms), and it& #39;s the same
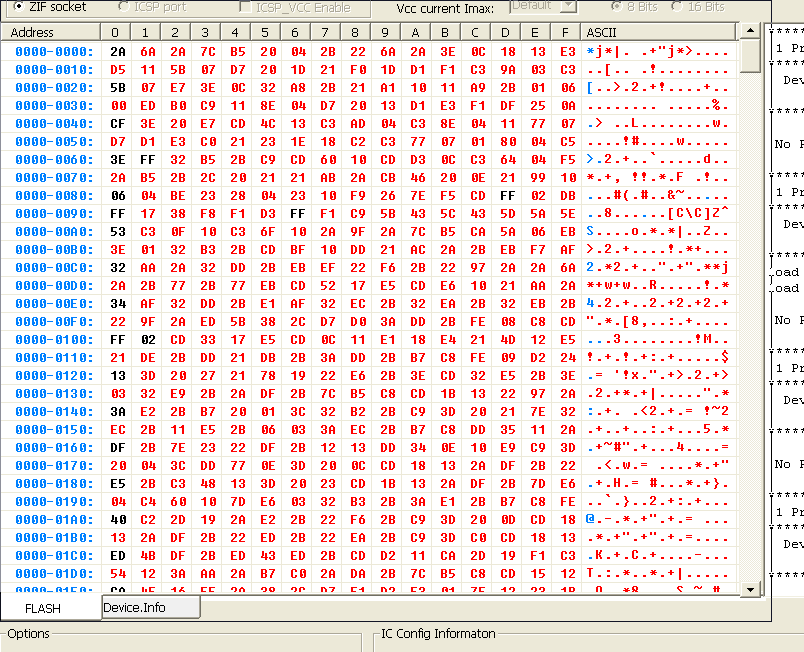
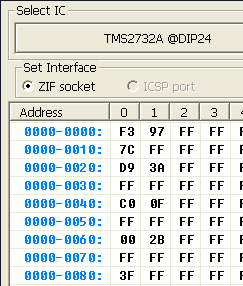
Basically, every other address is burned, but consistently it& #39;s just the first (0) HEX value. Or rather, it was until I tried to burn ROM 2, and now there are a few 1 HEX values that got burned in. I& #39;m sure there& #39;s a logical explanation, but I& #39;m very inexperienced
This is very much like what I& #39;m experiencing, except I& #39;m only able to write half a byte for every 16 bytes
So here& #39;s a theory. I& #39;m using minipro, the open source program I& #39;m running on Linux to burn the EPROM. I& #39;m using it because it can run a burn without verifying. I& #39;m running it without verifying, because it looks like I can& #39;t read the EPROM while I& #39;m sending 21V to vpp.
I know I can& #39;t read it, because when I use the manufacturer& #39;s program to read, while 21V is engaged, it reads nothing. When I take it out, it reads it fine. But my theory is that there is something off with minipro, based on that gitlab issue
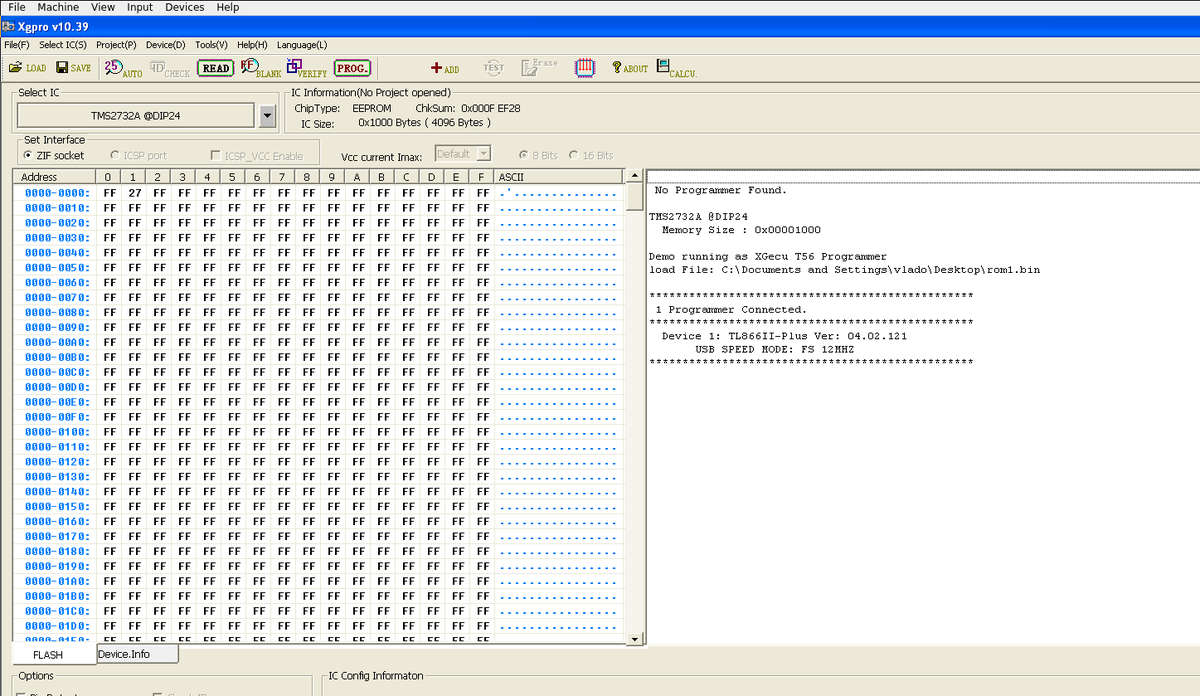
I also know that I can write to other locations with the manufacturer& #39;s Windows program -- I just wrote a custom value 27 to the second half of the first byte, something that minipro continuously fails. However, the program wants to do verification, so it fails after first 8 bits
I just performed the test, and if I edit the ROM file to include only the first byte out of every 32, I could burn it in... 32 tries.
This may not be the best way to do this, but I& #39;ll try it anyway. I hexdumped the rom and am now editing it as a spreadsheet  https://abs.twimg.com/emoji/v2/... draggable="false" alt="🤓" title="Nerd-Gesicht" aria-label="Emoji: Nerd-Gesicht">
This works, but it& #39;s tedious work. My workflow is: I have 32 spreadsheets, each one with 31 empty bytes, and every 32nd byte on. Then I do a copy into a text file, use xxd to turn it into a bin file, then burn it with minipro and then read w/ xgpro to check  https://abs.twimg.com/emoji/v2/... draggable="false" alt="😩" title="Mattes Gesicht" aria-label="Emoji: Mattes Gesicht"> TEDIOUS!
This was wrong btw, messed up my math. I have the exact same problem  https://abs.twimg.com/emoji/v2/... draggable="false" alt="😇" title="Lächelndes Gesicht mit Heiligenschein" aria-label="Emoji: Lächelndes Gesicht mit Heiligenschein"> https://twitter.com/mejs/status/1312850686422519808">https://twitter.com/mejs/stat...
I measured my time, and it takes me 1:49 seconds to do one series of bytes. I have 19 remaining, so I should theoretically be able to do this in 34 minutes. I& #39;ll give myself until 10pm instead :)
And with 12 minutes to spare, I created 32 small bins of ROM A and burned them successfully! 2732 passes verification!!
With ROM A installed, I finally go for it aaaand: NO SIGNAL. Honestly I didn& #39;t expect to get a picture on the first try. The way this computer generates video signal is extremely sensitive and 100% software based, so the real work begins now.
Also, I haven& #39;t come across any build logs where folks used RCA converters, which I presume expect a very clean signal  https://abs.twimg.com/emoji/v2/... draggable="false" alt="😇" title="Lächelndes Gesicht mit Heiligenschein" aria-label="Emoji: Lächelndes Gesicht mit Heiligenschein"> The two EPROMs are running pretty warm to the touch, but the Z80 CPU is cold as ice. Pretty suspicious. But this is a task for next week.
Well folks, I don& #39;t know how I messed this up so bad, but I most definitely didn& #39;t get the right CPU  https://abs.twimg.com/emoji/v2/... draggable="false" alt="🤣" title="Lachend auf dem Boden rollen" aria-label="Emoji: Lachend auf dem Boden rollen">
 https://abs.twimg.com/emoji/v2/... draggable="false" alt="🤓" title="Nerd-Gesicht" aria-label="Emoji: Nerd-Gesicht">
 https://abs.twimg.com/emoji/v2/... draggable="false" alt="😩" title="Mattes Gesicht" aria-label="Emoji: Mattes Gesicht">
I& #39;m struggling to figure out how I failed at the most important part. Well, in any case, I have an 1983 new old stock Z80 ordered, and it was made in Italy by Societa Generale Semiconduttore (later merged into STMicroelectronics). These would have been used in YU!
While I& #39;m waiting on my Italian Z80, I& #39;m getting ready to use my #Galaksija by reading the quick start guide that came out in the same issue of Računari u vašoj kući as the DIY guide! It came out ready to cut out and bind, so I printed mine from the scan and stapled it  https://abs.twimg.com/emoji/v2/... draggable="false" alt="🙃" title="Auf den Kopf gestelltes Gesicht" aria-label="Emoji: Auf den Kopf gestelltes Gesicht">
There& #39;s more to this than just teaching BASIC - the ASCII art on the cover is a joke about filling up gas with coupons -- a commentary on the daily issues in 1980s Yugoslavia, a time of economic crisis and rapid inflation.
I know I left the crowds hanging with this last tweet...  https://abs.twimg.com/emoji/v2/... draggable="false" alt="🤣" title="Lachend auf dem Boden rollen" aria-label="Emoji: Lachend auf dem Boden rollen"> So, the Italian Z80 arrived and it& #39;s pretty cool looking 1983 chip. Aaaand of course, I& #39;m still not getting an image. But before we talk about that, my new 2732B EPROMs arrived, with 12.5V programming voltage!
So, if you recall, I got a cheapo EPROM programmer that tops out at 18V, and then had to program 2732 EPROMs that require 21V. I put together an external power supply, jumped the programming PIN, and then split ROM A into 32 parts... And successfuly burned it.
So, for a few bucks more, I figured I would get two 2732Bs, that only need 12V. They get in aaaand... the software fails to burn them. At this point I am 100% sure the burn profile the software comes with is faulty for 2732s.
Whatever I try, the programmer burns HALF a byte and then quits. I manage to destroy one 2732B (ha, it got burnt lol), and then I try my last attempt: use the linux program (which I used for the 21V too) and JUST KEEP BURNING
I realized that every attempt burns ~ 5 bytes. So I get a shell script going that repeats the burn. And repeats it. And repeats it. Approximately 800 times. And it worked! I now have ROM A, ROM B and character ROM all ready to go.
So I pop it all in, connect RCA to my RCA/HDMI adapter, plug in power aaand.. again, nothing. I even test the adapter by plugging in an old Wii -- the adapter is fine. At this point, this needs more attention. I take out the big guns -- the schematic!
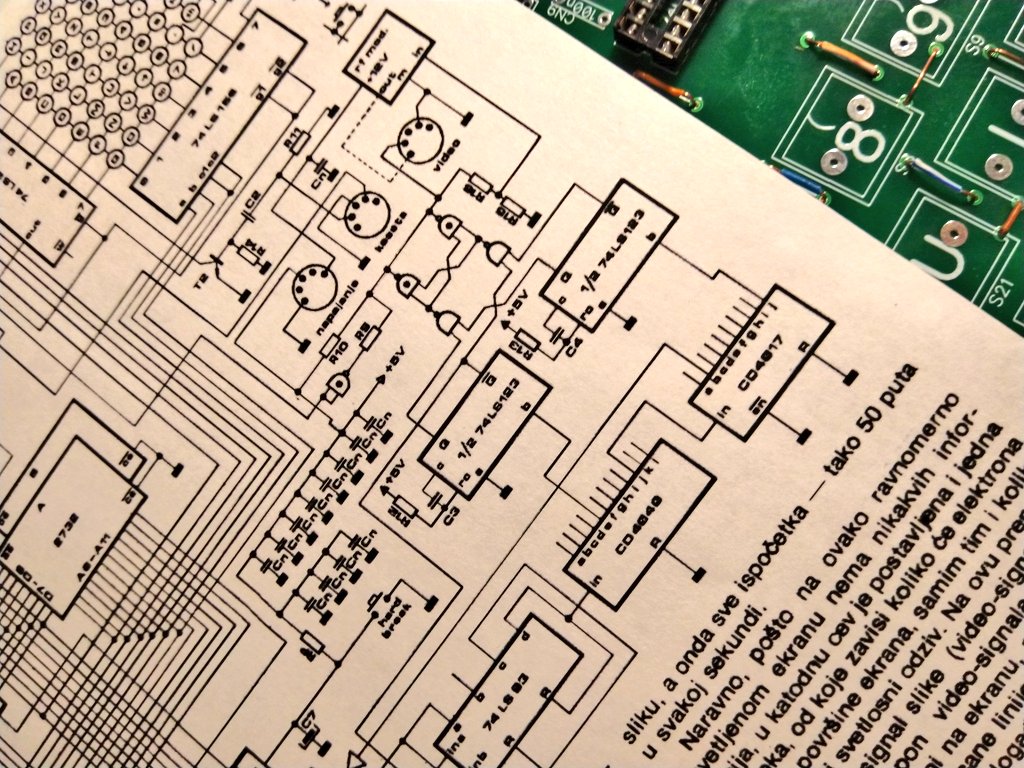
About the schematics -- I& #39;m using the original one published in January 1984 Računari, and I& #39;m trying to rely on primary sources as much as I can. However, it& #39;s not the most readable thing, so I& #39;ve been also referencing Fifan& #39;s schematic published at http://www.spetsialist-mx.ru/Galaksija/schemes/Galaksija.pdf">https://www.spetsialist-mx.ru/Galaksija...
Another reference I& #39;m using is the "frequent problems" article published in Računari 2, published in July 1984. Scan is available at http://pc.sux.org/indexRA.html ">https://pc.sux.org/indexRA.h...
But the most useful is @avian2& #39;s documentation published years ago when he was building his CMOS Galaksija clone. I& #39;ve been learning so much, not just about this particular computer, from his posts! He has a great breakdown of composite video generation https://www.tablix.org/~avian/blog/archives/2006/08/galaksija_composite_video_generation/">https://www.tablix.org/~avian/bl...
But you can only do so much by reading schematics -- you need a way to actually verify what& #39;s going on. I& #39;ve been relying on my multi meter, but at this point I needed more insight into what& #39;s happening. So, another small purchase later, I& #39;m testing with a logic probe  https://abs.twimg.com/emoji/v2/... draggable="false" alt="🤓" title="Nerd-Gesicht" aria-label="Emoji: Nerd-Gesicht">
A logic probe is a hand-held test probe used for analyzing logical states (0 or 1) of a digital circuit. It can also show you if the state is solid or changing. The original guide included instructions on how to make one. I cheated so I bought mine for $20.
And what do I find out? Following the wave generated by one of the transistors through logic ICs, I got to CD4017. The "wave" signal comes in... But it doesn& #39;t come out, instead, the exit pin is solid. Strange, right?
After checking the connections many times, looking at nearby resistors and the whole path of the signal, I decide to take it out and take a closer look. Looking at the model, I see: CD40175BEE4. Close enough right? Well, no, not exactly...
CD4017 is a decade counter. It literally counts from 1 to 10. And CD40175BEE4, despite the similar name, is a flip flop, an IC with two stable states that can store state information. For some reason, there& #39;s a model with essentially the same name, that does a different thing!
Just like the CPU, this is absolutely my fault. This is the first time I& #39;m working with ICs, and all these concepts are new to me. I& #39;m actually really enjoying learning about it, but when I was making the inventory list, I just couldn& #39;t tell the difference. Alas.
So, I& #39;ll be delayed a bit more. That& #39;s ok. I am now checking all the ICs to see if I made any more mistakes, before I place another order.
The rest seems to check out. I& #39;m just so annoyed that I have to place an order for a tiny thing that literally costs $0.52. I wish Radio Shack was still around...
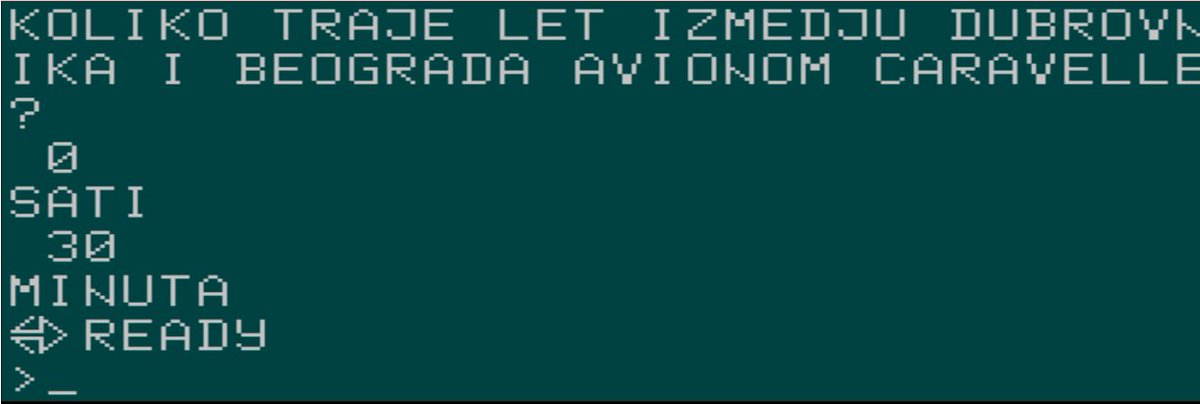
I& #39;m shifting gears a bit while I wait, yet again, for a crucial part to be delivered (CD4017). Teaching myself Galaksija& #39;s BASIC with the getting started guide. The example I& #39;m on is a program that calculates speed of flight between Belgrade and Dubrovnik/Zagreb  https://abs.twimg.com/emoji/v2/... draggable="false" alt="🥰" title="Smiling face with 3 hearts" aria-label="Emoji: Smiling face with 3 hearts">
The example assumes the aircraft is a Sud Aviation Caravelle, flying at 800km/h. Yugoslav airlines JAT indeed used Caravelle, and one was preserved and recently restored at Belgrade& #39;s Aviation museum https://www.exyuaviation.com/2019/09/jat-caravelle-restoration-nears.html?m=1">https://www.exyuaviation.com/2019/09/j...
Well, that& #39;s not very useful. Let& #39;s turn it into minutes! It& #39;s approximately 30 minutes.
Is this time true though  https://abs.twimg.com/emoji/v2/... draggable="false" alt="😁" title="Grinsendes Gesicht mit lächelnden Augen" aria-label="Emoji: Grinsendes Gesicht mit lächelnden Augen">? Currently an A320 will take 55 minutes, but Galaksija& #39;s Caravelle flies a straight line at 800 km/h from gate to gate, so we should give it some slack :)
Finally got the correct width 6116 RAM! (to the right of ROM B). My improvised adapter worked, but this is much better. #galaksija
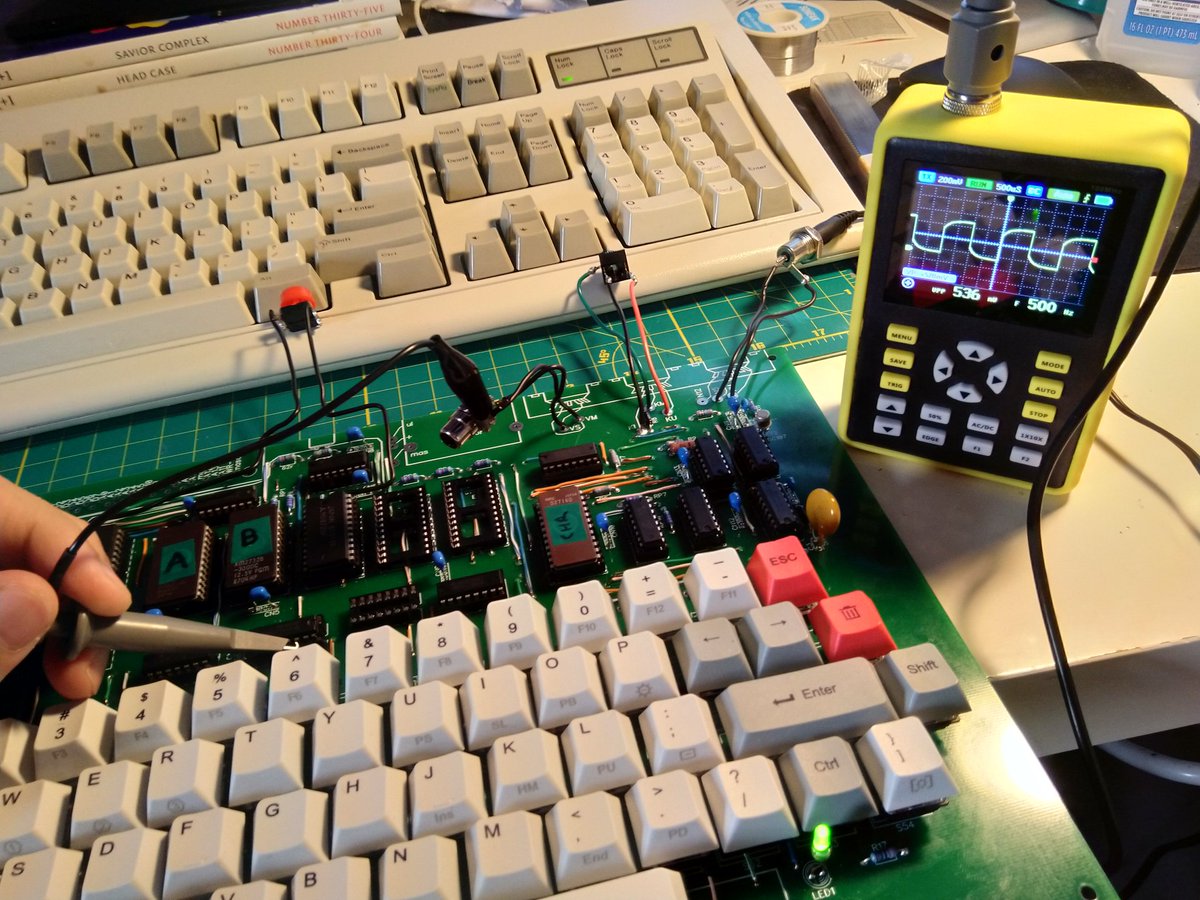
Now for the real fun stuff  https://abs.twimg.com/emoji/v2/... draggable="false" alt="🤓" title="Nerd-Gesicht" aria-label="Emoji: Nerd-Gesicht"> I& #39;m trying out this small oscilloscope. I was looking into a smaller desk one, and even a USB based one that outputs to software on your computer, but I& #39;m really into this form factor (for a beginner like me). BK apartments are small!
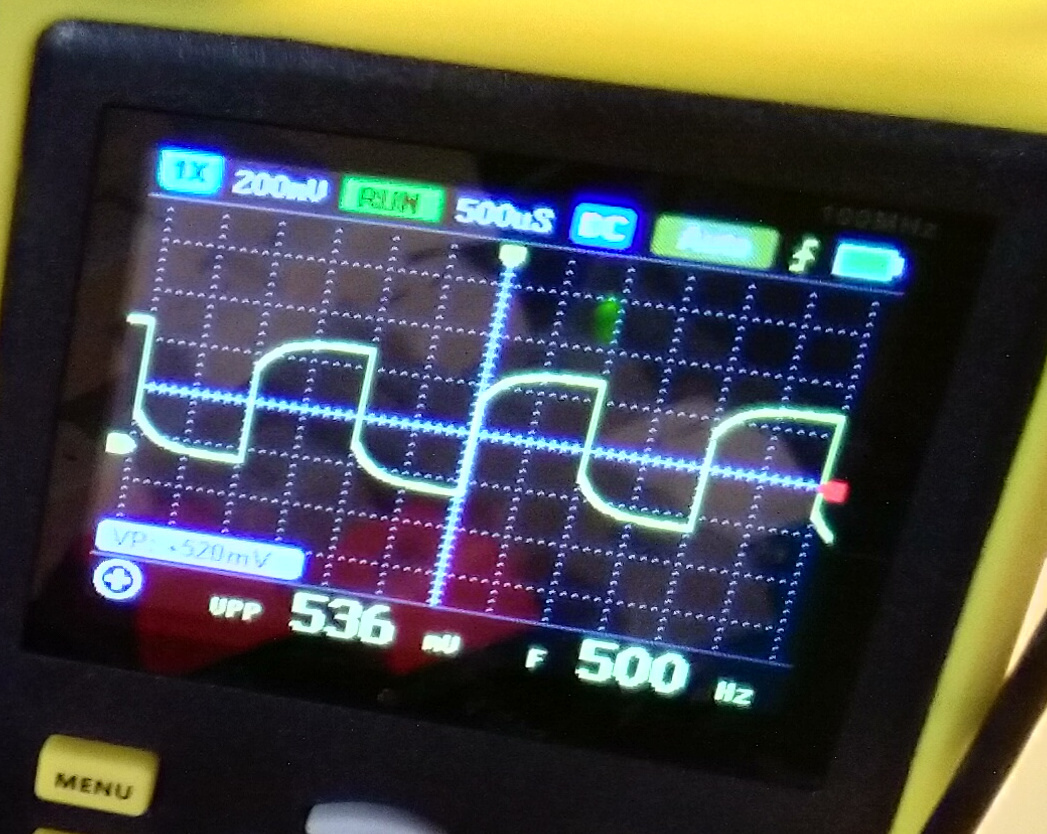
This is a great example to understand what the (still missing) CD4017 Decade counter does: it divides the 500Hz signal by 10, to 50Hz which is the frequency of PAL television (used in Europe and elsewhere, as opposed to NTSC and 60Hz used in North America and a few other places)
The fascinating thing about TV standards: the frequency is due to the difference of AC electric systems! So in the US, they use 110V and 60Hz, while Europe is at 220V and 50Hz. While our screens no longer generate image in a way that depends on AC frequency, issues remain.
This is a great article that explains it. If you& #39;re recording in a space that& #39;s lit up with lights connected to 60Hz (basically anywhere in North America), and you& #39;re recording with a video camera set to 50Hz (1/50 shutter speed), you& #39;ll get a flicker http://urbanvideo.ca/avoid-video-flicker">https://urbanvideo.ca/avoid-vid...
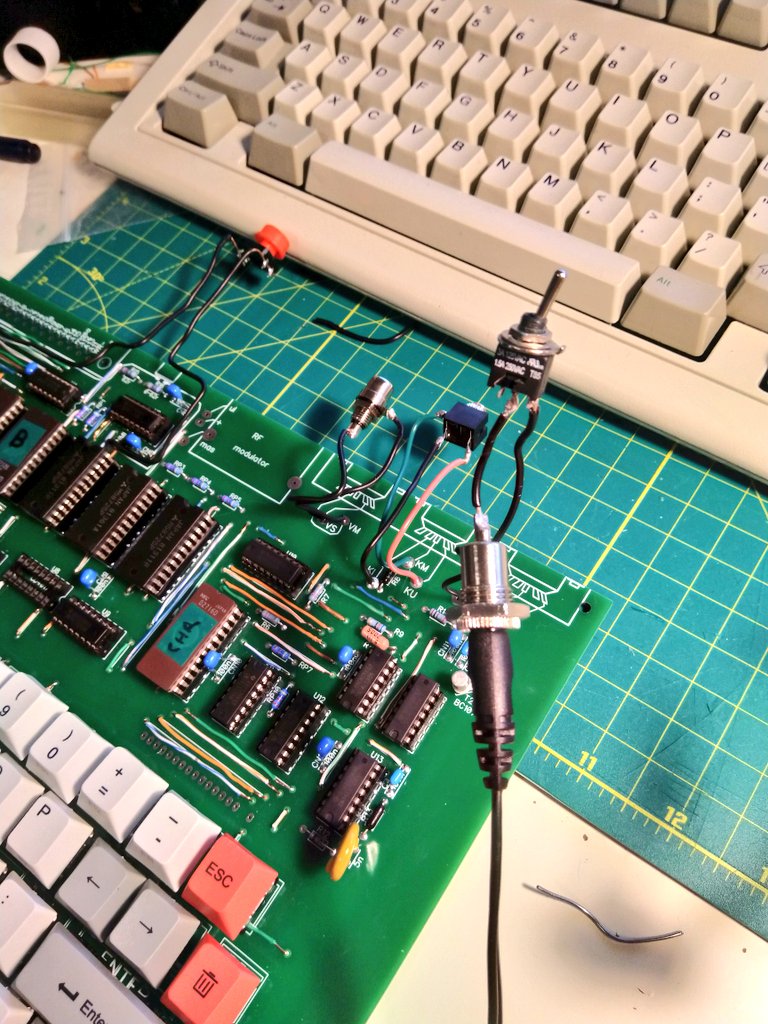
I& #39;m hoping to continue #galaksija project tomorrow evening with the CD4017 decade counter. In the meantime, I installed an SPDT switch to control power (pretty useful while testing!)
Switches are cool! I love this @TechConnectify video on why they& #39;re so clicky https://youtu.be/jrMiqEkSk48 ">https://youtu.be/jrMiqEkSk...
I& #39;d call this a success! I& #39;m getting image synchronization, and the HDMI converter correctly sets itself to PAL.
Still no luck getting more than a white image. Noticed some artifcating occurring if I touch or move my hand close to one of the capacitors in the character generator circuit.
Definitely some weirdness coming out of the character generator clock. On the left is my signal, on the right what it should look like  https://abs.twimg.com/emoji/v2/... draggable="false" alt="😅" title="Lächelndes Gesicht mit offenem Mund und Angstschweiß" aria-label="Emoji: Lächelndes Gesicht mit offenem Mund und Angstschweiß">
EPILEPSY WARNING! Is this progress? Maybe. I replaced a resistor and now there& #39;s at least some stuff happening  https://abs.twimg.com/emoji/v2/... draggable="false" alt="😂" title="Gesicht mit Freudentränen" aria-label="Emoji: Gesicht mit Freudentränen">
(CW: suicide joke) I got the idea from an article in Računari 3 (December 1984) titled "I& #39;ll kill myself, it won& #39;t work!). It features a few tips like replacing this resistor, but it also tells the story of Bane Ostojić who fixes Galaksijas at amateur radio club Avala!
Per the article, visitors looking for help are mostly from Belgrade, but people have come from as far as Slovenia and Macedonia to get their Galaksijas fixed!
The same issue also features a survey, asking the readers if they& #39;ve completed their builds and looking for feedback and suggestions!
I& #39;m still working on getting an image beyond a white screen. I& #39;ve restored the capacitor that caused the horrible artifacting, and I& #39;m pretty sure the white screen is proof that I have image sync. I just don& #39;t have anything drawn on it -- not even the black background!
This conundrum takes me back to how analog TVs work -- a fascinating topic that I feel sort of uneasy with, since I really only used them as a kid. Luckily, there& #39;s another great @TechConnectify video on this topic! https://www.youtube.com/watch?v=l4UgZBs7ZGo">https://www.youtube.com/watch...
So basically, with CD4017 installed, I& #39;ve successfully restored the composite video generation circuit, and the white image is a functioning raster -- but since it& #39;s converted into a digital image through the HDMI converter, it& #39;s completely white
However, in order to draw an image, Galaksija combines this signal with the signal from the character generator circuit. I& #39;ll try to explain it in simple terms (both to keep it twitter friendly, but also since I don& #39;t understand it completely just yet either)
So, there are two parts: we need a video signal that can be understood by PAL TV (or a converter :)), and we need graphics to draw on in it. I& #39;ve already covered this mostly, but here& #39;s an article that explains it really well https://www.tablix.org/~avian/blog/archives/2006/08/galaksija_composite_video_generation/">https://www.tablix.org/~avian/bl...
Now we need graphics. Galaksija doesn& #39;t have a dedicated graphics chip. Instead, it uses the Z80 cpu. This wasn& #39;t completely unique (I think the ZX Spectrum does the same thing?), but the way it& #39;s done really pushes timing limits, which causes complications.
We have three important chips. Z80 CPU, 2716 character ROM and 74LS166 shift register. 74LS166 and Z80 have to be synchronized with each other, and the composite video circuit, in order to successfully draw an image.
The composite video circuit tells the Z80 to start working on image generation. The CPU grabs the character shape (for example, letter Š) from the 2716 ROM, which is then passed to 74LS166 shift register. But this needs to be synchronized with the load scan line.
The load scan line needs to be in sync with the character generation and composite video output (I& #39;m obviously struggling with how this works exactly). Essentially -- the CPU needs to draw the character at the same time as the image is being sent to video output.
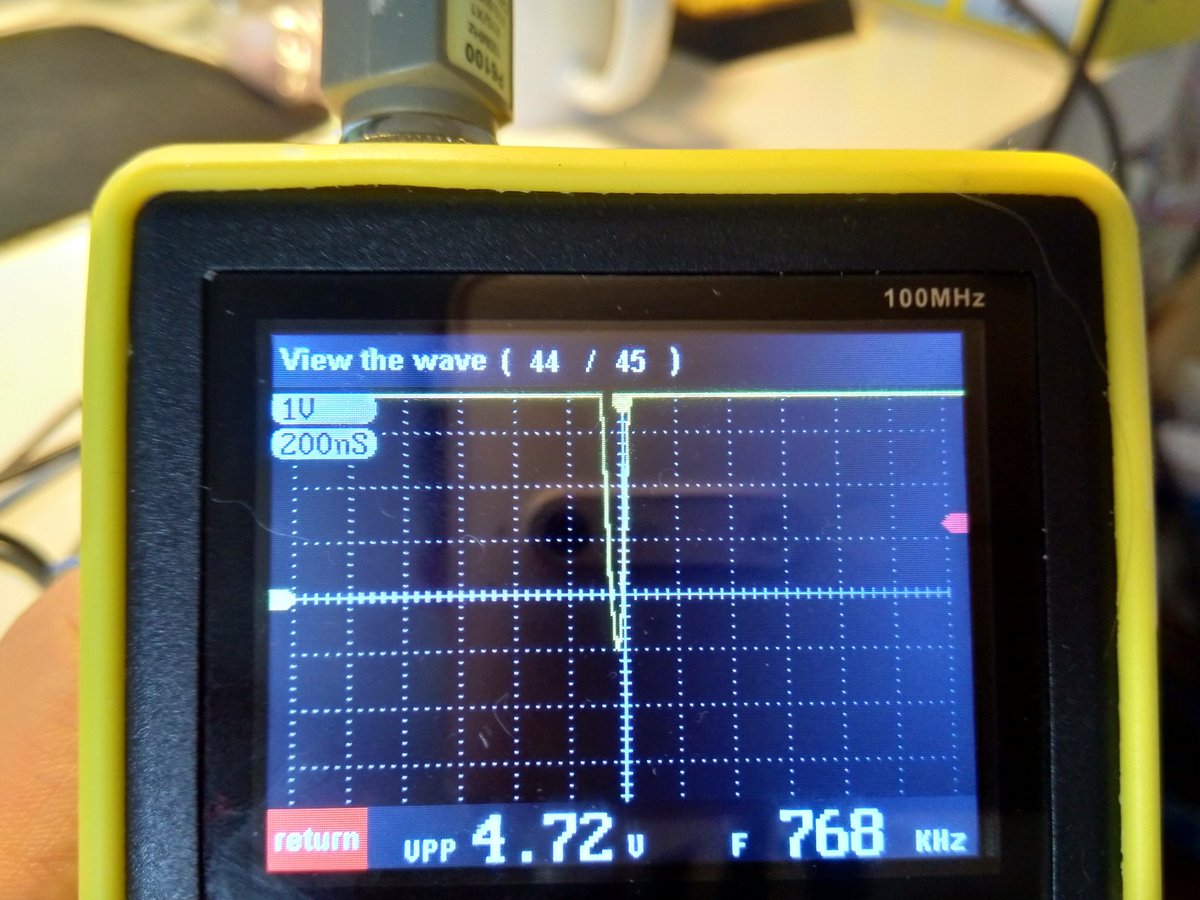
So here we get to my current conundrum. This is what my load scan line looks like. The low lines are signals when the line is 0 - the moments when the CPU is working on graphics. The time here is 200ms, and by my math the 0 lasts 16 ms.
So essentially, the CPU needs to "draw" 8 bits of image at the same time that the video clock sends light to the TV. 16 ms is very short, and may miss the clock. At least that& #39;s what I suspect.
Since it doesn& #39;t send this at the right time, there is 0V coming to the video out, drawing white. For an image to be drawn, we need black (5V). With no sync, we get white. With CPU in sync, it would draw the shape around Š with black pixels (5V) and the letter would be white (0V)
And this brings me to my current theory. When I got the CPU, I actually ordered the same model @avian2 found in a historic Galaksija a few years ago. What I failed to notice, is that this particular Galaksija came with a hack, apparently related to this particular CPU.
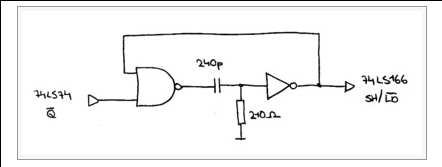
Per Tomaž, this Z80 is quite fast with its load scan line (shift/load), which may cause it to be out of sync with the video circuit. The former owner built a little extra circuit to get around this. https://www.tablix.org/~avian/blog/archives/2017/07/the_galaksija_character_generator_patch/">https://www.tablix.org/~avian/bl...
Now, I don& #39;t *know* if this is the cause of my issue, but that oscilloscope reading sure suggests that my shift/load is *very* short, meaning the CPU leaves very little time to grab characters and send them to video out.
I will try to build a little circuit like this, it& #39;s simple enough. But I& #39;m afraid that may be a temporary workaround. I would prefer to have a CPU that& #39;s in sync. But this is the issue that many folks (and especially Tomaž!) noted -- this computer needs very particular hardware
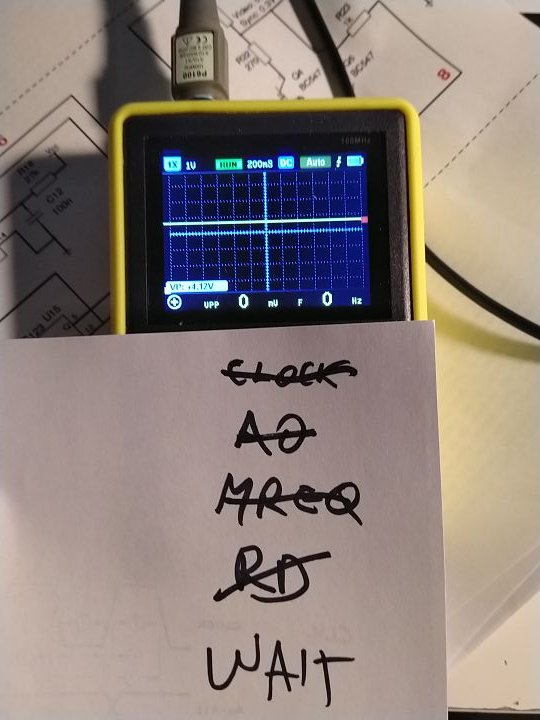
I have a new lead. Why is the CPU WAIT line not moving? This is the input that tells the Z80 to put rest of the processes on hold and draw 8 bits of image. This should be moving between 1 and 0. It& #39;s stuck at 1.
So the WAIT line is my new target, and I& #39;ve tracked it down to IORQ line not moving, BUT I just built the little backup circuit from Tomaž& #39;s article and... Well I don& #39;t think it& #39;s working exactly, but amazingly I did get something on the screen (two rows of lines)
After messing with the circuit for an embarrassingly long time I have the improvised stabilizer for the shift/load line. The signal is now longer and constant. Doesn& #39;t help much since the WAIT line is still messed up.
A reminder of what the shift/load line used to look like https://twitter.com/mejs/status/1316542916165337088?s=19">https://twitter.com/mejs/stat...
I& #39;ve been making slow progress!
I& #39;m taking a break from Galaksija today, so instead I& #39;ll tell you a bit more about history. First of all, this tweet from back in August is wrong. From what I can tell, you most definitely couldn& #39;t buy Z80 in stores in the 80s https://twitter.com/mejs/status/1296534350893395970">https://twitter.com/mejs/stat...
That is, you couldn& #39;t buy CPUs or other ICs in store *in Yugoslavia* in the 80s. As I& #39;ve spent more time on this project, I think I finally have a better idea why this computer is so important and significant, and it seems to revolve around two things:
- it& #39;s a unique piece of computer engineering that solved a bureaucratic and economic problem under very specific circumstances
- it was immensely successful because of the enormous publishing effort that accompanied it - Galaksija was a success because of Računari u vašoj kući
- it was immensely successful because of the enormous publishing effort that accompanied it - Galaksija was a success because of Računari u vašoj kući
Galaksija was designed to get around customs limitations imposed on many (though not all!) Yugoslav citizens in the early 80s which prevented import of items above ~ 50 Deutschmarks, basically making it impossible to (legally) import most Western made computers
The important thing to consider is that shopping abroad was a very common thing for Yugoslavs, especially the middle class. Two popular destinations were Graz in Austria and Trieste in Italy. This was huge! People would get all sorts of Western items that weren& #39;t sold at home
And it& #39;s a perfect example of the unique circumstances that resulted in Galaksija: there& #39;s a stereotypical phrase that Yugoslavia was between the East and the West, but in this case this is manifested very clearly. Our people bought tons of things abroad, but there were limits.
This is a great documentary about this phenomena of shopping abroad. The practice even stuck around into my childhood https://www.youtube.com/watch?v=2Bpl7gD2tH0">https://www.youtube.com/watch...
The limits were regulatory and financial. You could only import 50DM worth of goods, so people smuggled stuff all the time. Financial limits were more difficult to get around -- most Western computers were just too expensive. People still got them, but not in huge amounts.
It& #39;s often mentioned that Galaksija was Jugoslavija& #39;s "first computer". That& #39;s just not true -- In that first edition of Računari there& #39;s even an ad for Lola 8, an Intel 8085A based computer made by Ivo Lola Ribar, a manufacturer of heavy machine tools named after a Partisan hero
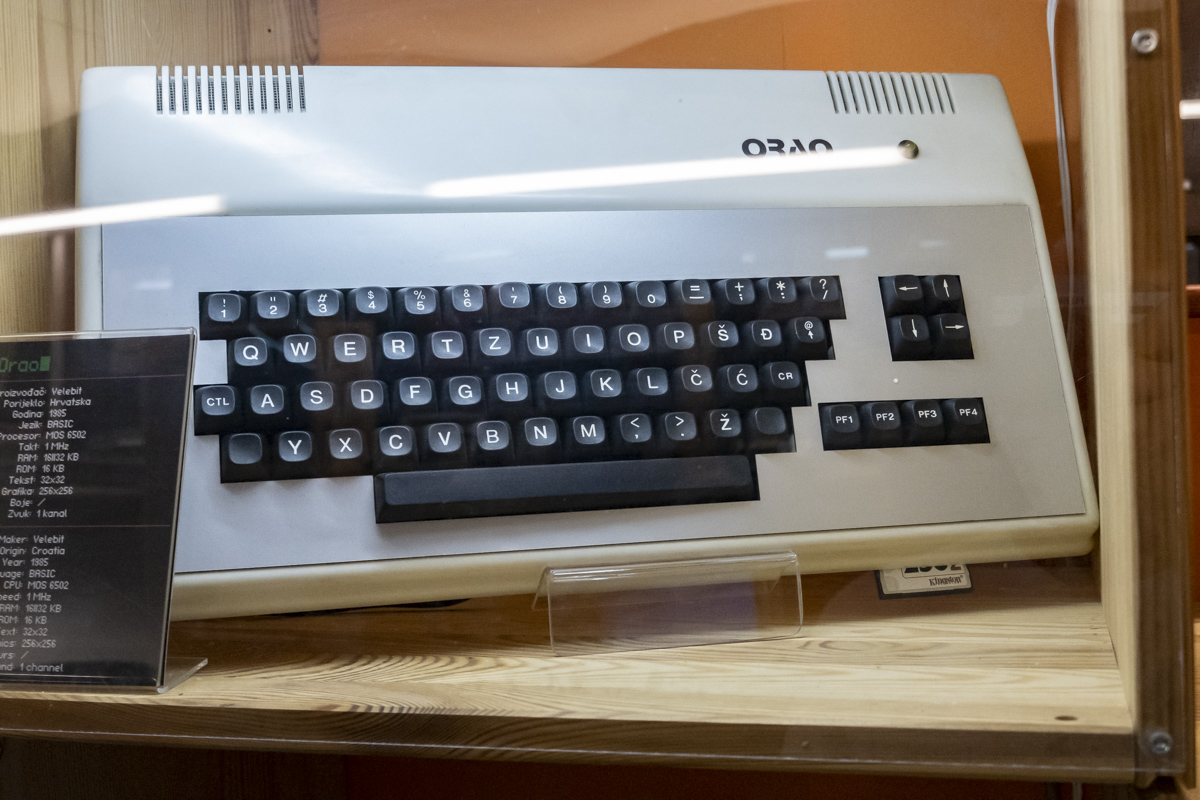
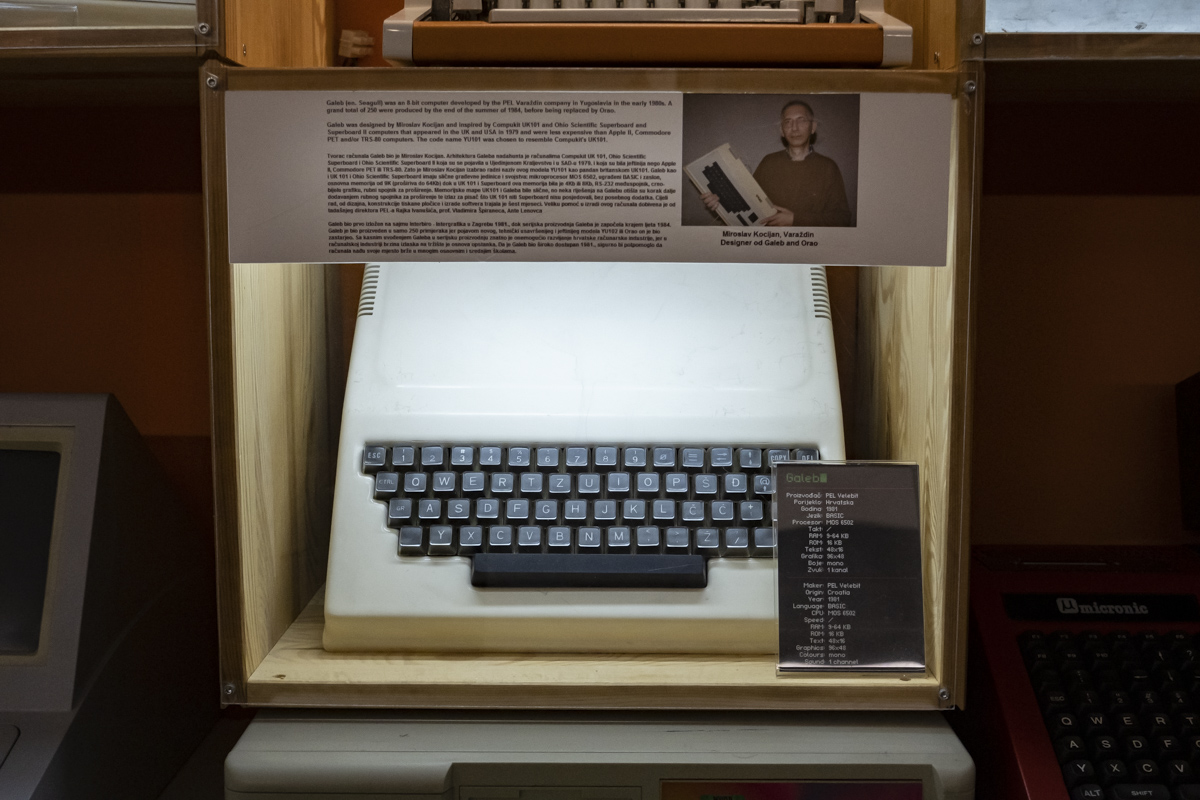
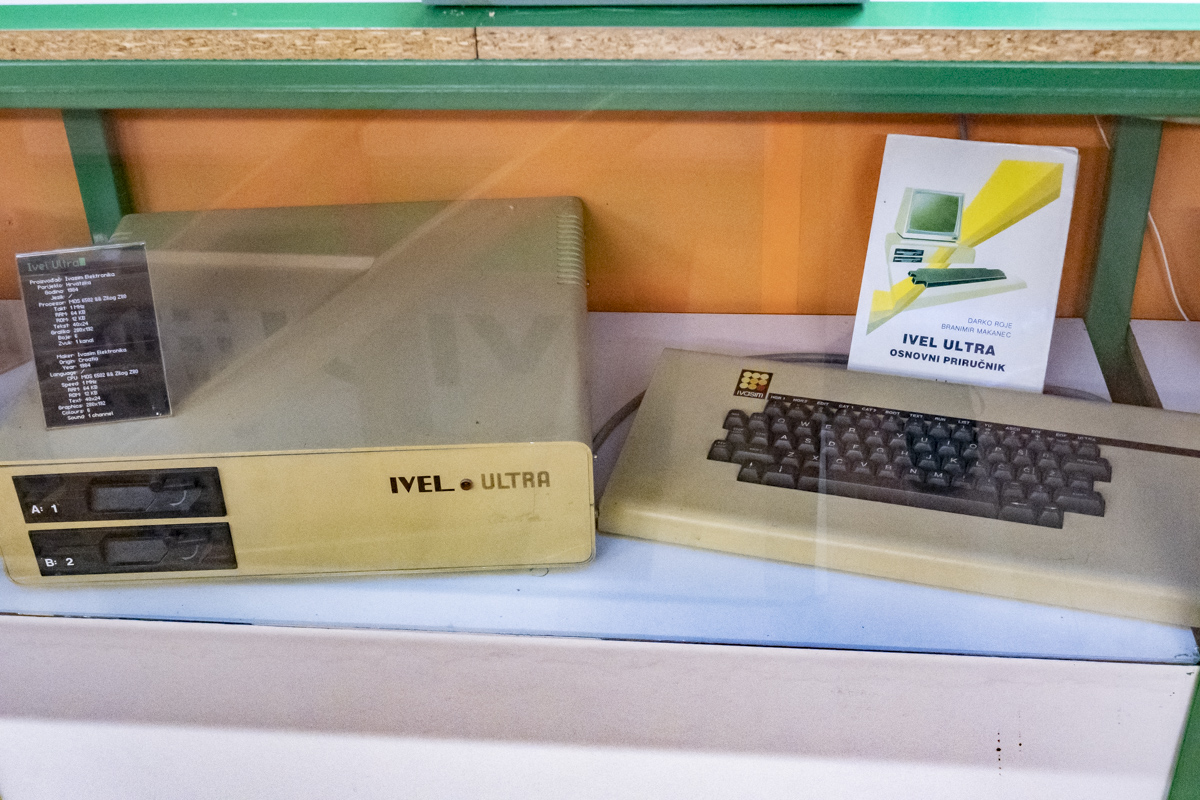
Around the same time, Miroslav Kocijan developed Galeb and then Orao, in Slovenia they produced Delta Partner, Kocijan& #39;s mentor Branimir Makanec designed the Apple II clone Ivel Ultra...
But none of these were widespread consumer computers -- most were manufactured for commercial use in state companies, or for schools like Galeb and Orao. Since they weren& #39;t widespread in home use, there was limited software, and no community.
This is something that took me a while to understand. At the time, most computers were not compatible with each other, so software had to be developed specifically for your computer. Communities formed around specific machines - which is one of the reasons why Apple became so big
So this brings us to what I believe is the key to Galaksija& #39;s success: Voja Antonić ingeniously designed it to be cheap enough to get around customs limitations and to be affordable, and then Računari magazine popularized it and created a community to support it.
It& #39;s important to consider how important it was that the computer was affordable. One of the things that took me a long time to understand about the history and eventual dissolution of the Yugoslavia is how economically disruptive the 1980s truly were.
It would far exceed the scope of this project to analyze economic policies and collapse of the Socialist Federal Republic of Yugoslavia, but this is a good intro if you& #39;re interested http://yuhistorija.com/economy_txt01.html">https://yuhistorija.com/economy_t...
For the sake of this thread, it& #39;s important to note that the times were Not Good. After a few decades of huge improvements in standard of living, our people experienced rapid stagnation and reduction. This was particularly manifested in inflation.
Inflation in Yugoslavia would reach record heights in the late 80s, and "FR Yugoslavia" (Serbia and Montengro) would trump even those in the 90s, but for a relatively stable socialist economy until then, inflation was hugely disruptive in the early 80s.
The prices would fluctuate all the time. A great example are some toll receipts I found this summer for crossing the bridge to Krk island. The price doubled from 1983 to 1984 https://twitter.com/mejs/status/1302146213328957441">https://twitter.com/mejs/stat...
So Galaksija is designed within the constraints of this economy. In that first issue of Računari there are many references to inflation and the economic situation, and the publishers are very open about designing this machine to get through customs https://twitter.com/mejs/status/1314013347256381440">https://twitter.com/mejs/stat...
I love this comic strip by Predrag Milićević about "importing" a ZX Spectrum (credit: http://www.onceuponabyte.org"> http://www.onceuponabyte.org )
Another thing that is often omitted, Voja Antonić designed another computer before Galaksija, EL-82 for Elektronika inženjering. EI supported development of Galaksija as well and eventually sold the complete computer, although Voja developed it independently.
So, how do you get the parts to make one in 1984? This is where Računari u vašoj kući comes in, the second and crucial ingredient in making Galaksija a success. This is the story of Dejan Ristanović.
Dejan& #39;s story really resonates with me, because he is someone who both understood computers but also how important they will become. He also understood and excelled in communication - publishing that first edition of Računari reached tens, if not hundreds of thousands of readers.
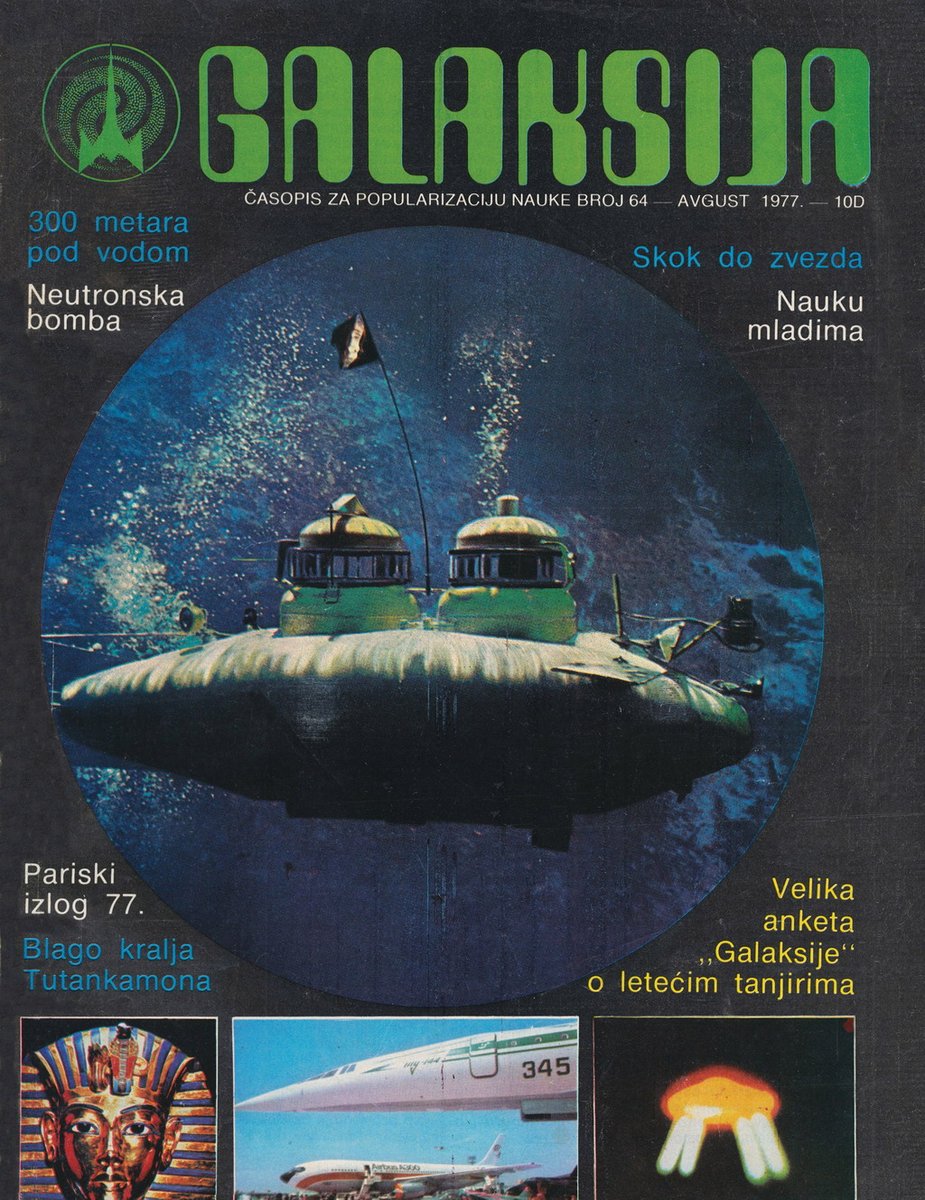
Also, Dejan was only 21 when he edited the first edition of Računari (and wrote most of the articles too)! At this point Dejan had been publishing articles for Galaksija since 1981, writing things about computers, but Galaksija was a general popular science magazine.
So basically, in April 1983 they decide to publish a special edition of Galaksija focused just on computers. Dejan is assigned as editor and he starts to work on an all encompassing intro to computers. And then in August Voja Antonić comes up with an idea of a DIY machine...
Računari u vašoj kući, special edition of Galaksija magazine, was supposed to come out in the fall of 1983. The decision to hold off and work with Voja on including the Galaksija DIY guide, and organize a distribution chain for parts was incredibly important!
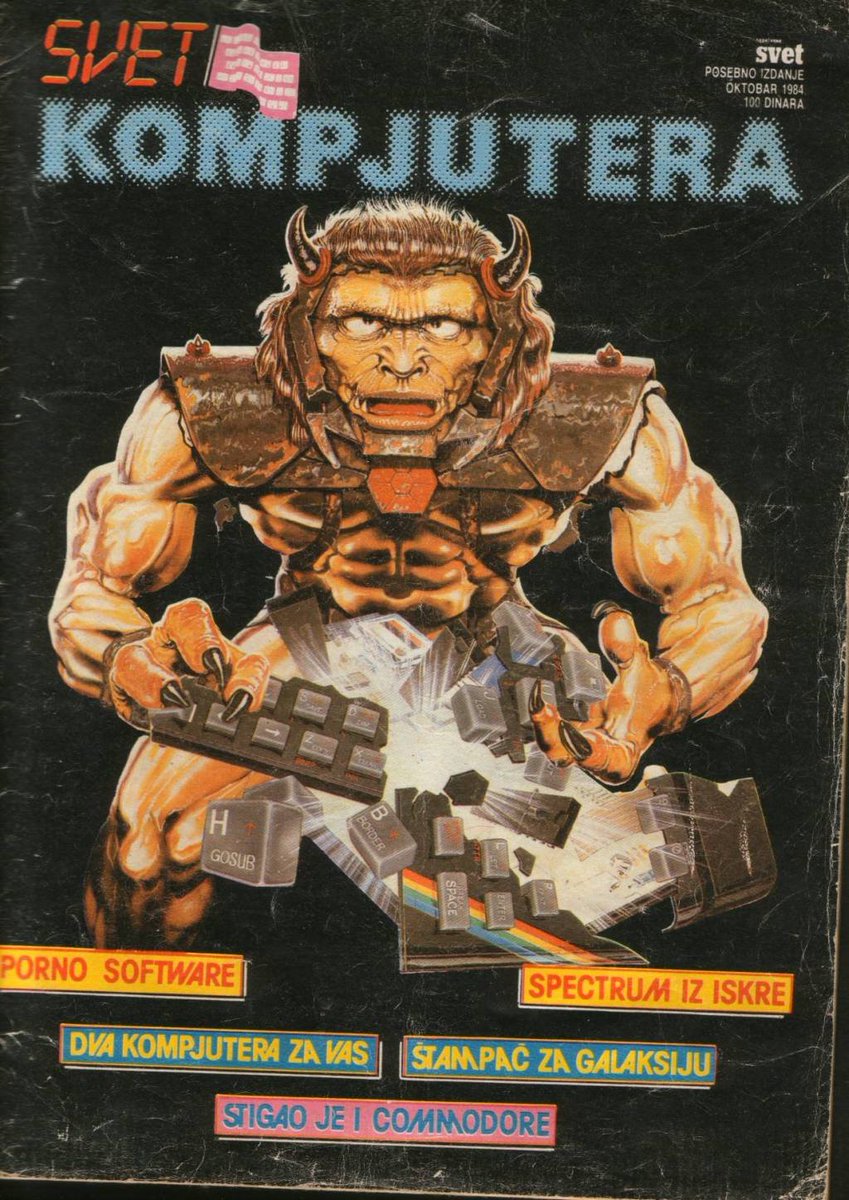
It& #39;s impossible to measure how influential this first issue was. It virtually single-handedly started the Yugoslav computer publishing industry. Before Računari there were random articles in newspapers in magazines. By 1985 there was Moj mikro, Svet kompjutera...
Računari eventually split from Galaksija and became a regular monthly magazine. In the late 80s they embraced a very particular visual language... https://twitter.com/PulpLibrarian/status/688801476043522048">https://twitter.com/PulpLibra...
So finally, how does a magazine organize a supply and distribution chain for an affordable computer in a country with strict customs rules? Let& #39;s take a look at how a Računari reader in early 1984 could get their hands on parts to build a Galaksija!
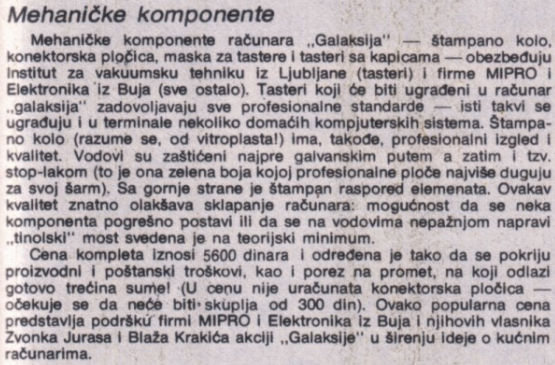
First off, "mechanical components": PCB, keys and keycaps. Institut za vakuumsku tehniku from Ljubljana made the keys, Mipro and Elektronika from Buje made the PCB and the rest. You would order these parts directly through Računari for 5600 dinars.
The ICs: these include the Z80 CPU, logic ICs, RF modulator, crystal and 3 IC sockets. Sold through Microtechnica in Graz, Austria (remember the story about shopping abroad!) for 1660 Austrian schillings. Ordering is coordinated so that no single package exceeds 1500 dinars
The instructions here are fascinating: you first write a letter to Microtechnica, they send you an invoice (this is all through mail), you go to a bank to send the money, and then you wait. You can pay by Amex, Diners, Eurocard or Visa. Not sure how widespread these were.
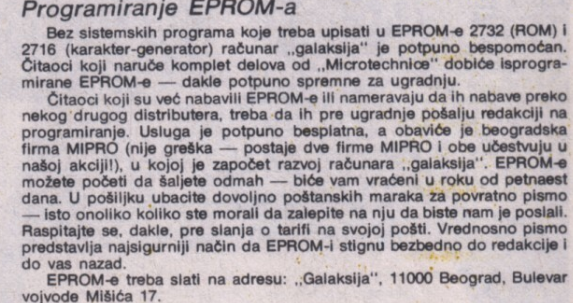
The EPROMs: if you recall, Galaksija uses 2732 and 2716 ROMs to store the OS and characters. Per the ordering instructions, folks who order ICs from Microtechnica will get their EPROMs programmed. It& #39;s unclear if they are included in that 1660 schilling price
But I assume that the EPROMs would come from Belgrade, where Voja Antonić programmed them at MIPRO (a different one than the one making PCBs  https://abs.twimg.com/emoji/v2/... draggable="false" alt="🙃" title="Auf den Kopf gestelltes Gesicht" aria-label="Emoji: Auf den Kopf gestelltes Gesicht">) where he worked and started developing Galaksija.
The really cool thing here is that Računari offered to program EPROMs for folks who obtained them independently completely for free! You would just send yours in an envelope!
Lastly, there is no mention of ordering more common electronics parts like capacitors and resistors. I assume that those indeed were available locally.
There is also mention of the helpdesk phone line, provided by Avala amateur radio club every day from 5 - 8pm! I already wrote about their Galaksija repair service https://twitter.com/mejs/status/1316227446849581056">https://twitter.com/mejs/stat...
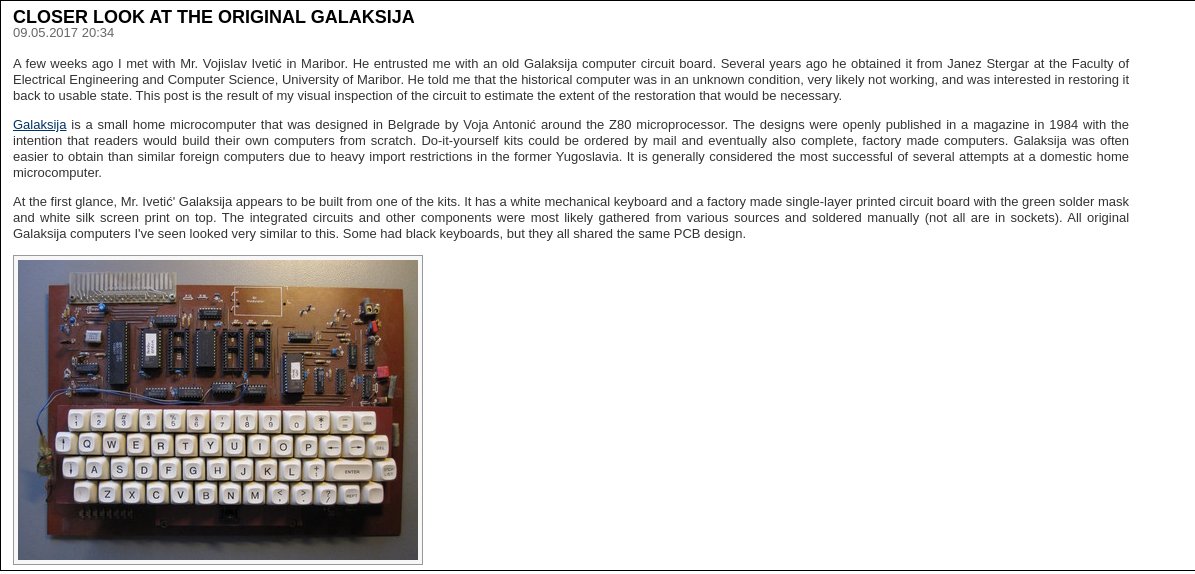
An interesting note on ICs. Even though Računari directed folks to get all the ICs from abroad, Tomaž Šolc discovered that some Galaksijas were assembled using domestically produced 6116 RAM made by Iskra in Slovenia! https://www.tablix.org/~avian/blog/archives/2017/05/closer_look_at_the_original_galaksija/">https://www.tablix.org/~avian/bl...
For folks who weren& #39;t ready for DIY, and for use in schools, Elektronika inženjering and Zavod za učila i nastavna sredstva made pre-built Galaksijas. These weren& #39;t ready yet when Računari 1 came out, but the collaboration of many companies and orgs here is super interesting.
Most Galaksija ROMs include Elektronika inženjering logo, but some had MIPROs logo. Both companies were involved. Another thanks to @avian2 for noticing this https://www.tablix.org/~avian/blog/archives/2017/09/testing_galaksijas_memory/">https://www.tablix.org/~avian/bl...
So there you have it, the ingredients to make, distribute and popularize a computer under very specific and challenging conditions! There is much more to this story, and later I will focus on the community that sprung around it.
Dejan Ristanović& #39;s story goes on, in the late 80s he founded one of the earliest and biggest BBS& #39;s in Yugoslavia & #39; Sezam, a fascinating story that I& #39;ve been researching for a while now. He wrote for Računari for years, and then started PC Press magazine.
Dejan& #39;s website is a great resource on all things Galaksija, Računari and other 80s computer projects, as well as his later work https://www.dejanristanovic.com/ ">https://www.dejanristanovic.com/">...
Researching the experience people would have ordering and then building this computer has been so wild to me! The difference from my experience now is staggering! I got my PCB in 3 days from China. Mouser delivers components in 2 days. I get old stuff on eBay.
Not to mention troubleshooting and learning about this stuff! I have the whole internet available, and while I& #39;ve been trying to primarily use contemporary sources like Računari, I& #39;m of course using other sources too.
Then there are tools! I have a good Weller soldering iron, multi meter, logic probe, an oscilloscope. Most people wouldn& #39;t own these. But they had the community, the magazine, the help line. Something that is much different now. But I have Twitter :) Thank you for following this!
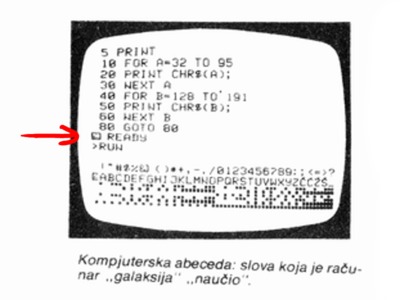
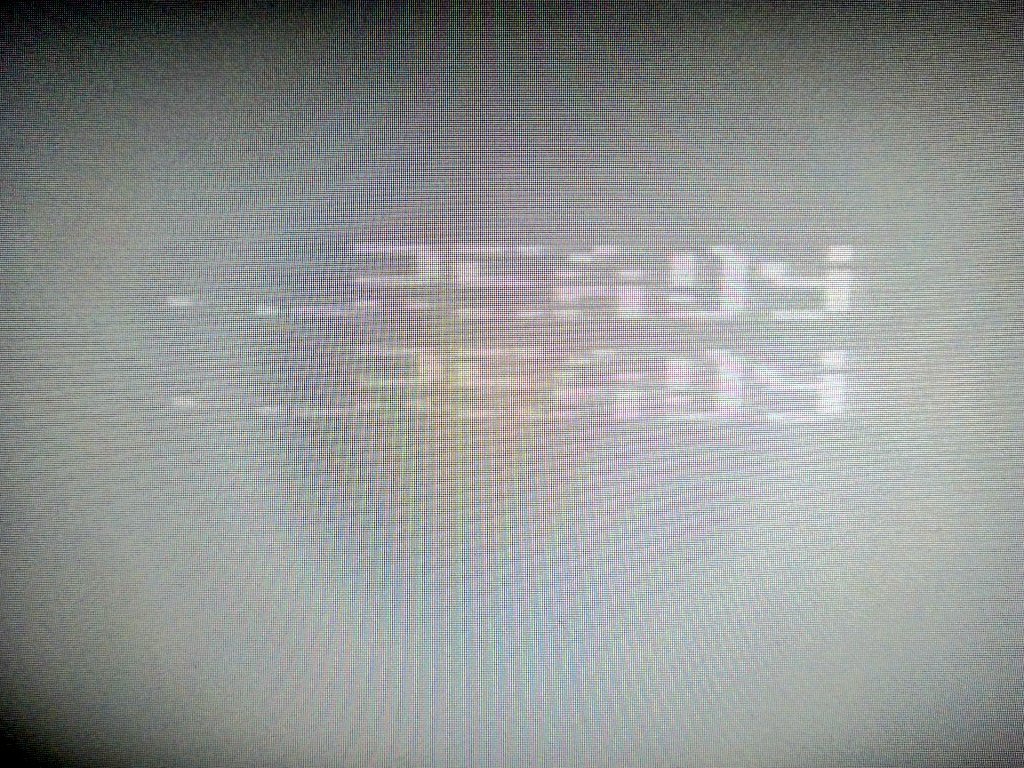
It isn& #39;t much, but I can& #39;t tell you how exciting it is to see the tiny Elektronika inženjering logo and something resembling READY show up on the screen after 3 weeks and hours and hours working on #Galaksija
I am so READY  https://abs.twimg.com/emoji/v2/... draggable="false" alt="😍" title="Lächelndes Gesicht mit herzförmigen Augen" aria-label="Emoji: Lächelndes Gesicht mit herzförmigen Augen">
Here& #39;s what that looks like on the screen. It& #39;s still far from usable. I can& #39;t get anything else to show on the screen, and the image loves to go out of sync. There should be just one ready. But finally, it& #39;s progress
So what was it, you ask, that finally got those magical letters on the screen? Well, I had two jumper wires missing. Instead of just looking at the board, I discovered them in the most roundabout way possible. Troubleshooting that WAIT line from last week, or even 2 weeks ago
These two jumpers were needed for two data bus lines going between the CPU and ROM and RAM. No wonder nothing was working, including the WAIT line. Too bad it took me days to figure this out. https://twitter.com/mejs/status/1316588388116500483?s=19">https://twitter.com/mejs/stat...
Looks like leaving it on to "warm up" produces... Usable results? Next step will be to try to run something. I& #39;ll deal with double rows later.
So here& #39;s the state of things:
- the shift/load line timings are messed up (I talked about this earlier in the thread). The image loves to go out of sync but I can kind of kick it into place by touching the SL path between the crystal and shift register. This has to be fixed.
- the shift/load line timings are messed up (I talked about this earlier in the thread). The image loves to go out of sync but I can kind of kick it into place by touching the SL path between the crystal and shift register. This has to be fixed.
- I can& #39;t run even the simplest commands like PRINT. This will be my second priority once I get a reliable and stable image that doesn& #39;t fall apart so easily
- Lastly there are double lines, missing pixels in characters, and just random artefacts on the screen. These are annoying, but I have a feeling they are mostly related to the shift/load issue, so I& #39;ll focus on them last
Here& #39;s where the shift/load situation is right now: my theory is that my timings are indeed incorrect, due to my Italian Z80 running "too fast" for the sync to be stable. Two possible solutions: change CPU (working on that) or try the stabilizer circuit https://twitter.com/mejs/status/1316546781258412032?s=19">https://twitter.com/mejs/stat...
I did build this little circuit, but I don& #39;t think it& #39;s working. Here& #39;s the oscillator comparison before and after the circuit. Basically no change (the voltage fluctuates a bit regardless). Virtually the same. Might have to rebuild it.
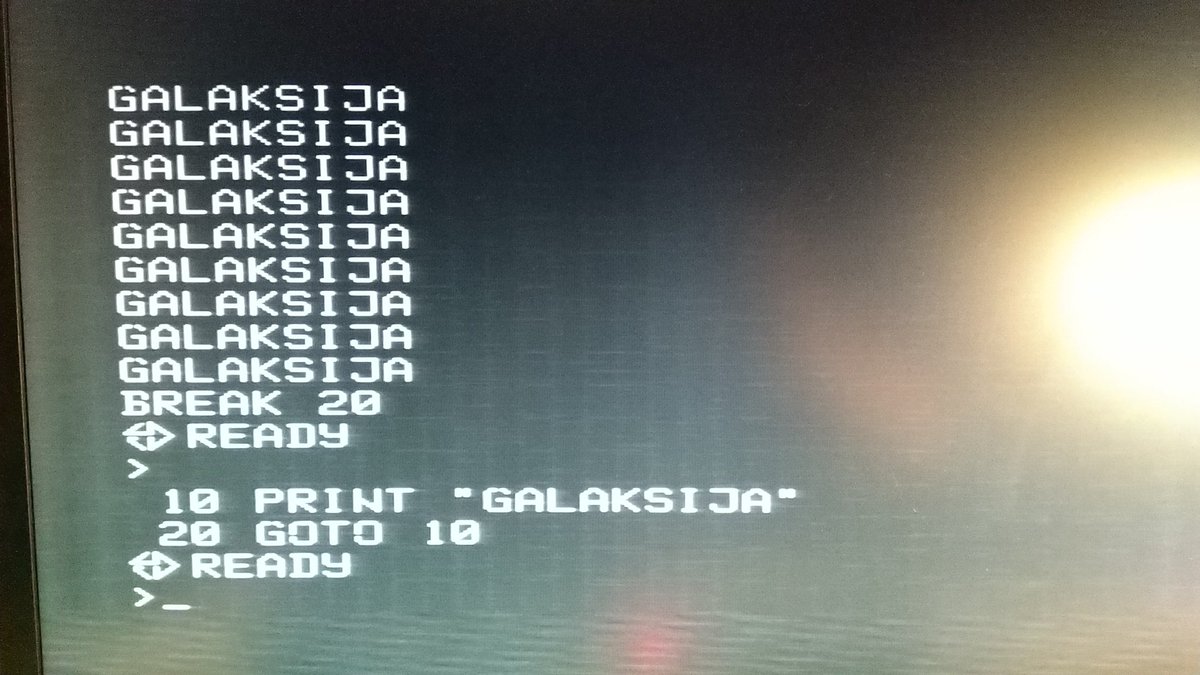
Last night my #Galaksija ran a command successfully for the first time without failing with a WHAT or SORRY response.  https://abs.twimg.com/emoji/v2/... draggable="false" alt="🥰" title="Smiling face with 3 hearts" aria-label="Emoji: Smiling face with 3 hearts">
I& #39;ve been making slow but steady progress, especially around getting stable video. But I& #39;m still experiencing crashes, and some are fun like this list of commands
Here& #39;s another fun one
Hackaday writing about the Galaksija documentary crowdfunding effort. Voja chimes in in the comments :) https://hackaday.com/2020/10/25/iconic-yugoslavian-galaksija-computer-reborn-with-a-documentary-too/">https://hackaday.com/2020/10/2...
Voja also published the gerbers file for the two layer PCBs used for new Galaksija kits! This means they no longer require 119 jumpers, which is awesome. There have been a few other small changes that I need to check out, but the board is 99% the same https://hackaday.io/project/6059-how-to-use-more-than-100-of-program-memory/files">https://hackaday.io/project/6...
So here are the updates to the PCB:
1. Dual layer, replaces jumpers
2. New connectors for power/cassette/video
3. 5nF ceramic capacitor added between -RFSH and GND on Z80A. This solves the problem of modified timings on the CMOS version of Z80A
4. New keyboard connectors (!)
1. Dual layer, replaces jumpers
2. New connectors for power/cassette/video
3. 5nF ceramic capacitor added between -RFSH and GND on Z80A. This solves the problem of modified timings on the CMOS version of Z80A
4. New keyboard connectors (!)
Having jumpers on the top layer built in makes this a much more practical build. That means you don& #39;t have to spend hours soldering tiny wires (119 of them) https://twitter.com/mejs/status/1310807053422735364">https://twitter.com/mejs/stat...
Missing jumpers is what caused a 10 day delay for me, so having them on the board is significant https://twitter.com/mejs/status/1319171848672784385">https://twitter.com/mejs/stat...
On the other hand, I wanted to have an experience that would reflect the original one as close as possible, so I& #39;m glad I still had to do it https://twitter.com/mejs/status/1310772113545064453">https://twitter.com/mejs/stat...
However, having the adjusted keyboard connector spacing is a huge improvement and I had to improvise to get my modern switches onto the old board. I would love to have had the new board design for this one. https://twitter.com/mejs/status/1311480797669527553">https://twitter.com/mejs/stat...
An update! I have a pretty stable image with good contrast and a black background. Makes it much easier to work! However, I& #39;ve been unable to replicate getting commands to run, I still have missing pixels and double rows, and my hack to stop flickering... relies on my body.
First the good stuff. I had to fix the issue where the image wouldn& #39;t stay in sync and would move across the screen like this
I noticed that if I touched the RAM while running I could stabilize the image. I tracked this down to A5 on the address bus and I realized that my body was serving as a load. I added an LED to it, and now the image is stable. Additionally, it indicates restarts!
Next - the contrast. I first experimented with adding a resistor + capacitor just as the composite signal exits the circuit, which lowered the voltage and gave out a nicer image.
I then tracked down resistors R9 and R10 and experimented with raising the value of R9 to 130 ohm (from 62), and lowering R10 to 39 ohm (from 50). I achieved an even better image, so I removed the hacked together resistor and capacitor.
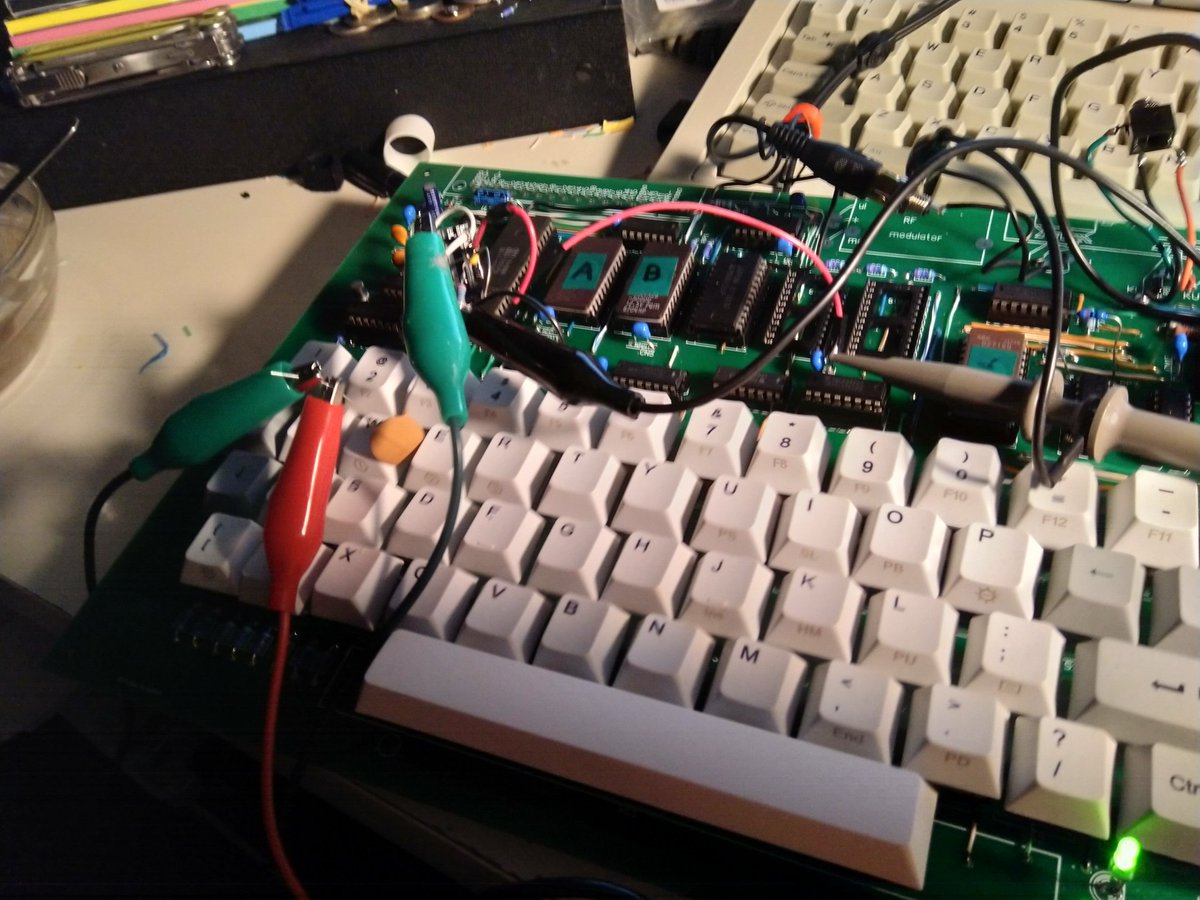
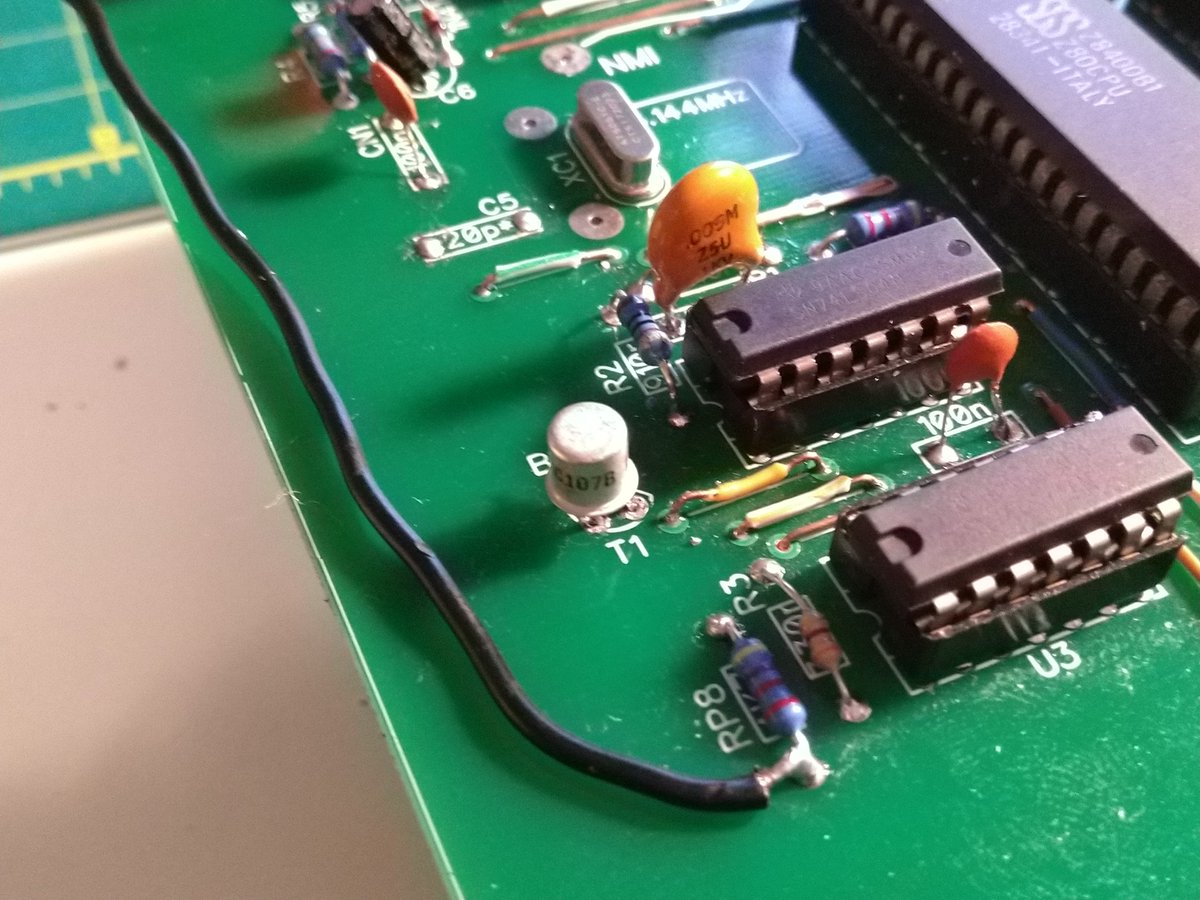
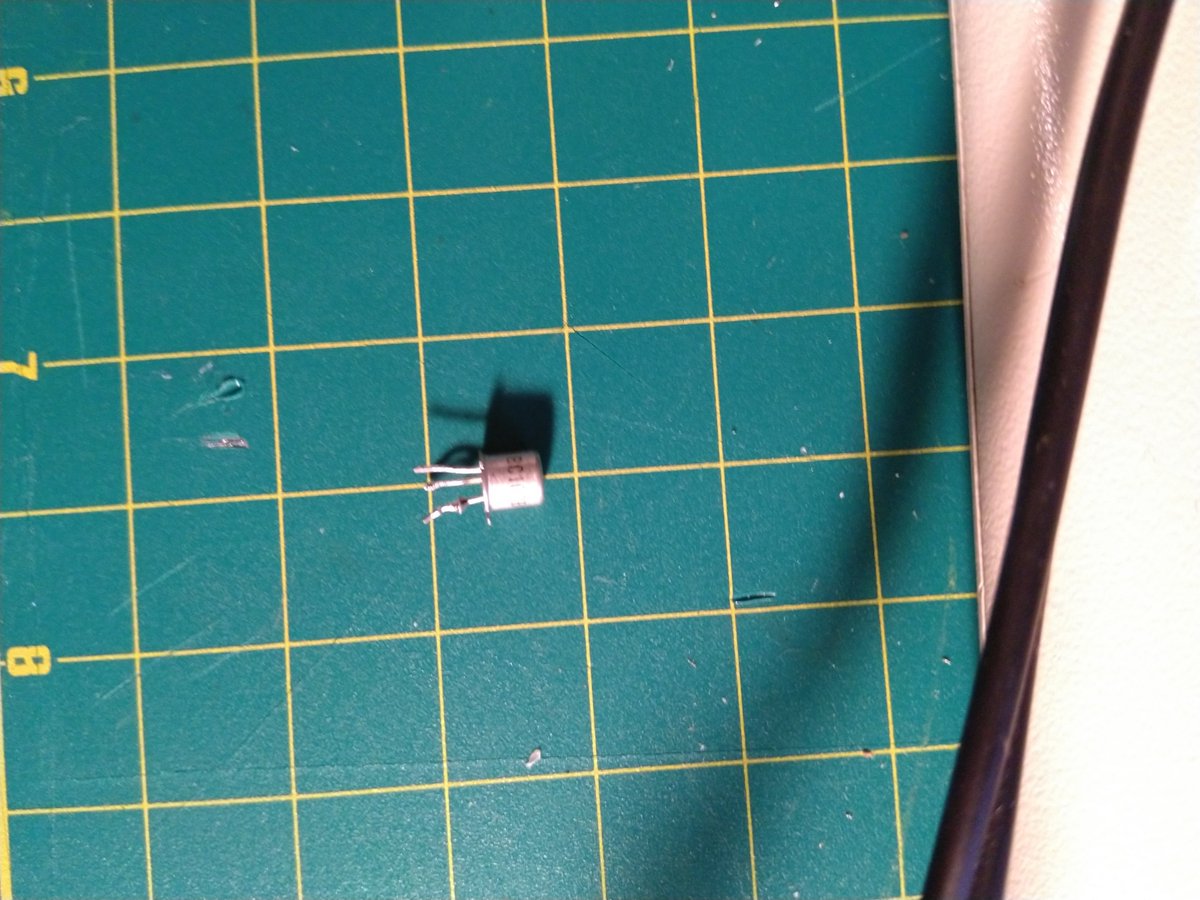
I& #39;ve been experimenting with other capacitors too, and while doing so I accidentally blew up the T1 transistor. This transistor is very cool, as it initiates "RESET" pin to start up the CPU. I noticed that I wasn& #39;t getting a prompt until pressing my improvised reset button.
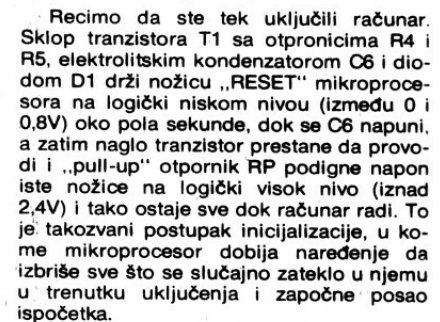
I immediately suspected the resistor, since I remembered the description of the initialization process from Računari: T1 holds RESET low until capacitor C6 fills up, then it goes high, triggering the startup. This wasn& #39;t happening.
Luckily there is another transistor of the same type on the board, and tit& #39;s used for cassette input/output. Since I& #39;m not ready yet to use it, I cannibalized it until I can get a replacement.
Finally -- my body hack. Just like the image stabilization, I noticed that the image would stop flickering if I touch the ground wire
Unlike the image stabilization issue, this isn& #39;t limited to a specific part of the circuit, and I& #39;ve been unsuccessful in resolving it by adding LEDs or capacitors. It seems like an issue with voltage fluctuation across the circuit.
There are 13 100nf decoupling capacitors that are meant to keep the voltage steady, and they don& #39;t seem to fix the issue.
But for now I can touch the ground (which is not dangerous) to stabilize, but this is not a solution. However, the big thing -- running commands, is still unsolved. I have photographic evidence that I got it to work at one point, but I have no idea what it was...
I just got absolutely clear text. Experimenting with flicker, I added a 1 ohm resistor between the board and power supply, dropping it from 5.1V to 4.63V. It didn& #39;t resolve my flicker, but the letters are crystal clear. I& #39;m not sure if this messes with something else tho.
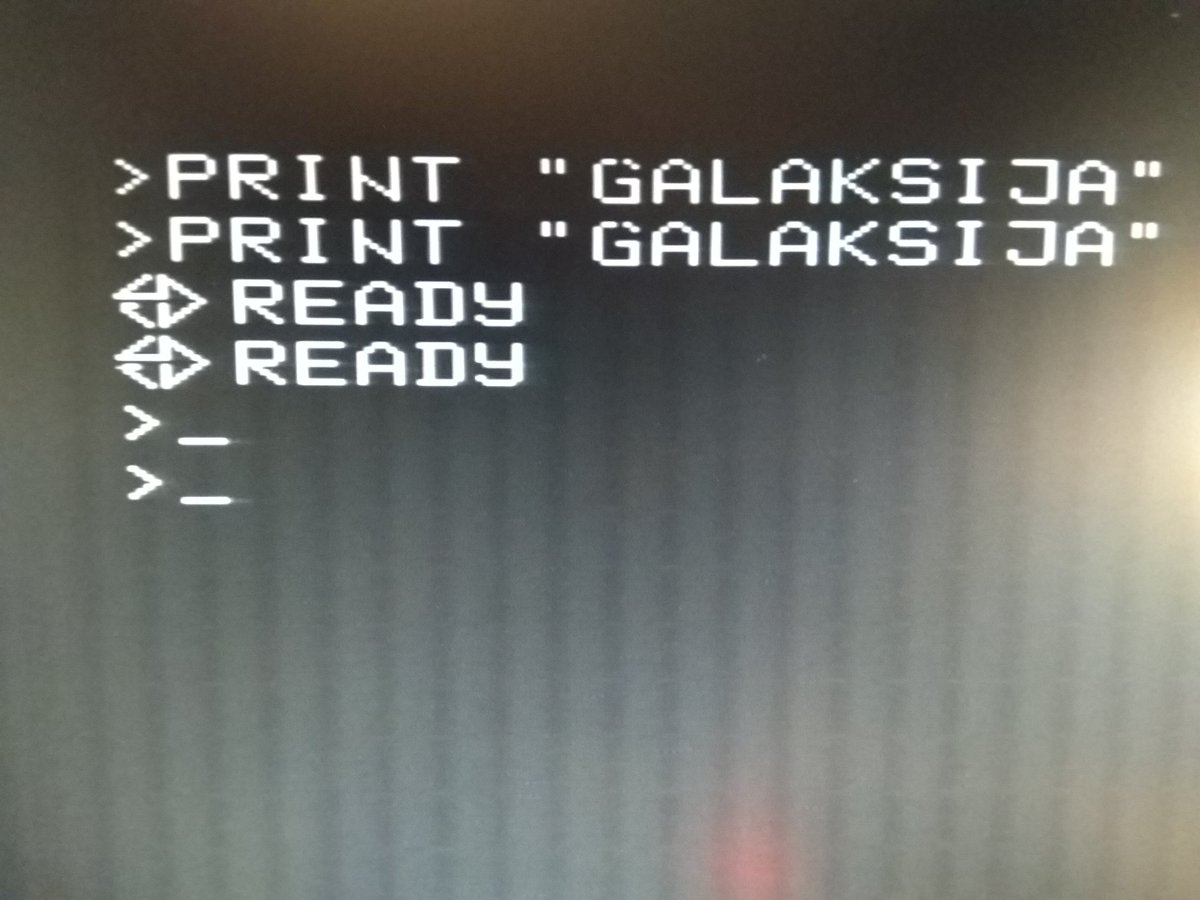
Folks this is it. Commands run, double row issue solved. It was RAM. I had a hunch. My money is on the bad socket connection. Won& #39;t mess with it more tonight. Hey, I have a working computer!! #Galaksija
Enjoy  https://abs.twimg.com/emoji/v2/... draggable="false" alt="😍" title="Lächelndes Gesicht mit herzförmigen Augen" aria-label="Emoji: Lächelndes Gesicht mit herzförmigen Augen">
A few kinks are left to fix, mainly RAM sockets, but otherwise Galaksija is fully functional. I& #39;ve been able to save my programs to virtual tape (Audacity), and had some success loading them too. However, my laptop& #39;s audio out might need an audio amp to load without errors
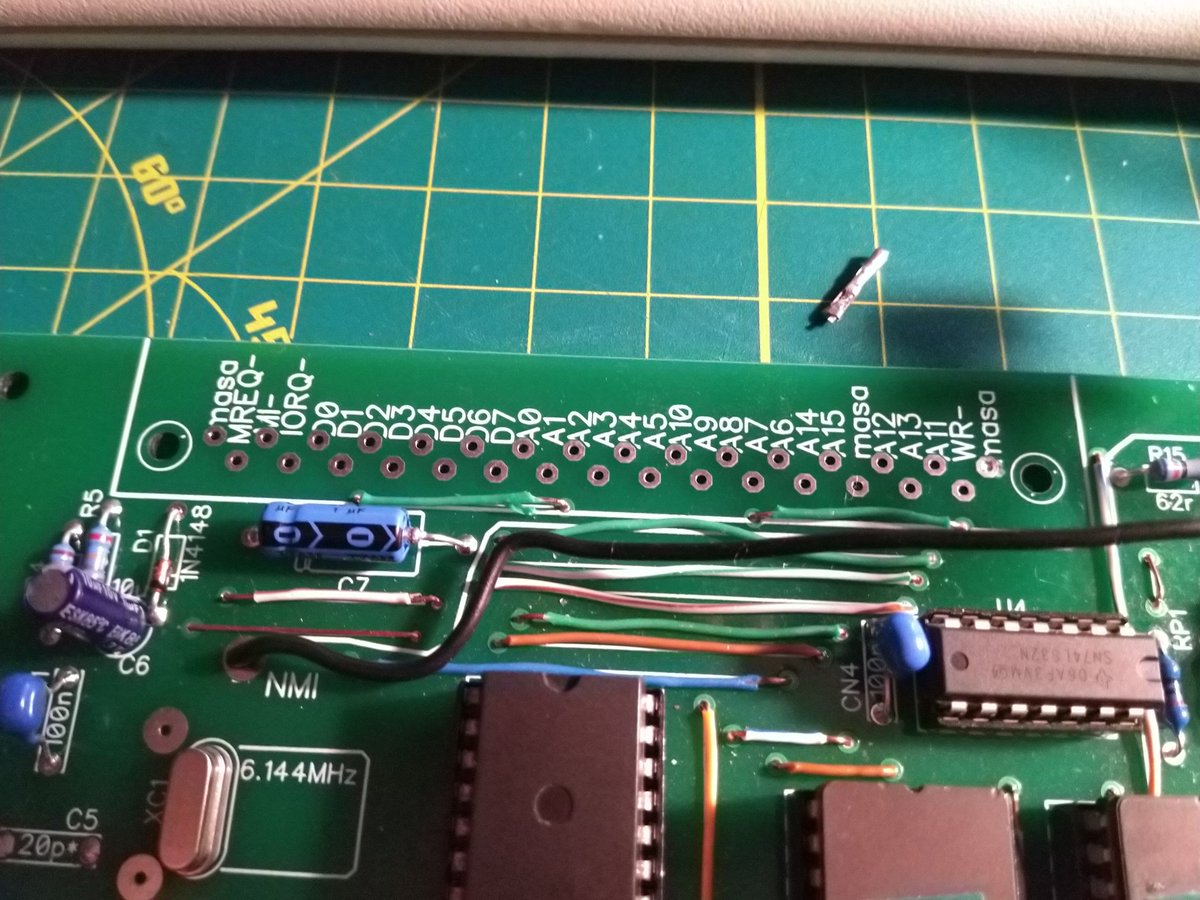
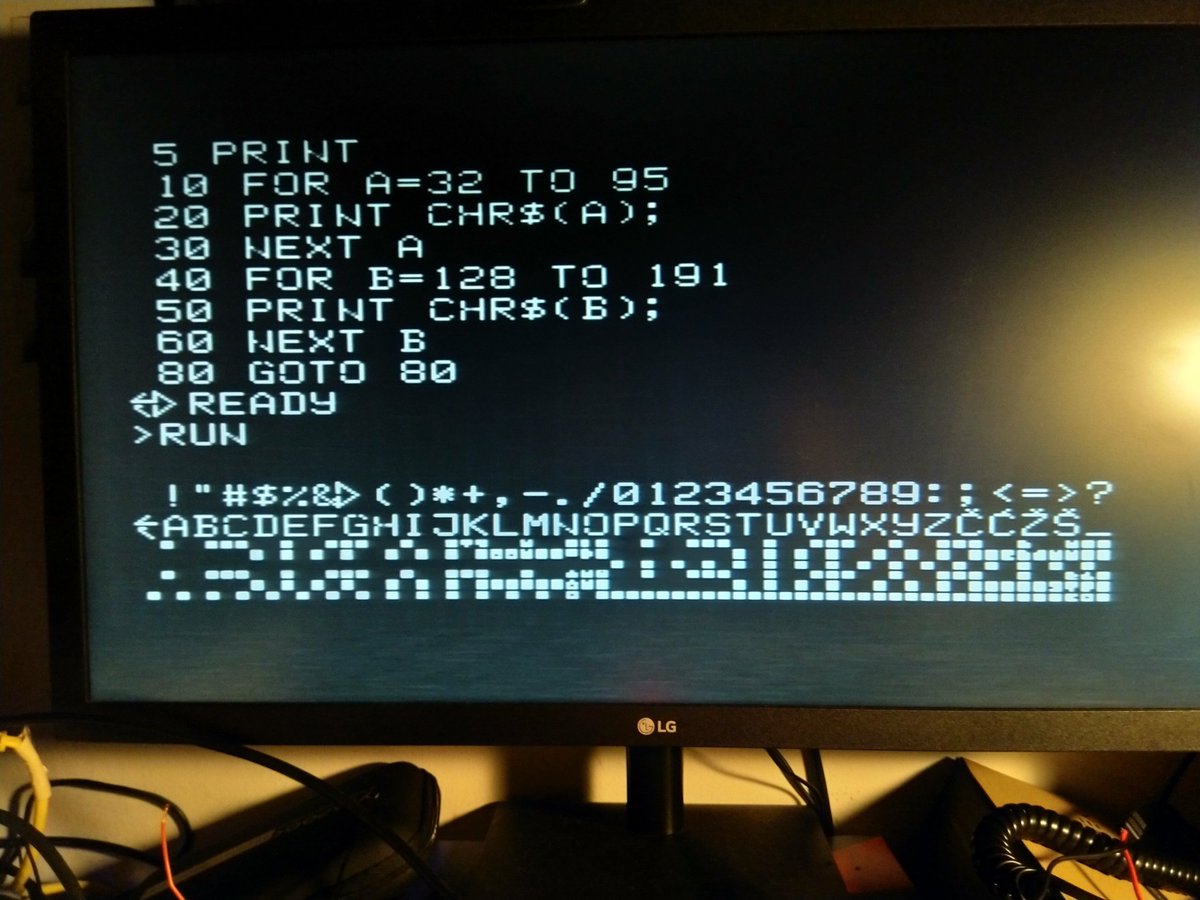
Here& #39;s a program that loads all the characters Galaksija knows. Note the BCS diacritics: čćžš
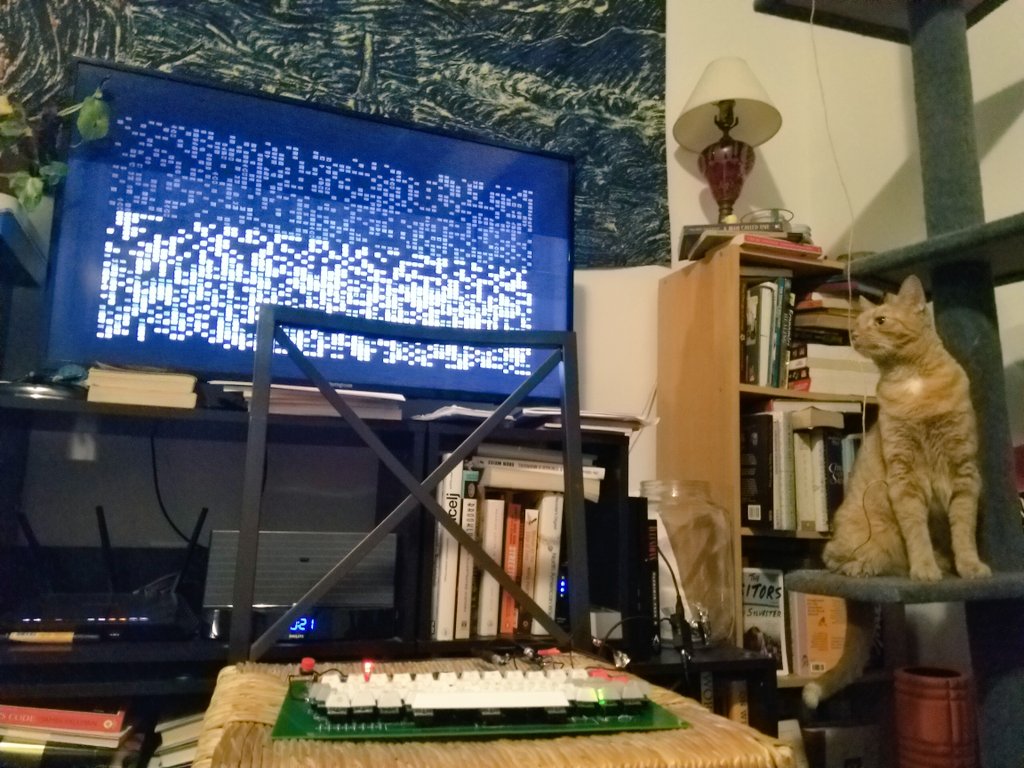
Here& #39;s a fun "stars" program by Tomaž& #39; Šolc that turns pixels on and off to create a fun effect. I hooked it up to the TV for the first time to show off :)
Check out my new gaming rig. I& #39;m thinking of starting a twitch channel
I& #39;m a gamer now
Final adjustments complete. I soldered the memory chips directly to the board. The total shown is what is available of 6144 KB after boot up. This is the max RAM allowed by original design. It can be expanded to over 48K by using an expansion board, but that& #39;s another project.
Memory issues plagued me from the start. First I ordered the wrong width 6116 RAM. Then I didn& #39;t have the right IC sockets (the same ones that I now took out). Then I struggled with getting image sync and commands to run due to bad memory connections.
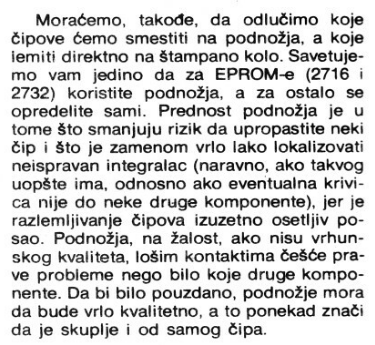
I should have heeded the warning from Računari: they warned of low quality IC sockets and advised using them only for the EPROMs. I naively assumed this was an 80s thing. I was wrong. I decided to follow this advice now instead of placing yet another order for equipment.
My other adjustment was to take out resistor R14 (100 ohms) from the tape in circuit (used for loading programs). I& #39;ve heard that some people built amplifiers to load programs using a computer or phone instead of a tape deck. I ended up removing a resistor. So far no issues.
Before I did this, the only way I could load programs was to crank up the volume to 11 dB on my laptop. This only sort of worked, as everything I would load came up with errors, probably due to distortion.
Which brings me to one of the most fun aspects of this project -- finally running some software, and using sound to do it!
I& #39;ve never actually seen or experienced using audio tapes to store data before. When I was growing up, 3.5" floppies were still common, and I do remember seeing 5 1⁄4-inch floppies once or twice. But I never used tape, and never really thought about it much until this project.
Some basics: all data consists of bits: units of 1 and 0. In computers, we often count those bits in groups of 8 as bytes. These days we transfer millions of bytes per second when we doom scroll Twitter in the morning, but at the end of the day they& #39;re still ones and zeros.
While today those ones and zeros may be going between our phone to a cell tower through the air, or if we& #39;re old school through copper cables between our computer to a switch or a router, at the lowest level we are still transferring electrical signals of 1 and 0.
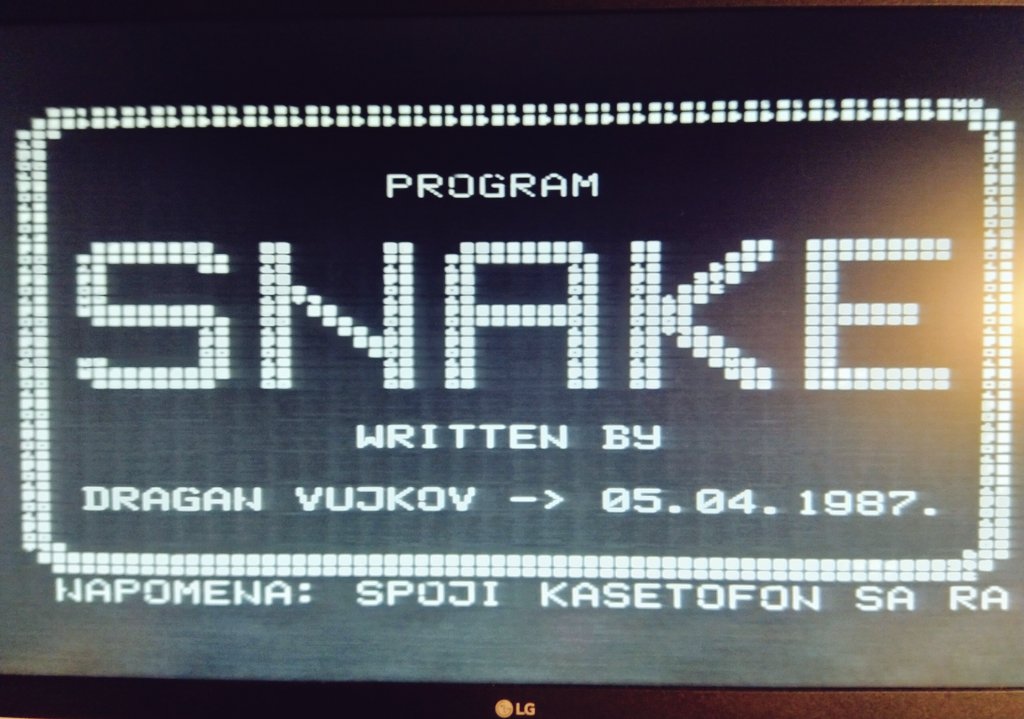
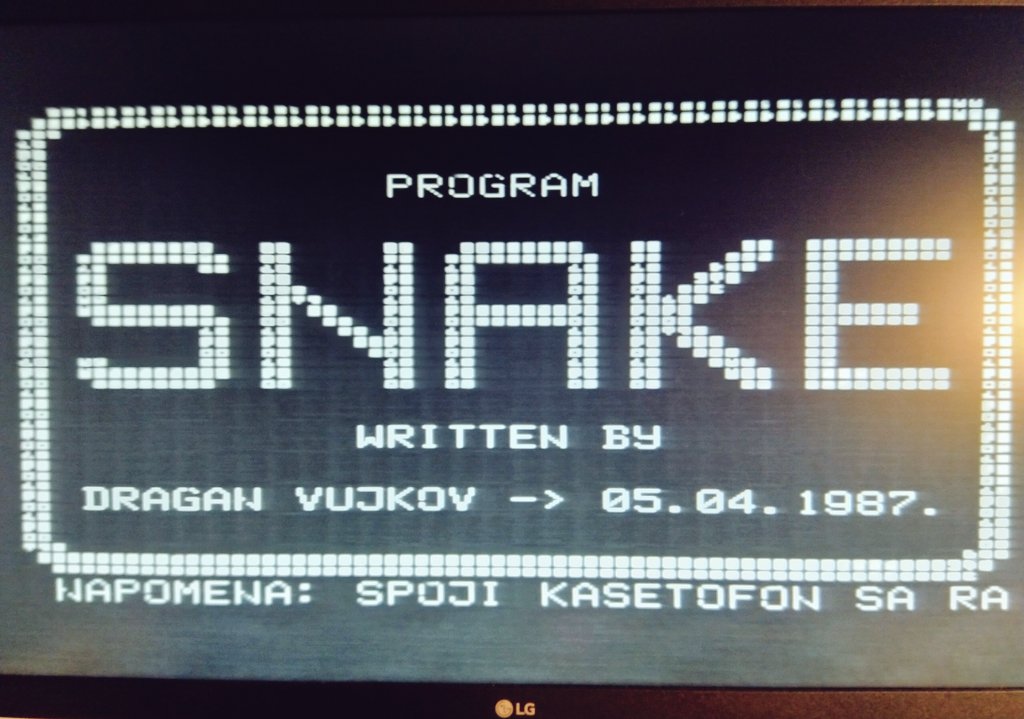
The same thing happens when using cassette tapes as storage. To store data on a tape, Galaksija generates modulated sounds that corresponds to ones and zeros it can understand. Here& #39;s what half a second of that sound looks like in Audacity (this is the code to the Snake game)
Here& #39;s what that sounds like (warning, check your volume before starting)
The sound is modulated to achieve appropriate efficiency for the hardware. @avian2 has a good write up on this and the comparison between Galaksija and Spectrum& #39;s tapes https://www.tablix.org/~avian/blog/archives/2007/02/comparing_galaksija_and_spectrum_tapes/">https://www.tablix.org/~avian/bl...
But how exactly does this sound go in/out of Galaksija? Typical stereo analog audio consists of 3 wires: left, right and ground. Galaksija uses one channel for input, one channel for output. You connect it to your tape decks headphone jack to load, or mic to save files
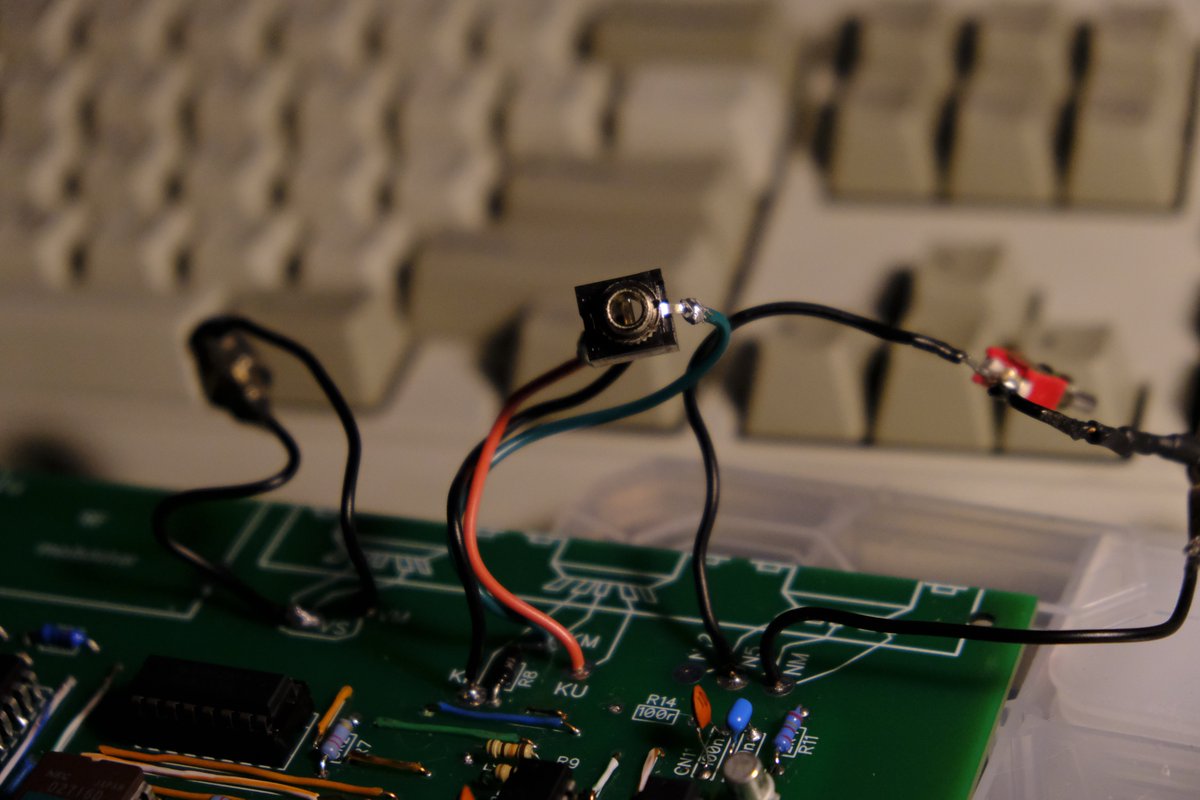
The original instructions suggested using a DIN jack for this. Since it& #39;s 2020 and nothing uses DIN jacks anymore, I installed a 3.5mm audio jack in it& #39;s place (luckily my laptop/phone haven& #39;t followed the iPhone and still feature these jacks)
If you& #39;re saving your program, the signal goes from the character generator circuit into the tape. If you& #39;re loading, the sound enters from the tape and goes into the keyboard circuit! In a way, the computer understands the tape as keys getting pressed!
I don& #39;t have a tape deck, so I& #39;m using my computer to load/save programs. To save, Galaksija outputs the signal to the right channel. To load, the computer should output the signal to the left channel (although there& #39;s no issue if you output to both). It& #39;s the best to output mono
Before I go through the process of loading/saving, let& #39;s talk about obtaining programs then and now.
Unless you& #39;re writing the program yourself, in the 80s you have three options:
- obtain it printed out and type it manually
- buy or borrow a cassette tape
- tape a program being broadcast on the radio (!)
- obtain it printed out and type it manually
- buy or borrow a cassette tape
- tape a program being broadcast on the radio (!)
It was common to publish programs in Računari and other computer magazines. Here& #39;s an example of a hex loader program published in Svet Kompjutera in February 1986. You would type this in and then save to tape for future use. http://retrospec.sgn.net/users/tomcat/Galaksija/MagScans/SK8602/SK8602-37.jpg">https://retrospec.sgn.net/users/tom...
I found a few stories about commercial programs (games) being sold for Galaksija, but from what I can tell most software was shared for free in the community. Unfortunately I couldn& #39;t find a photo of a tape with a Galaksija program (maybe I should make one?)
But the coolest way to get a program was to "download" it over the air. In Belgrade, late Zoran Modli broadcast Galaksija programs on his radio show Ventilator 202. The listeners would prepare their recorders and then tape the awful sounds coming from the radio!
Ventilator 202 was a very popular show, and Zoran Modli was another important part of the emerging community at the intersection of tech and culture. Here& #39;s an interview with him from 1990. https://www.youtube.com/watch?v=iJqnP5jsXZY&t=2s">https://www.youtube.com/watch...
Modli was also a professional pilot and flew 727s for Jat Yugoslav Airlines. He sadly passed away earlier this year, but will appear posthumously in the Galaksija documentary currently in post production. https://www.crowdsupply.com/rcc-productions/galaksija">https://www.crowdsupply.com/rcc-produ...
How about now? There are three types of files you can find online these days:
- scans of text files to type in
- .gpt files that are HEX dumps of BASIC or machine code
- WAV recordings ready to load
- scans of text files to type in
- .gpt files that are HEX dumps of BASIC or machine code
- WAV recordings ready to load
retrospec has one of the best organized collections of Galaksija compatible software, but everything is available in .gpt files, not wav http://retrospec.sgn.net/users/tomcat/yu/Galaksija_list.php">https://retrospec.sgn.net/users/tom...
This is where Tomaž Šolc saves the day once more. His Galaksija development tools feature a gtp2wav program that will convert any .gpt hex dump into a Galaksija compatible wav file! https://www.tablix.org/~avian/blog/articles/galaksija-tools/">https://www.tablix.org/~avian/bl...
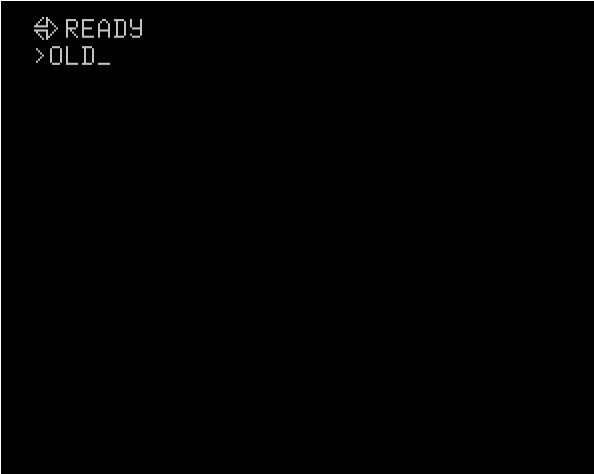
Once you obtain your audio file, either as wav or cassette tape ( https://abs.twimg.com/emoji/v2/... draggable="false" alt="🙃" title="Auf den Kopf gestelltes Gesicht" aria-label="Emoji: Auf den Kopf gestelltes Gesicht">), you& #39;ll connect the Galaksija tape interface to your sound output. Then you& #39;ll type in OLD command and run it, and then play your file/tape. The screen will turn black while the tape is loading.
The screen should go back to READY when the program is loaded, but for me none of the programs I got from the internet or converted with gpt2wav seem to do so. The few I saved myself and then loaded do.
I haven& #39;t come any documentation on this, but if I "reset" Galaksija using the hard break button (NMI), I can get back to the READY prompt. NMI resets the state without erasing memory.
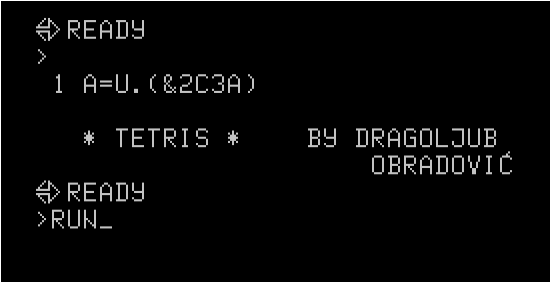
At this point you can run the program by typing RUN! BASIC programs can be viewed easily by hitting the STOP/LIST button or typing LIST. Machine code programs will show up only with the BASIC command 10 A=U. (&2C3A) telling the computer to find the program at memory address &2C3A
This wasn& #39;t very well documented in the introduction in Računari, nor online, so it took a bit of trial and error to get right. Some machine code programs I& #39;m still having issues with, and it looks like they require the hex loader mentioned here https://twitter.com/mejs/status/1321621264117760000">https://twitter.com/mejs/stat...
Many games were written in machine code because it ran much faster than BASIC, allowing for speed needed in games. Here& #39;s what LISTing Tetris looks like. Just one command telling the computer where to find machine code.
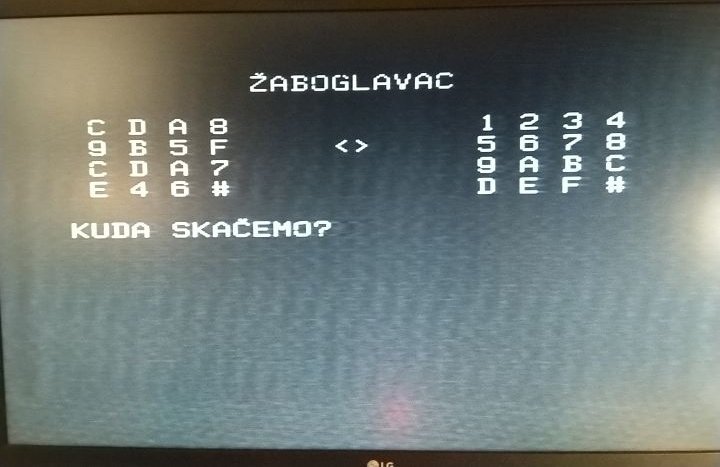
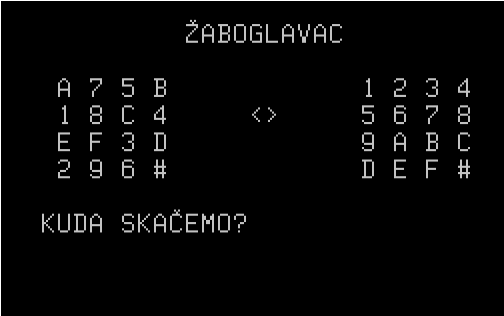
But some software is in BASIC. This is Žaboglavac, a game published this year for Galaksija and Spectrum by RETRO INFO, a computer heritage organization based in Zagreb. https://retroinfo.hr/zaboglavac/ ">https://retroinfo.hr/zaboglava...
You can also find software online in .gal files which are mostly used in emulators. They basically snapshot RAM state with the program loaded so no "tape" loading is necessary. I think it should be possible to use them with a real Galaksija but I haven& #39;t tried yet.
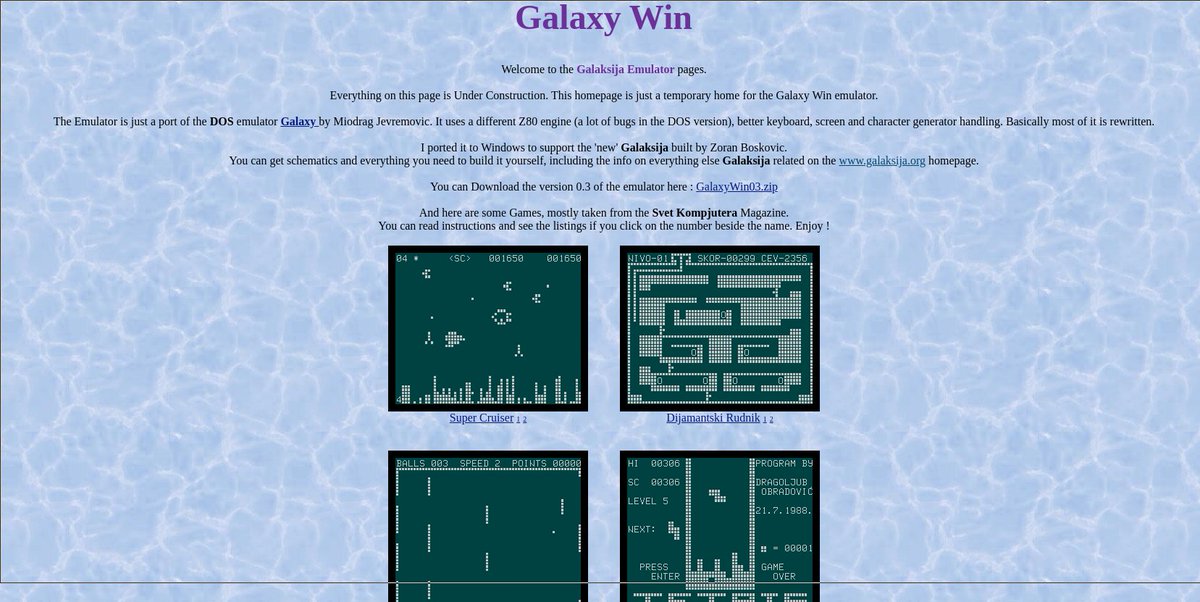
There are a few Galaksija emulators floating around. I& #39;ve been using Galaxy Win, a port of Galaksija DOS emulator by Miodrag Jevremović hosted at http://emulator.galaksija.org"> http://emulator.galaksija.org
But what about saving your work? Pretty much the same thing, but in reverse. You would write your could, hook up Galaksija to a mic input, press record and then type SAVE. The screen would go black and return to READY when done.
I have my programs loaded as wav files, so organizing and playing them is easy. If you had them on tape though, you would have to keep precise notes on where the programs were on tape (start/end seconds). This is why it was advised to get a tape deck with time indicators
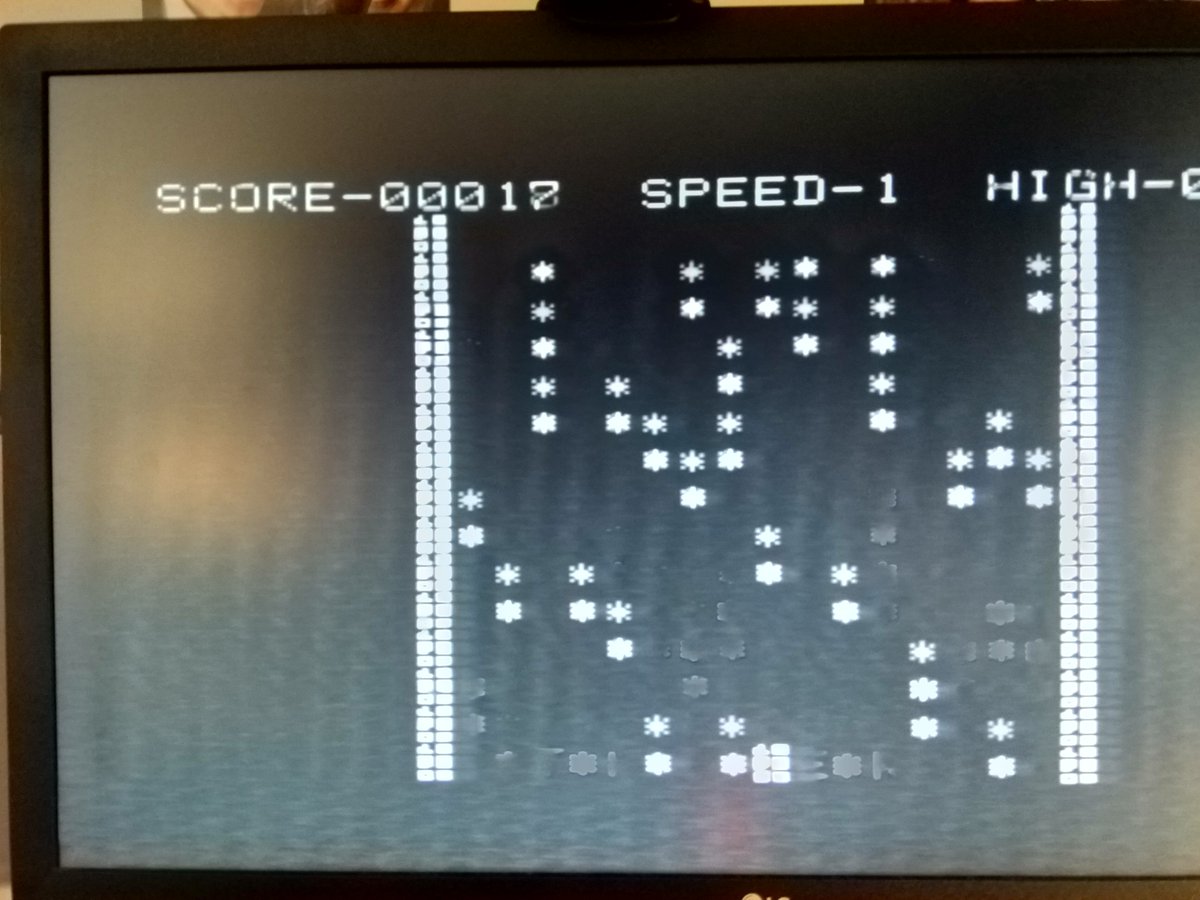
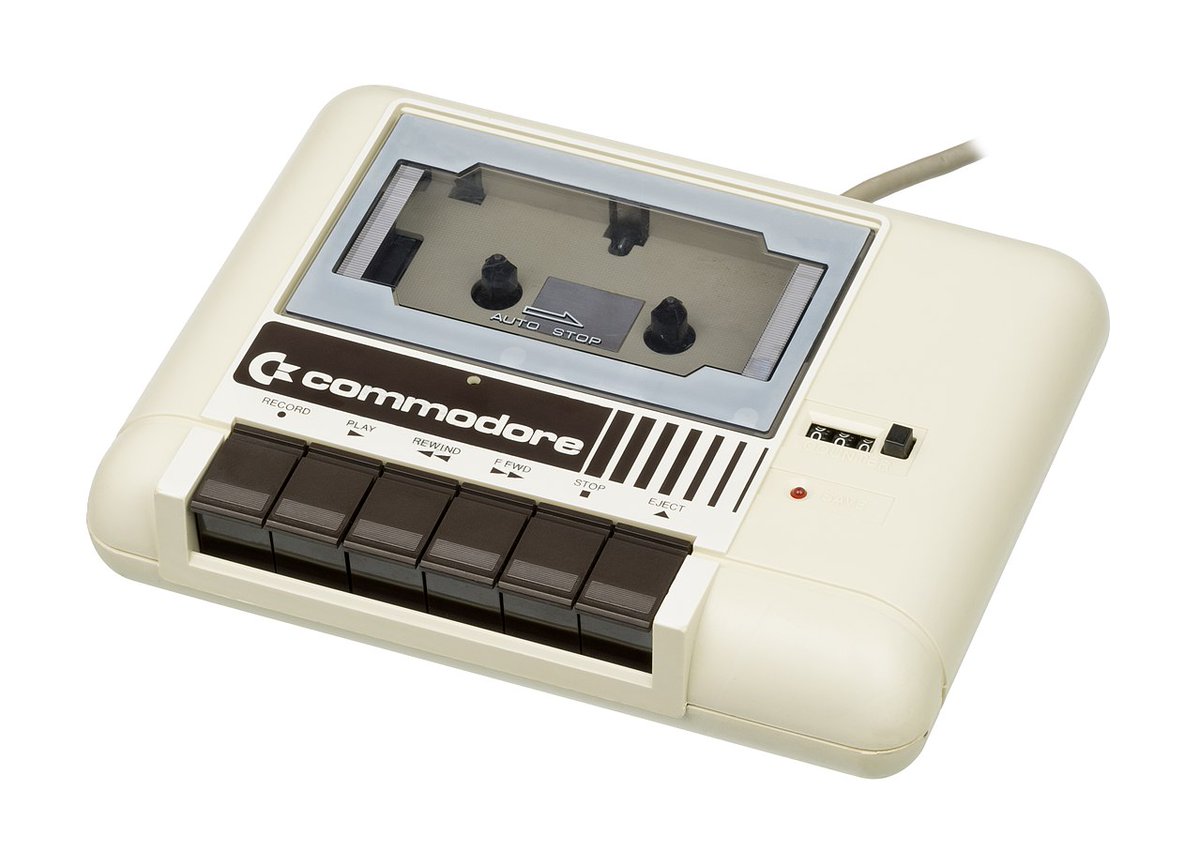
So that& #39;s the cassette tape story so far. I would love to actually use a real tape recorder to try this, but I& #39;m not sure I can justify getting another piece of old tech just to say I did. We& #39;ll see  https://abs.twimg.com/emoji/v2/... draggable="false" alt="😅" title="Lächelndes Gesicht mit offenem Mund und Angstschweiß" aria-label="Emoji: Lächelndes Gesicht mit offenem Mund und Angstschweiß">
What& #39;s next for my Galaksija? With the memory and cassette loading issues resolved, this project is almost complete. I still need to build a case (fun!) and I& #39;ve been thinking of integrating my RCA/HDMI adapter inside the box. Maybe put it in place of the RF modulator? We& #39;ll see.
I& #39;ve started loading programs (playing sound) with VLC and the issues I experienced earlier with some programs seem to have gone away. So many fun games like (definitely unlicensed) Star Trek. I& #39;m playing while I watch TNG  https://abs.twimg.com/emoji/v2/... draggable="false" alt="🤓" title="Nerd-Gesicht" aria-label="Emoji: Nerd-Gesicht">

 Read on Twitter







 but I& #39;m slowly getting better and faster :)" title="I only got 26 out of 119 jumpers tonight https://abs.twimg.com/emoji/v2/... draggable="false" alt="😩" title="Mattes Gesicht" aria-label="Emoji: Mattes Gesicht"> but I& #39;m slowly getting better and faster :)" class="img-responsive" style="max-width:100%;"/>





 I have a plan how to get around this, but let& #39;s talk ROMs" title="I also got the EPROM programmer! 2716 EPROM chip is programmed (the one used for storing characters), but I& #39;m having issues with 2732 chips. Turns out they are programmed at 21V, and this $50 programmer tops out at 18V https://abs.twimg.com/emoji/v2/... draggable="false" alt="😩" title="Mattes Gesicht" aria-label="Emoji: Mattes Gesicht"> I have a plan how to get around this, but let& #39;s talk ROMs" class="img-responsive" style="max-width:100%;"/>


 " title="So, once you get your files, your EPROMs and your (hopefully compatible :)) EPROM programmer, you& #39;re ready to burn in your ROMs. TL866Ⅱ Plus Programmer I got comes with pretty good software, that apparently runs the best on Windows XP, so I ran it inside a VM https://abs.twimg.com/emoji/v2/... draggable="false" alt="😇" title="Lächelndes Gesicht mit Heiligenschein" aria-label="Emoji: Lächelndes Gesicht mit Heiligenschein">" class="img-responsive" style="max-width:100%;"/>





 " title="So with most of the work done, I decided to put the rest of the ICs in. And then I realized why my IC sockets were wrong width in the first place: the RAM I got is half the width!! https://abs.twimg.com/emoji/v2/... draggable="false" alt="😩" title="Mattes Gesicht" aria-label="Emoji: Mattes Gesicht">" class="img-responsive" style="max-width:100%;"/>




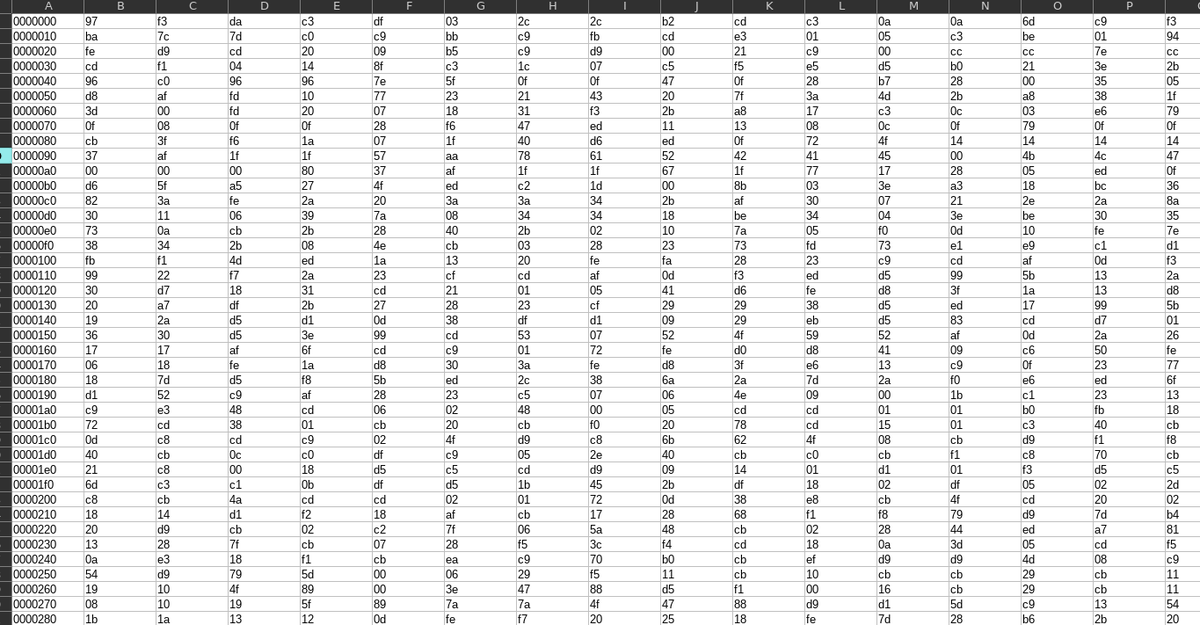 " title="This may not be the best way to do this, but I& #39;ll try it anyway. I hexdumped the rom and am now editing it as a spreadsheet https://abs.twimg.com/emoji/v2/... draggable="false" alt="🤓" title="Nerd-Gesicht" aria-label="Emoji: Nerd-Gesicht">" class="img-responsive" style="max-width:100%;"/>

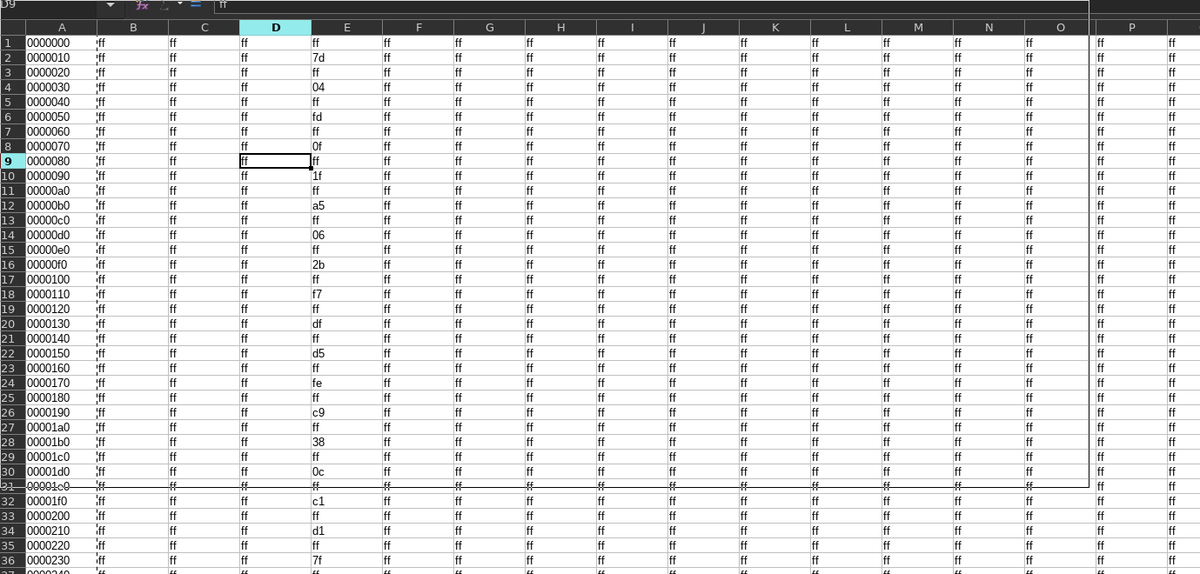 TEDIOUS!" title="This works, but it& #39;s tedious work. My workflow is: I have 32 spreadsheets, each one with 31 empty bytes, and every 32nd byte on. Then I do a copy into a text file, use xxd to turn it into a bin file, then burn it with minipro and then read w/ xgpro to check https://abs.twimg.com/emoji/v2/... draggable="false" alt="😩" title="Mattes Gesicht" aria-label="Emoji: Mattes Gesicht"> TEDIOUS!">
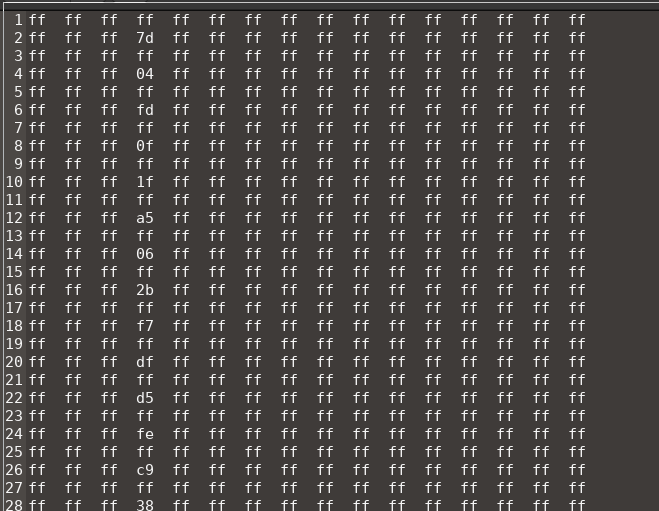 TEDIOUS!" title="This works, but it& #39;s tedious work. My workflow is: I have 32 spreadsheets, each one with 31 empty bytes, and every 32nd byte on. Then I do a copy into a text file, use xxd to turn it into a bin file, then burn it with minipro and then read w/ xgpro to check https://abs.twimg.com/emoji/v2/... draggable="false" alt="😩" title="Mattes Gesicht" aria-label="Emoji: Mattes Gesicht"> TEDIOUS!">
 TEDIOUS!" title="This works, but it& #39;s tedious work. My workflow is: I have 32 spreadsheets, each one with 31 empty bytes, and every 32nd byte on. Then I do a copy into a text file, use xxd to turn it into a bin file, then burn it with minipro and then read w/ xgpro to check https://abs.twimg.com/emoji/v2/... draggable="false" alt="😩" title="Mattes Gesicht" aria-label="Emoji: Mattes Gesicht"> TEDIOUS!">
 TEDIOUS!" title="This works, but it& #39;s tedious work. My workflow is: I have 32 spreadsheets, each one with 31 empty bytes, and every 32nd byte on. Then I do a copy into a text file, use xxd to turn it into a bin file, then burn it with minipro and then read w/ xgpro to check https://abs.twimg.com/emoji/v2/... draggable="false" alt="😩" title="Mattes Gesicht" aria-label="Emoji: Mattes Gesicht"> TEDIOUS!">


 https://abs.twimg.com/emoji/v2/... draggable="false" alt="🤓" title="Nerd-Gesicht" aria-label="Emoji: Nerd-Gesicht">https://abs.twimg.com/emoji/v2/... draggable="false" alt="😩" title="Mattes Gesicht" aria-label="Emoji: Mattes Gesicht">" title="Well folks, I don& #39;t know how I messed this up so bad, but I most definitely didn& #39;t get the right CPU https://abs.twimg.com/emoji/v2/... draggable="false" alt="🤣" title="Lachend auf dem Boden rollen" aria-label="Emoji: Lachend auf dem Boden rollen">https://abs.twimg.com/emoji/v2/... draggable="false" alt="🤓" title="Nerd-Gesicht" aria-label="Emoji: Nerd-Gesicht">https://abs.twimg.com/emoji/v2/... draggable="false" alt="😩" title="Mattes Gesicht" aria-label="Emoji: Mattes Gesicht">" class="img-responsive" style="max-width:100%;"/>

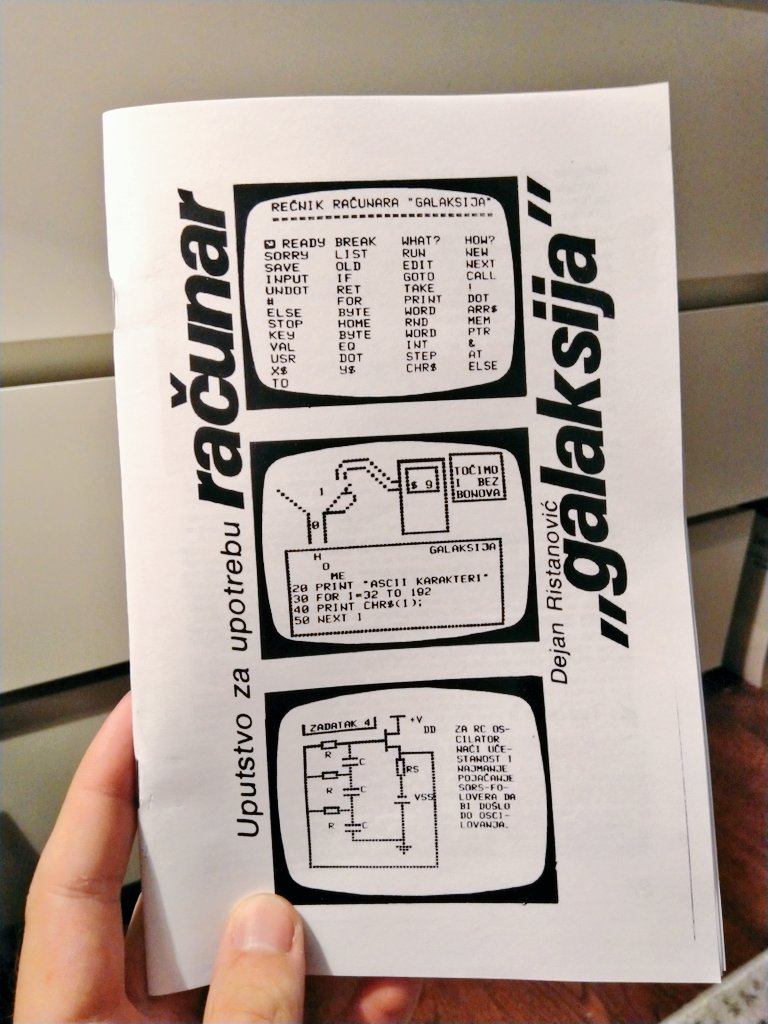 " title="While I& #39;m waiting on my Italian Z80, I& #39;m getting ready to use my #Galaksija by reading the quick start guide that came out in the same issue of Računari u vašoj kući as the DIY guide! It came out ready to cut out and bind, so I printed mine from the scan and stapled it https://abs.twimg.com/emoji/v2/... draggable="false" alt="🙃" title="Auf den Kopf gestelltes Gesicht" aria-label="Emoji: Auf den Kopf gestelltes Gesicht">">
 " title="While I& #39;m waiting on my Italian Z80, I& #39;m getting ready to use my #Galaksija by reading the quick start guide that came out in the same issue of Računari u vašoj kući as the DIY guide! It came out ready to cut out and bind, so I printed mine from the scan and stapled it https://abs.twimg.com/emoji/v2/... draggable="false" alt="🙃" title="Auf den Kopf gestelltes Gesicht" aria-label="Emoji: Auf den Kopf gestelltes Gesicht">">
 " title="While I& #39;m waiting on my Italian Z80, I& #39;m getting ready to use my #Galaksija by reading the quick start guide that came out in the same issue of Računari u vašoj kući as the DIY guide! It came out ready to cut out and bind, so I printed mine from the scan and stapled it https://abs.twimg.com/emoji/v2/... draggable="false" alt="🙃" title="Auf den Kopf gestelltes Gesicht" aria-label="Emoji: Auf den Kopf gestelltes Gesicht">">

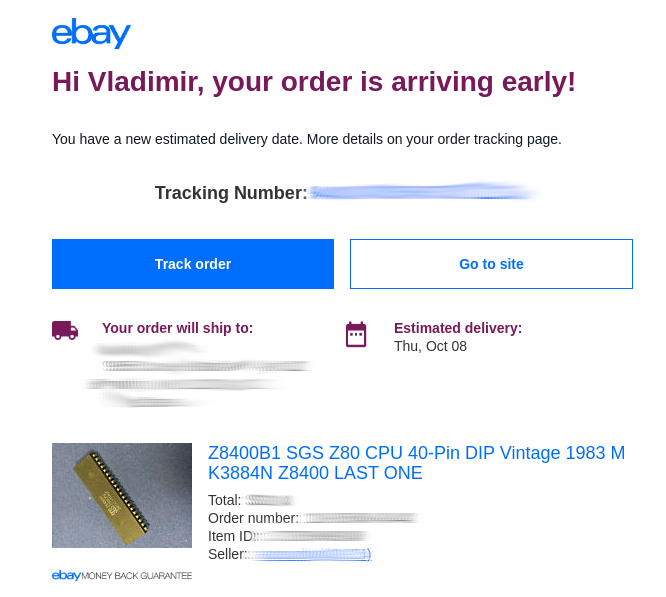
 So, the Italian Z80 arrived and it& #39;s pretty cool looking 1983 chip. Aaaand of course, I& #39;m still not getting an image. But before we talk about that, my new 2732B EPROMs arrived, with 12.5V programming voltage!" title="I know I left the crowds hanging with this last tweet... https://abs.twimg.com/emoji/v2/... draggable="false" alt="🤣" title="Lachend auf dem Boden rollen" aria-label="Emoji: Lachend auf dem Boden rollen"> So, the Italian Z80 arrived and it& #39;s pretty cool looking 1983 chip. Aaaand of course, I& #39;m still not getting an image. But before we talk about that, my new 2732B EPROMs arrived, with 12.5V programming voltage!" class="img-responsive" style="max-width:100%;"/>

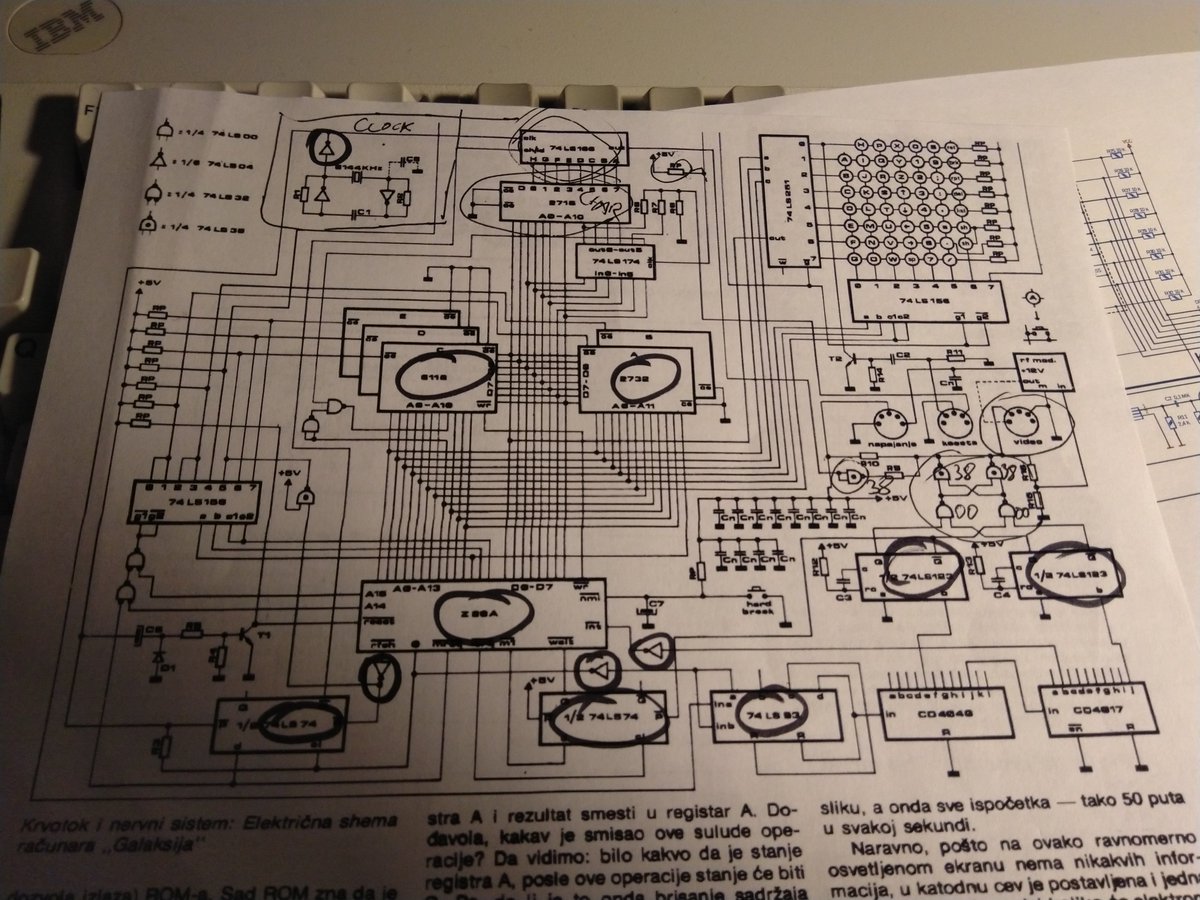
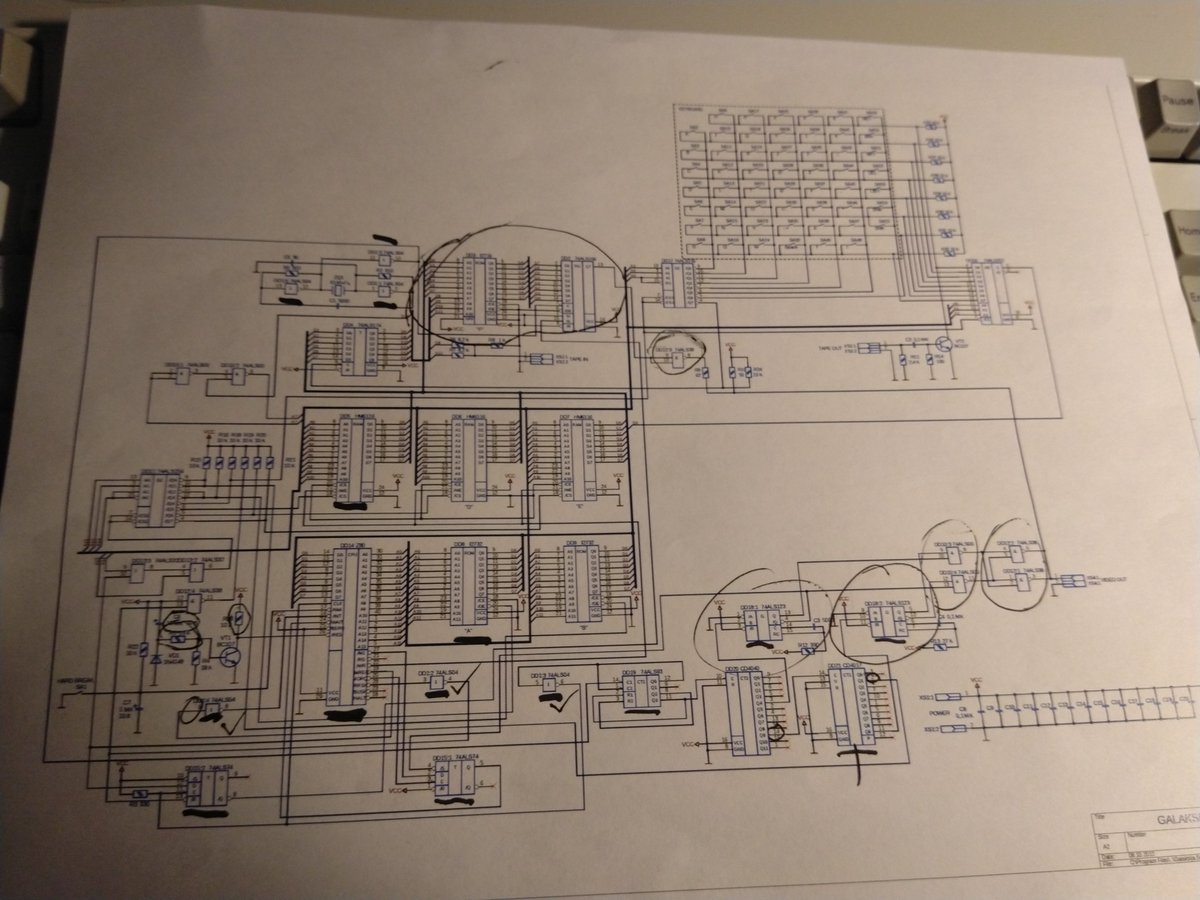


 " title="But you can only do so much by reading schematics -- you need a way to actually verify what& #39;s going on. I& #39;ve been relying on my multi meter, but at this point I needed more insight into what& #39;s happening. So, another small purchase later, I& #39;m testing with a logic probe https://abs.twimg.com/emoji/v2/... draggable="false" alt="🤓" title="Nerd-Gesicht" aria-label="Emoji: Nerd-Gesicht">" class="img-responsive" style="max-width:100%;"/>


 " title="I& #39;m shifting gears a bit while I wait, yet again, for a crucial part to be delivered (CD4017). Teaching myself Galaksija& #39;s BASIC with the getting started guide. The example I& #39;m on is a program that calculates speed of flight between Belgrade and Dubrovnik/Zagreb https://abs.twimg.com/emoji/v2/... draggable="false" alt="🥰" title="Smiling face with 3 hearts" aria-label="Emoji: Smiling face with 3 hearts">">
 " title="I& #39;m shifting gears a bit while I wait, yet again, for a crucial part to be delivered (CD4017). Teaching myself Galaksija& #39;s BASIC with the getting started guide. The example I& #39;m on is a program that calculates speed of flight between Belgrade and Dubrovnik/Zagreb https://abs.twimg.com/emoji/v2/... draggable="false" alt="🥰" title="Smiling face with 3 hearts" aria-label="Emoji: Smiling face with 3 hearts">">


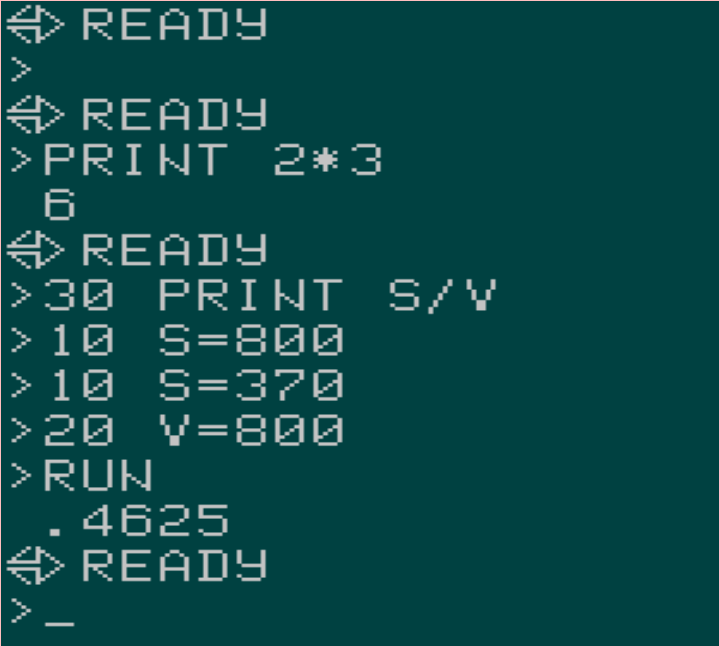

 ? Currently an A320 will take 55 minutes, but Galaksija& #39;s Caravelle flies a straight line at 800 km/h from gate to gate, so we should give it some slack :)" title="Is this time true though https://abs.twimg.com/emoji/v2/... draggable="false" alt="😁" title="Grinsendes Gesicht mit lächelnden Augen" aria-label="Emoji: Grinsendes Gesicht mit lächelnden Augen">? Currently an A320 will take 55 minutes, but Galaksija& #39;s Caravelle flies a straight line at 800 km/h from gate to gate, so we should give it some slack :)" class="img-responsive" style="max-width:100%;"/>

 I& #39;m trying out this small oscilloscope. I was looking into a smaller desk one, and even a USB based one that outputs to software on your computer, but I& #39;m really into this form factor (for a beginner like me). BK apartments are small!" title="Now for the real fun stuff https://abs.twimg.com/emoji/v2/... draggable="false" alt="🤓" title="Nerd-Gesicht" aria-label="Emoji: Nerd-Gesicht"> I& #39;m trying out this small oscilloscope. I was looking into a smaller desk one, and even a USB based one that outputs to software on your computer, but I& #39;m really into this form factor (for a beginner like me). BK apartments are small!" class="img-responsive" style="max-width:100%;"/>

 " title="Definitely some weirdness coming out of the character generator clock. On the left is my signal, on the right what it should look like https://abs.twimg.com/emoji/v2/... draggable="false" alt="😅" title="Lächelndes Gesicht mit offenem Mund und Angstschweiß" aria-label="Emoji: Lächelndes Gesicht mit offenem Mund und Angstschweiß">">
 " title="Definitely some weirdness coming out of the character generator clock. On the left is my signal, on the right what it should look like https://abs.twimg.com/emoji/v2/... draggable="false" alt="😅" title="Lächelndes Gesicht mit offenem Mund und Angstschweiß" aria-label="Emoji: Lächelndes Gesicht mit offenem Mund und Angstschweiß">">















 ) where he worked and started developing Galaksija." title="But I assume that the EPROMs would come from Belgrade, where Voja Antonić programmed them at MIPRO (a different one than the one making PCBs https://abs.twimg.com/emoji/v2/... draggable="false" alt="🙃" title="Auf den Kopf gestelltes Gesicht" aria-label="Emoji: Auf den Kopf gestelltes Gesicht">) where he worked and started developing Galaksija." class="img-responsive" style="max-width:100%;"/>




 " title="I am so READY https://abs.twimg.com/emoji/v2/... draggable="false" alt="😍" title="Lächelndes Gesicht mit herzförmigen Augen" aria-label="Emoji: Lächelndes Gesicht mit herzförmigen Augen">" class="img-responsive" style="max-width:100%;"/>




 " title="Last night my #Galaksija ran a command successfully for the first time without failing with a WHAT or SORRY response. https://abs.twimg.com/emoji/v2/... draggable="false" alt="🥰" title="Smiling face with 3 hearts" aria-label="Emoji: Smiling face with 3 hearts">" class="img-responsive" style="max-width:100%;"/>














 ), you& #39;ll connect the Galaksija tape interface to your sound output. Then you& #39;ll type in OLD command and run it, and then play your file/tape. The screen will turn black while the tape is loading." title="Once you obtain your audio file, either as wav or cassette tape (https://abs.twimg.com/emoji/v2/... draggable="false" alt="🙃" title="Auf den Kopf gestelltes Gesicht" aria-label="Emoji: Auf den Kopf gestelltes Gesicht">), you& #39;ll connect the Galaksija tape interface to your sound output. Then you& #39;ll type in OLD command and run it, and then play your file/tape. The screen will turn black while the tape is loading." class="img-responsive" style="max-width:100%;"/>




 " title="So that& #39;s the cassette tape story so far. I would love to actually use a real tape recorder to try this, but I& #39;m not sure I can justify getting another piece of old tech just to say I did. We& #39;ll see https://abs.twimg.com/emoji/v2/... draggable="false" alt="😅" title="Lächelndes Gesicht mit offenem Mund und Angstschweiß" aria-label="Emoji: Lächelndes Gesicht mit offenem Mund und Angstschweiß">" class="img-responsive" style="max-width:100%;"/>
 " title="I& #39;ve started loading programs (playing sound) with VLC and the issues I experienced earlier with some programs seem to have gone away. So many fun games like (definitely unlicensed) Star Trek. I& #39;m playing while I watch TNG https://abs.twimg.com/emoji/v2/... draggable="false" alt="🤓" title="Nerd-Gesicht" aria-label="Emoji: Nerd-Gesicht">" class="img-responsive" style="max-width:100%;"/>


