So, you may have noticed I abruptly stopped talking about building models a few weeks ago. Specifically, it was when my brother died. Even now, my interest in hobbies, any pastimes in fact, is about zero. This, it transpires is a common symptom of depression. So...
1/
1/
...as part of an ongoing effort to reboot my brain and get a train out of Griefsville, I decided to buy a cheap kit and bash it together over the weekend, not caring too much about how good or bad a job I do of it. I& #39;m not even overly concerned about getting the colours right.
/2
/2
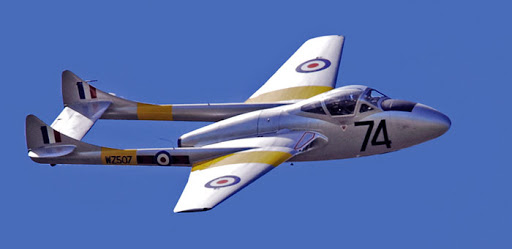
The kit I found going cheap on eBay that appealed to me was this little blighter: a De Havilland Vampire. I saw one of these in the flesh years ago and it rather appealed to me, a feisty little jet strike aircraft commissioned during WWII but rolling out a few months too late.
/3
/3
Isn& #39;t it adorable? Early models used a jet engine called the Halford Goblin. I always love British names for military hardware.
US name: DEATHFUCKER 5000X
UK name: Mr Murgatroyd& #39;s Pixie Bomb Bus
I digress.
/4
US name: DEATHFUCKER 5000X
UK name: Mr Murgatroyd& #39;s Pixie Bomb Bus
I digress.
/4
This is a later variant that went into service when it became apparent that the more leisurely peacetime developed jet fighters were going to hand the Vampire its arse on a plate. It was partially made from plywood, for heaven& #39;s sake. It made a terrific jet trainer, however.
/5
/5
So this is the T.11 trainer, with a two seater cockpit based on de Havilland& #39;s famous Mosquito& #39;s. It& #39;s a simple enough kit, and I have enough of the listed paint colours to do a decent job, I believe.
I thought I& #39;d bash it together and then spend 10 mins doing the decals.
/6
I thought I& #39;d bash it together and then spend 10 mins doing the decals.
/6
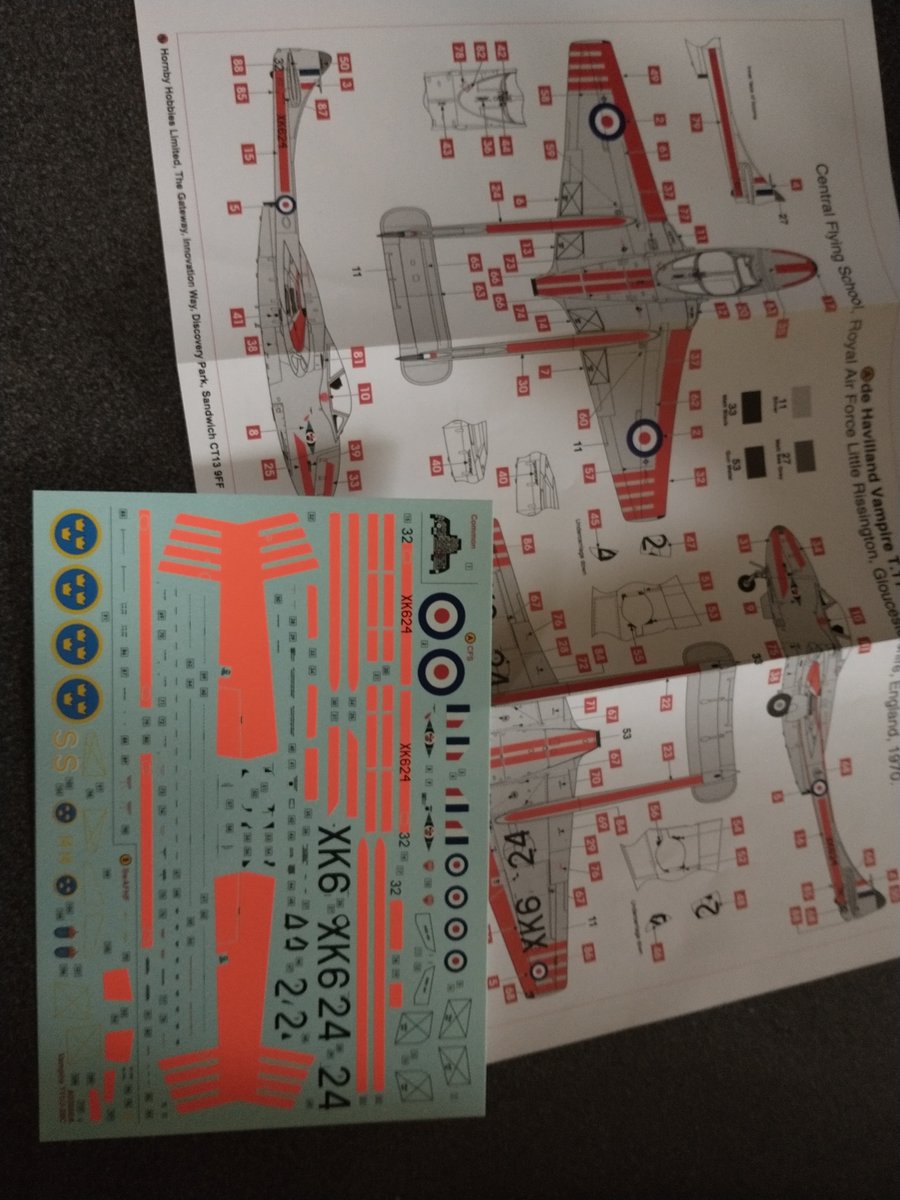
See that thin strip of decals to one side with the Swedish Royal Air Force markings? Not doing that variant.
See that mass of orange and RAF roundels? Yep. There are 90 of the fiddly little bastards to cut out, soak, slide, place, and tamp,
Ten minutes... (hollow laughter)
/8
See that mass of orange and RAF roundels? Yep. There are 90 of the fiddly little bastards to cut out, soak, slide, place, and tamp,
Ten minutes... (hollow laughter)
/8
Anyway, I& #39;ll give it a shot. If it& #39;s not too horrific I will post pictures of the resulting mass of glue, patchy paintwork, and randomly placed markings. But, any worse than that and I shan& #39;t. It is, after all, primarily intended as therapy.
Roll on Saturday.
/9 et fin
Roll on Saturday.
/9 et fin
Addendum re British military hardware names. The other day I fell down a self-propelled artillery rabbit hole (don& #39;t ask).
In WWII a gun was called Bishop because the mantel looked a bit like a bishop& #39;s mitre. Thus, successors all had ecclesiastical names: Priest, Deacon, Sexton, Abbot and so on.
The last such was in & #39;93, the AS-90, unofficially known as Choirboy "because it was fucked by Vickers."
The last such was in & #39;93, the AS-90, unofficially known as Choirboy "because it was fucked by Vickers."
I& #39;m going to carry on doing this thread, albeit sans numbers now. It will be an exciting partwork for "Jonathan Makes a Dog& #39;s Dinner of Building a Model Jet."
Just washed down the sprues in warm detergenty water to get the mould grease off, so the paint will stick.
Just washed down the sprues in warm detergenty water to get the mould grease off, so the paint will stick.
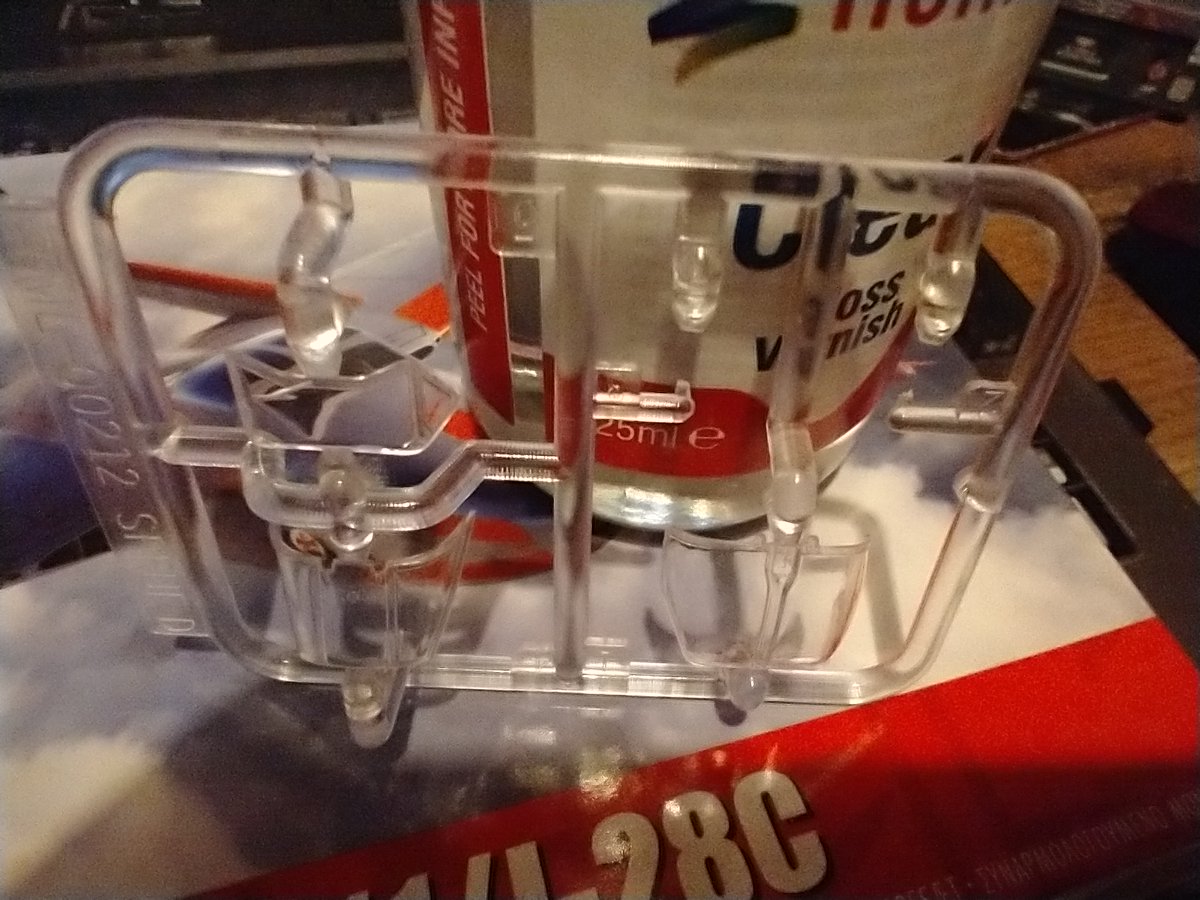
This is also the first time I& #39;ve had the sprues out of their bags and properly examined them. Ye gods but 1:72 scale is tiny. I found two tiny bits on the transparent plastic sprue I couldn& #39;t identify. "Navigation lights, surely?" I thought. If only...
They& #39;re reflector sights.
They& #39;re reflector sights.
Back in Ye Anciente Days Afore Ye Invention of HUDs, fighter aircraft used reflector sights for aiming their guns, rather ingenious mechanical devices that project an aiming reticle onto an angled piece of glass. By some clever optics, the sight is true wherever your eye is.
The glass is about the size of a Post-It note. Now imagine that reduced by a factor of 72. The intention is the whole thing is painted black except the glass, a square of plastic about a millimetre to an edge.
Ah, my delight on realising that. And, lo, the swearing was colourful.
Ah, my delight on realising that. And, lo, the swearing was colourful.
Still, such horrors can wait for tomorrow. I& #39;ve also realised that some of the decals are alternates. There are numbers that go across the landing gear covers. There are full numbers if you want the model with gear up, or partial bits of numbers if you want it gear down.
Guess which bozo with two thumbs is doing it gear down?
*Does the two thumbs dance*
Just keep telling myself, I& #39;m doing this for fun, I& #39;m doing this for fun, stop crying, I& #39;m doing this for fun.
*Does the two thumbs dance*
Just keep telling myself, I& #39;m doing this for fun, I& #39;m doing this for fun, stop crying, I& #39;m doing this for fun.
Well, here we are at 3pm. I slept terribly last night, overslept this morning, I& #39;m tired, have a headache, and don& #39;t feel at all motivated to do this bloody kit.
But, oh no, Mr Depression. You& #39;ll have to do better than that.
But, oh no, Mr Depression. You& #39;ll have to do better than that.
*To JERUSALEM*
FETCH ME A PAIR OF ASPIRIN
FETCH ME MY SPRUE CUTTER THAT CLICKS
FETCH ME MY FILE
INSTRUCTIONS UNFOLD!
FETCH ME MY WORK TRAY OF AIRFIX
I SHALL NOT CEASE ect ect ect
FETCH ME A PAIR OF ASPIRIN
FETCH ME MY SPRUE CUTTER THAT CLICKS
FETCH ME MY FILE
INSTRUCTIONS UNFOLD!
FETCH ME MY WORK TRAY OF AIRFIX
I SHALL NOT CEASE ect ect ect
*Looks very seriously at camera*
I can& #39;t find my sprue cutter.
Yes, I can always use - and shall be using - a craft knife. Just galling to own a dedicated tool for a job and not be able to find it when needed. Can& #39;t imagine what& #39;s happened to it. I keep my stuff together.
I can& #39;t find my sprue cutter.
Yes, I can always use - and shall be using - a craft knife. Just galling to own a dedicated tool for a job and not be able to find it when needed. Can& #39;t imagine what& #39;s happened to it. I keep my stuff together.
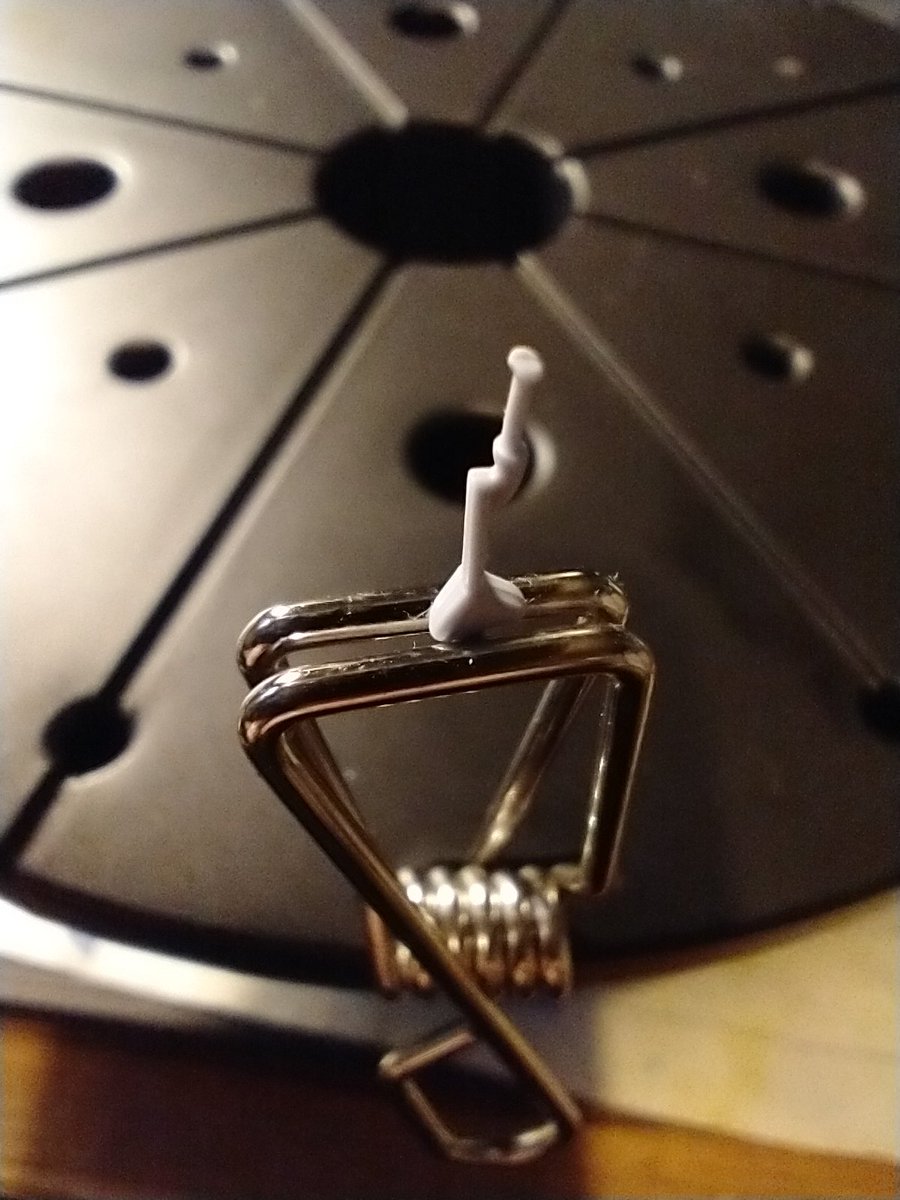
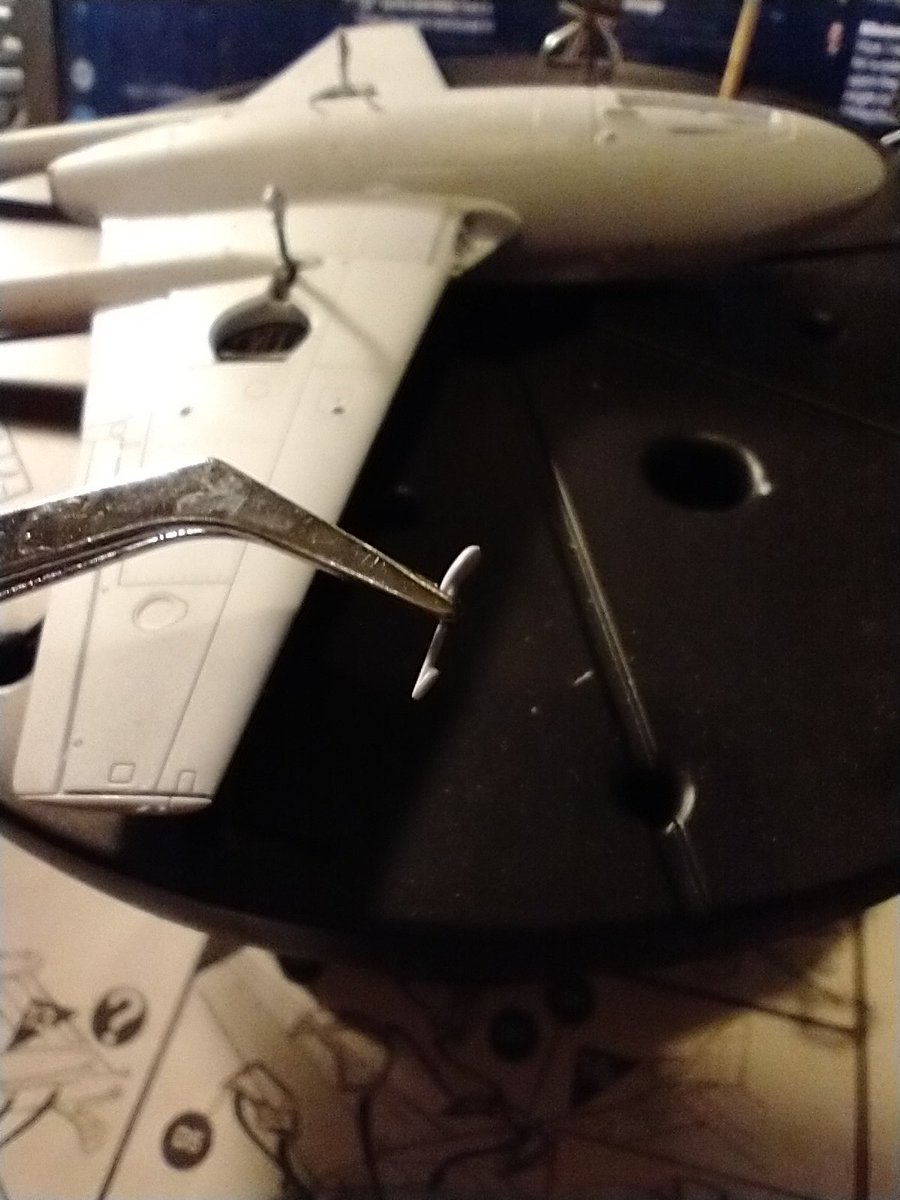
Remember my horror on realising a couple of tiny bits of transparent plastic have to be delicately painted as reflector sights? Here& #39;s one of the infinitesimal gits on a pound coin for scale. That rectangle at the top has to stay clear whilst the rest is painted black.
(As an aside, this is the first time I& #39;ve really used the macro mode on my & #39;phone& #39;s camera. That& #39;s not bad.)
I got into model building as a kid, because it was what my brother did. He just bashed them together and rarely painted them. I think he just enjoyed the construction. He bought me my first kit, a Vought F4U Corsair, I think, in 1969. Then built it without asking me.
He always built aircraft and always with the landing gear up, because he& #39;d have to read the instructions for gear down, and he couldn& #39;t be arsed with that. He hated tank kits because of all the wheels. When I got a bit older, I built only tanks. Showing individuality, perhaps.
Tell a lie; I also built biplanes and triplanes, two other categories he disliked. Interesting. Hadn& #39;t really occurred to me before. Building this thing really is proving therapeutic.
Anyone know what 7 grams of Blu Tack looks like? No, me neither. Transpires the nose needs weighting or the model will sit on its arse. Glad I noticed that before putting the fuselage together.
*Finishes cutting parts for first stage, sands off burrs, sets up for painting*
Mysterious voice: Sooo, you don& #39;t need the sprue cutter now?
Me: No, made do with the craft knife. Hey, who said that?
*Sprue cutter strolls in wearing a lei and playing "Honolulu Baby" on ukulele*
Mysterious voice: Sooo, you don& #39;t need the sprue cutter now?
Me: No, made do with the craft knife. Hey, who said that?
*Sprue cutter strolls in wearing a lei and playing "Honolulu Baby" on ukulele*
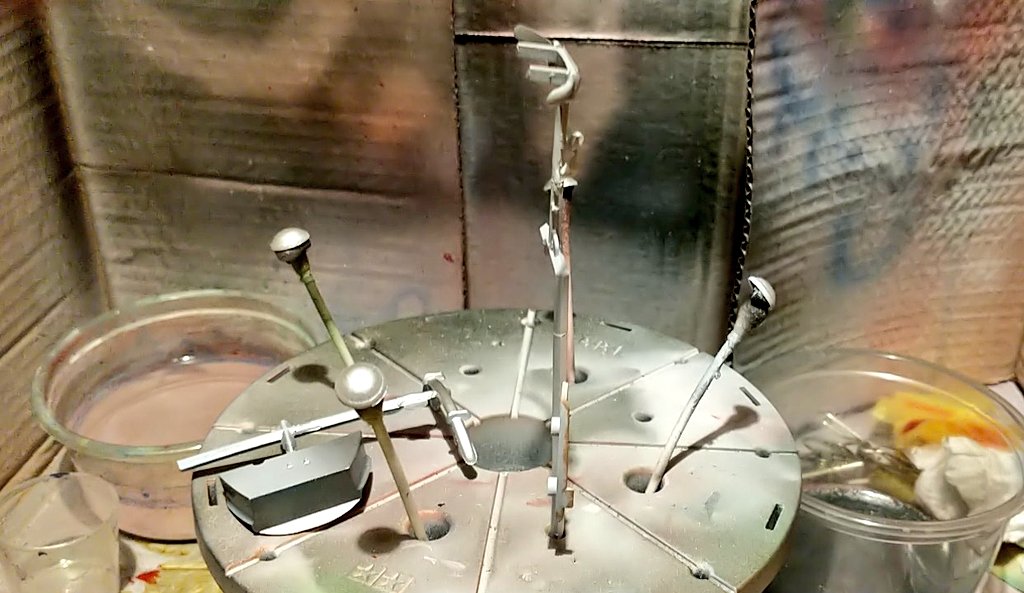
Look at this nonsense.
"How did you spend your Saturday evening?"
"Painting joysticks that you could use for piloting individual atoms."
"Did you go quite insane?"
"Oh, yes."
"How did you spend your Saturday evening?"
"Painting joysticks that you could use for piloting individual atoms."
"Did you go quite insane?"
"Oh, yes."
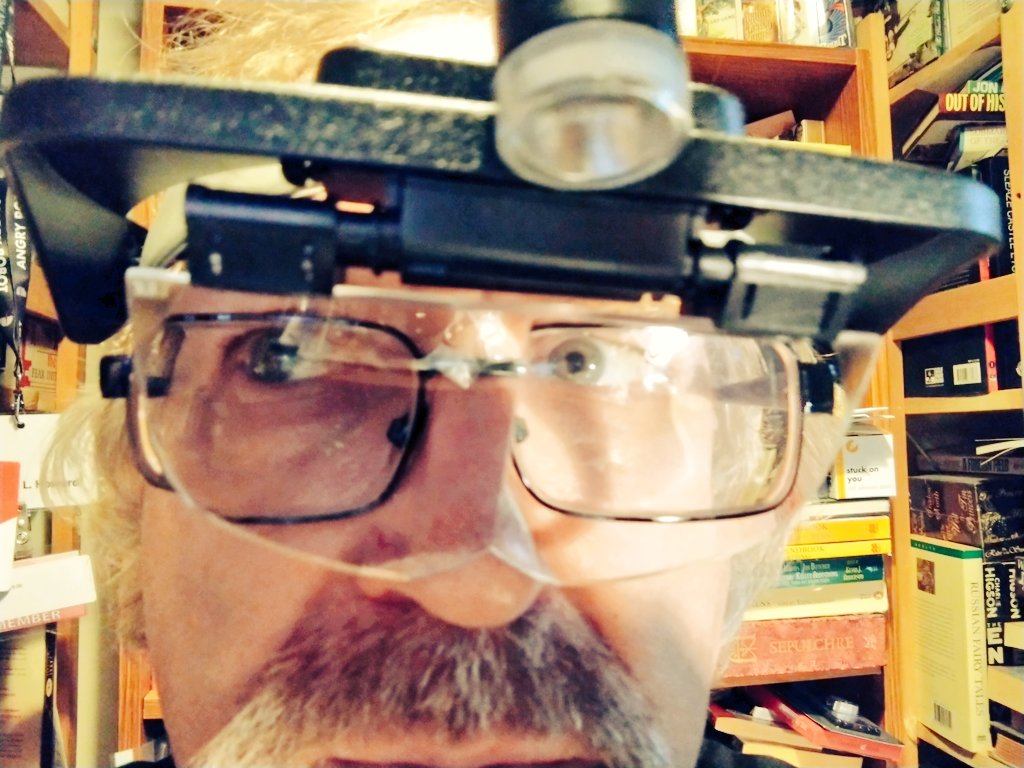
respec mah authoritay
Yeah, yeah, me and my thirst traps. See you in your dreams https://abs.twimg.com/emoji/v2/... draggable="false" alt="💕" title="Zwei Herzen" aria-label="Emoji: Zwei Herzen">
Yeah, yeah, me and my thirst traps. See you in your dreams
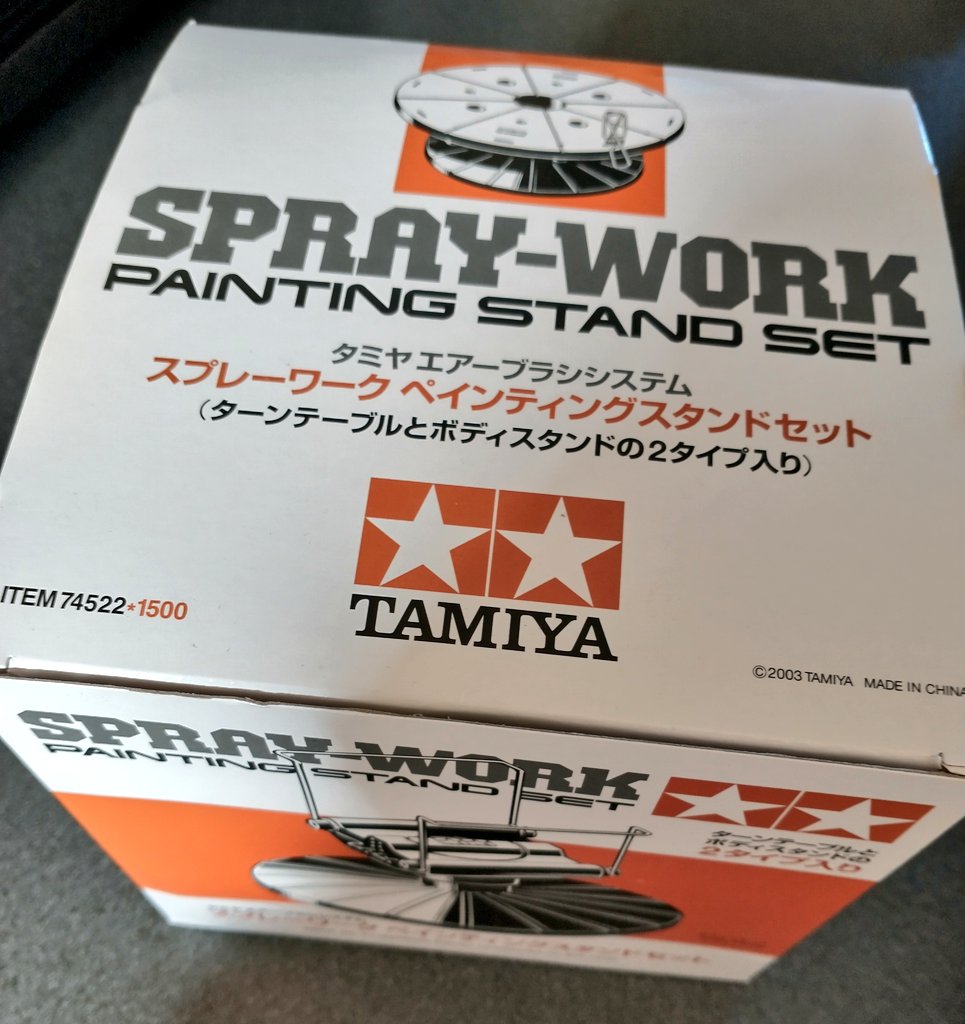
This Tamiya painting stand is a brilliant piece of design and so useful. Had to order it from Japan, but the price was good (although it did literally take six months to get here). You get two stands in the set, and I& #39;d bet the other design works just as well.
Me: I just intend to bang this model any old way. I mean, take reasonable care, but I& #39;m not fussed about doing it perfectly. It& #39;s therapy, really.
Also me: *Researching photos to get the colour of the seat leather right."
Also me: *Researching photos to get the colour of the seat leather right."
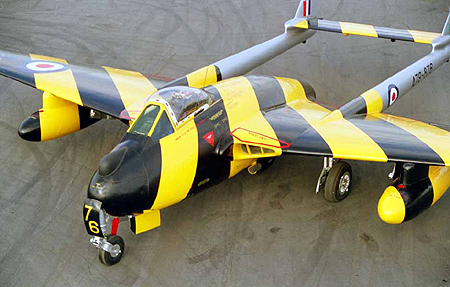
Whilst doing so, I came across this pic. It& #39;s an awesome paint job, but I& #39;m kind of glad it& #39;s not the one this model has. The decals would be a topographical nightmare.
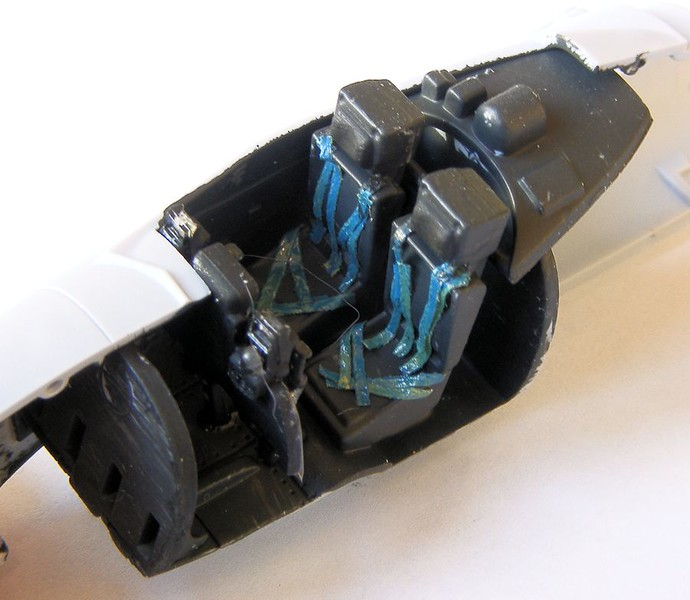
I& #39;m doing the cockpit without the pilot and trainee figures, and with the canopy up, hence why I want to have a reasonable stab at the seat colour. I did consider making harness straps, but decided not to because at 1:72, they& #39;re crazy tiny. Then I saw this. The bastard.
Me: Just doing this kit for fun and focus and ferapy.
Also me: *Paints tiny component that is all but hidden white as undercoat to make a decal which will also be all but hidden "pop" a little more*
It& #39;s weird. I& #39;m a messy bastard in most things, but I fuss on stuff like this.
Also me: *Paints tiny component that is all but hidden white as undercoat to make a decal which will also be all but hidden "pop" a little more*
It& #39;s weird. I& #39;m a messy bastard in most things, but I fuss on stuff like this.
Oh, and a call back to "The British Penchant for Boggling Military Hardware Names." During early development, the de Havilland Vampire itself was designated the DH.100 Spider Crab.
Man from War Office: *Long pause* "About this name..."
(Thanks, @VonHitchofen, for reminding me.)
Man from War Office: *Long pause* "About this name..."
(Thanks, @VonHitchofen, for reminding me.)
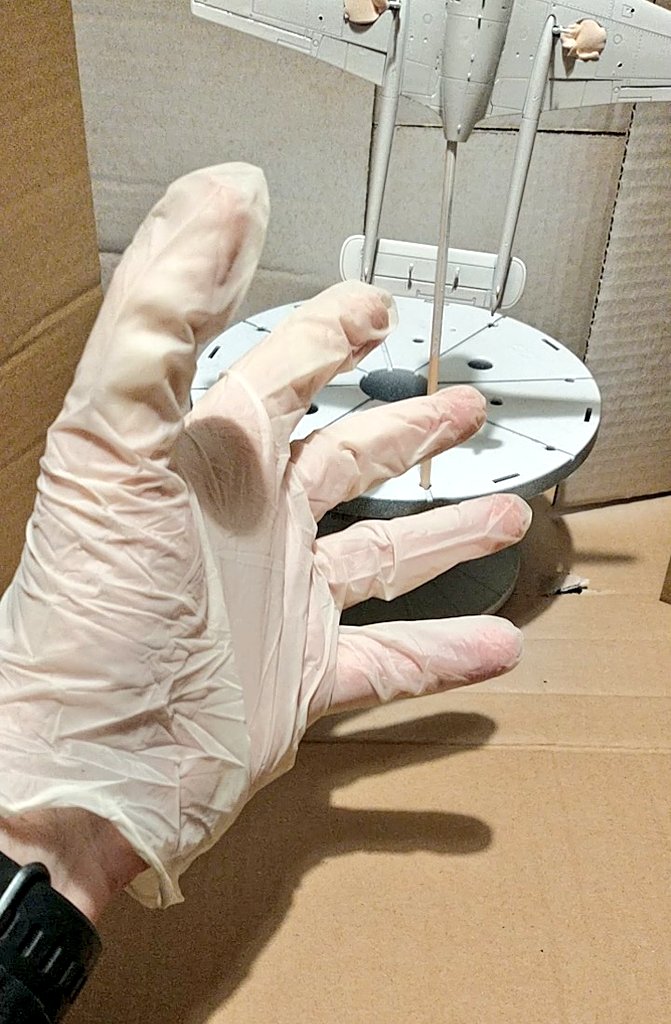
Adventures in Spray Painting: I have primed the fingers of my left hand. I wish I could say it was deliberate.
I& #39;ve discovered my hand is pretty steady, and most painting/construction screwups are down to imperfect light so I literally can& #39;t quite see what I& #39;m doing *or* paint behaving unexpectedly at such a scale. Capillary action takes the bloody stuff everywhere if you over-thin it.
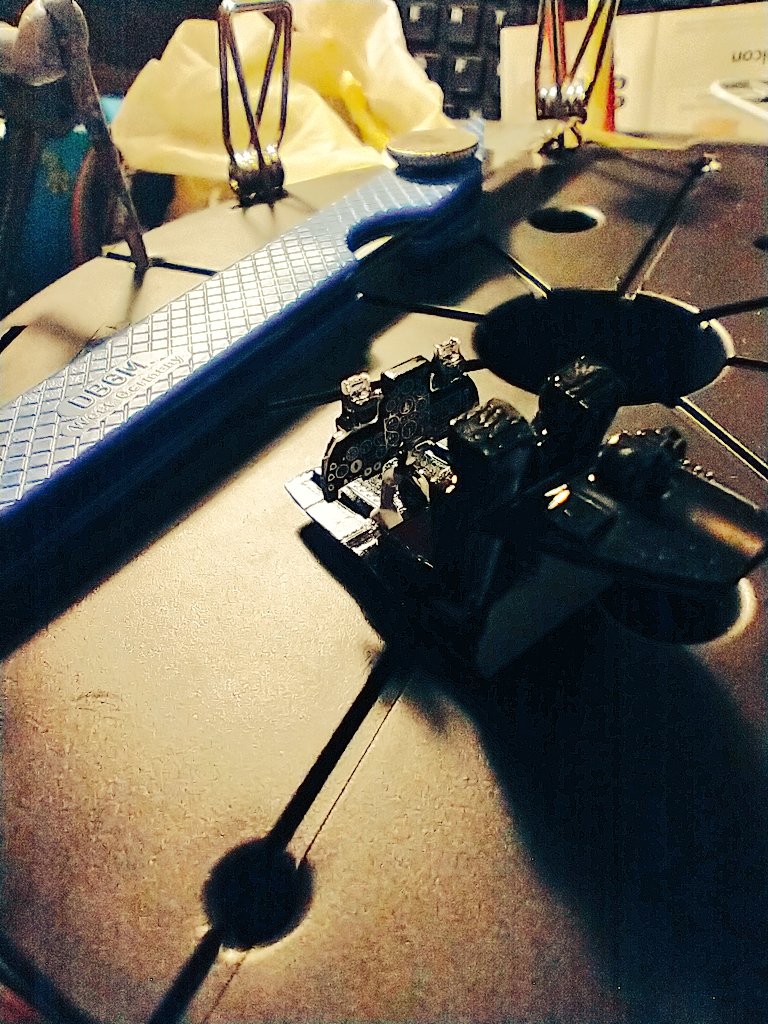
The cockpit& #39;s not quite complete as I belatedly realised I& #39;d painted the forward bulkhead on the wrong side. The paint is grey. The plastic is a slightly different shade of grey. To see the bulkhead once it& #39;s inside the fuselage will require a proctoscope intended for ants.
In the whole wide world, nobody would care that the bulkhead wasn& #39;t painted.
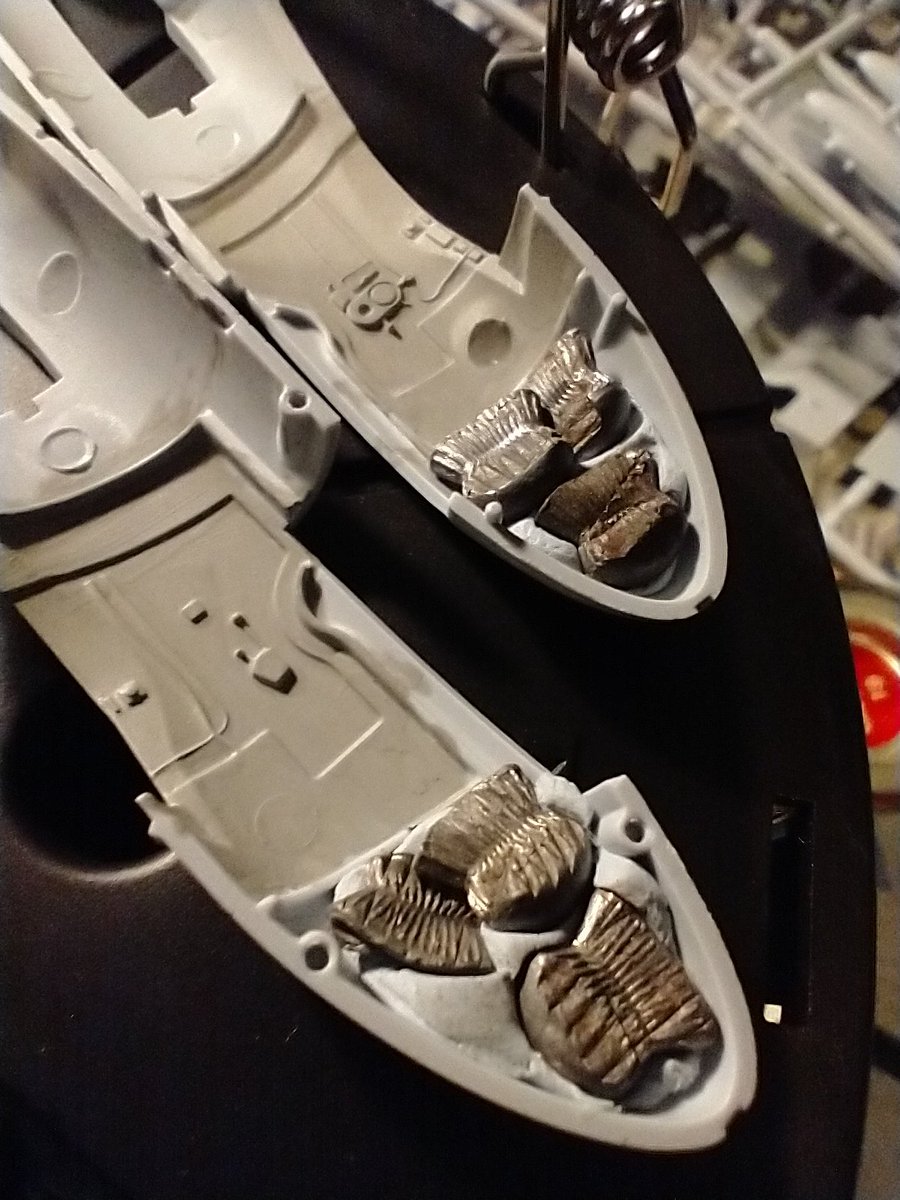
Little bit of work before bed. The naughty bulkhead is on now. Here are the two fuselage halves, crammed with Blu Tack and crushed .22 air pellets to weight the nose.
Just put the cockpit in and dry assembled the fuselage to make sure it all goes together. You will note that it& #39;s literally impossible to see the forward bulkhead (it& #39;s behind the instrument panel). Soooo glad I spent time painting the invisible thing  https://abs.twimg.com/emoji/v2/... draggable="false" alt="🤨" title="Gesicht mit hochgezogener Augenbraue" aria-label="Emoji: Gesicht mit hochgezogener Augenbraue">
Oh, and, hey, want to know what I& #39;m going to build after I finish this de Havilland Vampire?
A VERY SLIGHTLY DIFFERENT DE HAVILLAND VAMPIRE, OBVIOUSLY.
A VERY SLIGHTLY DIFFERENT DE HAVILLAND VAMPIRE, OBVIOUSLY.
A lot has changed in model kits since I was a kid, notably the hobby as a whole is pitched fairly squarely at adults now, by and large. There& #39;s still an entry-level layer of kits, but even those aren& #39;t the very cheap pocket money purchases they once were.
That said, technically speaking the modern kits are streets ahead. Very sharp moulds without the sheets of flash that used to be a feature, and some tiny components that were simply not possible with the old tech.
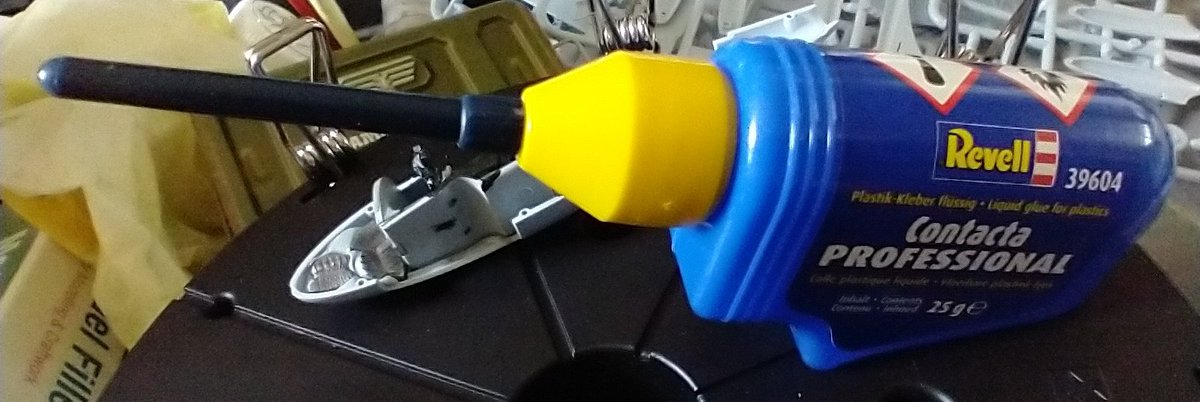
One huge innovation actually appears trivial; this blighter, the needle applicator. Back in the day, you applied your polystyrene cement from a tube nozzle. It was messy, and led to blobs and strings and threads of cement going all over. Now, it& #39;s surgical in its precision.
This reminds me of an unedifying event from over fifty years ago. My brother and sister resented me as a late addition to the family. My sister largely ignored me, but my brother actively bullied me.
Part of this was a refusal to ever accept an apology from me, always answering any such with the formula "It& #39;s too late to say sorry." That& #39;s a hell of a thing to say to a 3 or 4yo who& #39;s trying to grok social rules. Apparently the done thing was to apologise *before* fucking up.
So, one evening we were in the living room as he was about to start building a model kit. I was all agog, and sat cross-legged, watching. As mentioned previously, my bro wasn& #39;t much of a one for prep and dived straight in by breaking the seal on a new tube of Airfix cement.
But... the tube was kinked or something, and the contents were under pressure. As he opened it, it launched a spray of polystyrene cement which caught me in the face. More exactly, in my eye.
Want to know something that hurts like fury? Polystyrene cement in the eye, that& #39;s what.
Want to know something that hurts like fury? Polystyrene cement in the eye, that& #39;s what.
My eye felt like it had been poked with hot needles. It teared instantly and I screamed the joint down because the bastard seemed to have stopped working, I was terrified I& #39;d been blinded, and, oh ye gods, the pain.
Unable to stay still, I ran into the hallway.
Unable to stay still, I ran into the hallway.
My family were in hot pursuit, led by my brother.
"I& #39;m sorry! I& #39;m sorry!" he called after me.
And there, through my pain, I said what he had socialised me to say.
"It& #39;s too late to be sorry."
Reader, I still remember the warm glow of pleasure that gave me even despite the pain.
"I& #39;m sorry! I& #39;m sorry!" he called after me.
And there, through my pain, I said what he had socialised me to say.
"It& #39;s too late to be sorry."
Reader, I still remember the warm glow of pleasure that gave me even despite the pain.
The lovely endorphin rush engendered by that moment of, "There, fucker, how do *you* like it?" did a lot to ameliorate the pain.
My mum washed my eye clear, tore a strip off Neil for being so clumsy, and all was well.
And as I recall, he never said that dipshit thing again.
My mum washed my eye clear, tore a strip off Neil for being so clumsy, and all was well.
And as I recall, he never said that dipshit thing again.
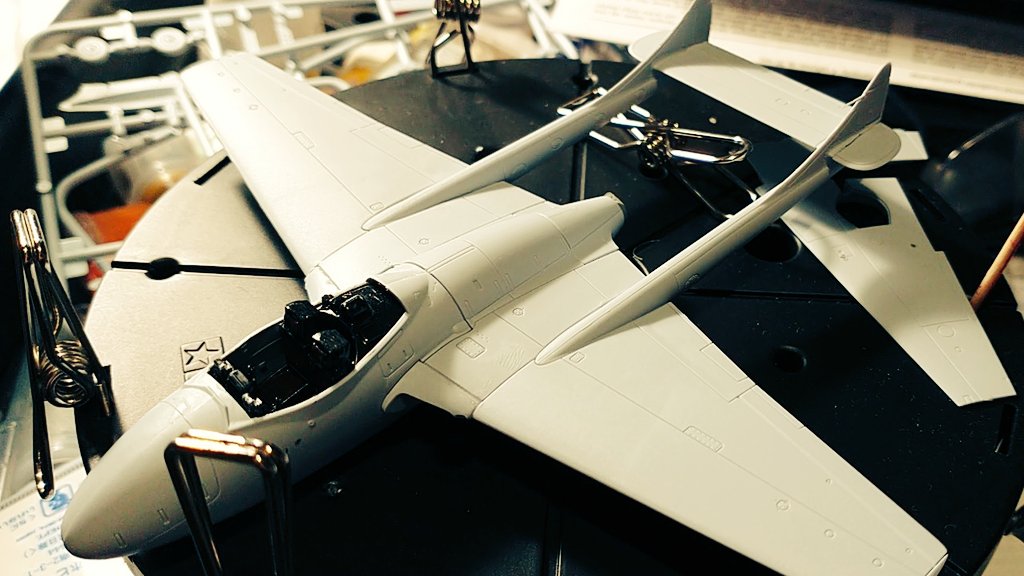
Short sabbatical from working on the Vampire whilst I waited for a tool to turn up, but now, dear hearts, I& #39;m back at it. The fuselage is formed, and the upper half of the wings. The parts did not match up magnificently and I anticipate much filling and sanding. w00t
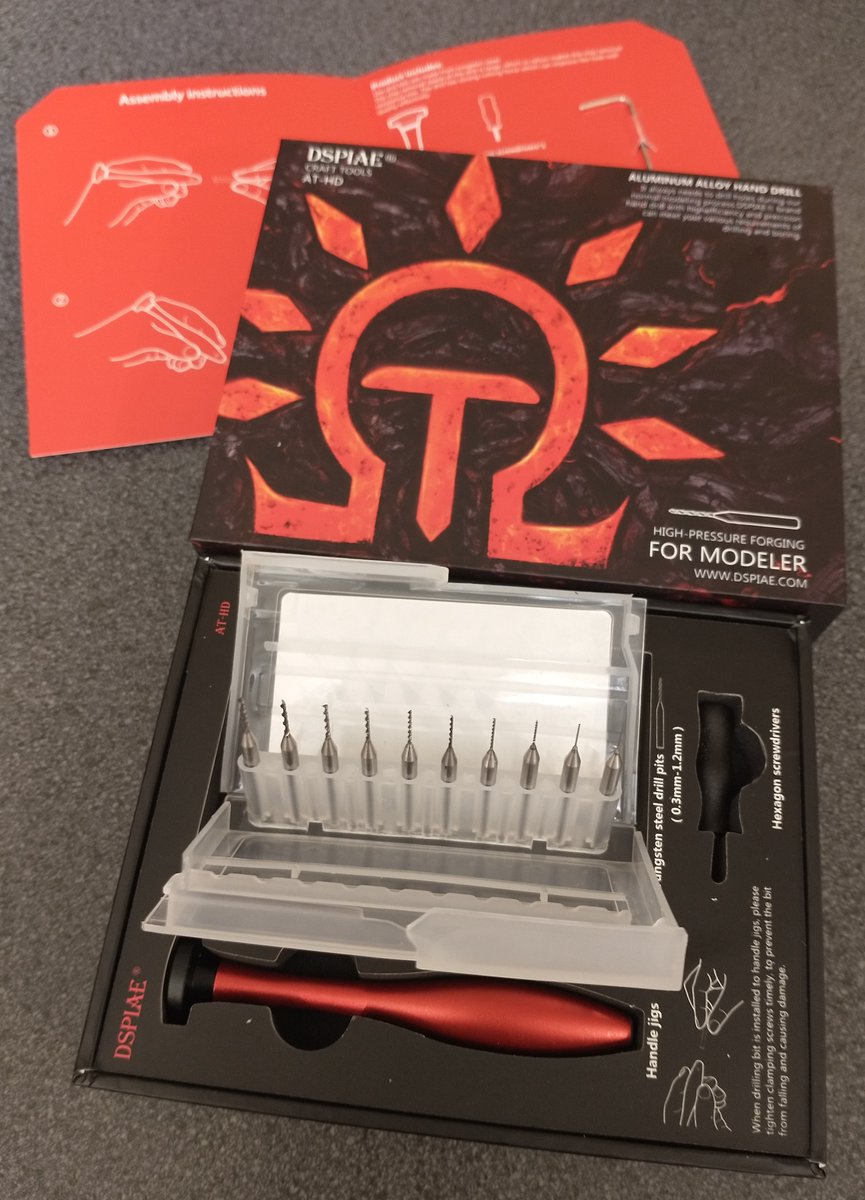
The tool, by the way, is a set of teeny-tiny drill bits made from tungsten steel and inexpressibly sharp. Also gorgeously presented. Very impressed by these.
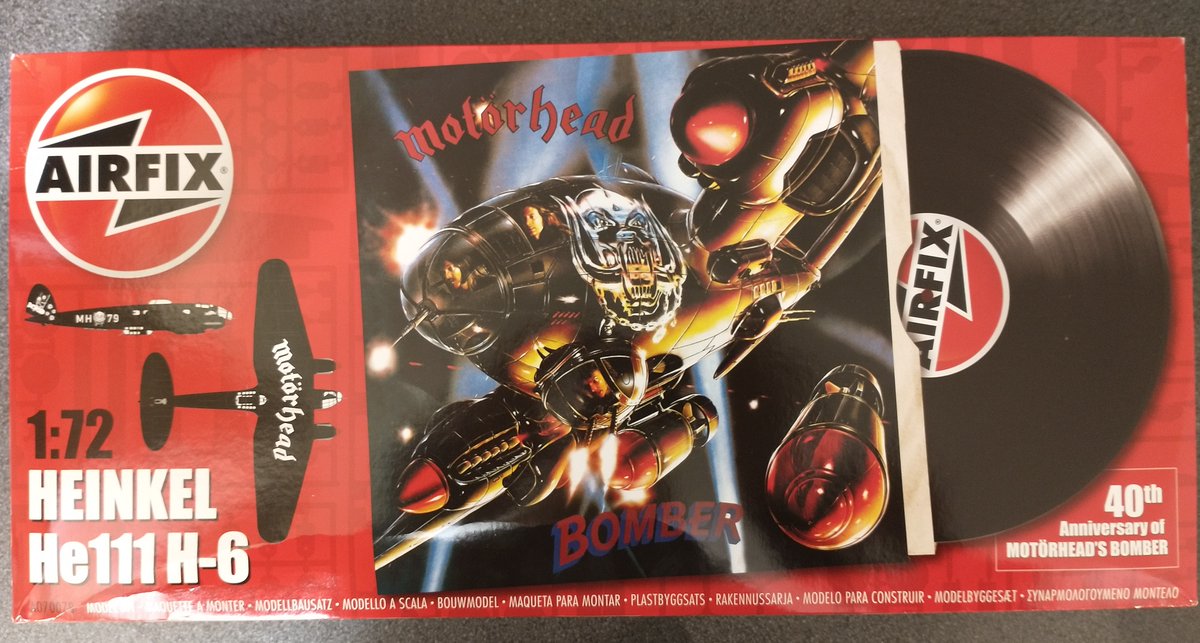
As explained in exhaustive detail upthread, I got into modelling as a kid because it was what my big brother did. He also was totally into Motorhead right from their formation. He had all the vinyl, saw them umpteen times, and roadied for them once at Wigan Casino.
Lemmy bought him a pint and they drank together. My bro didn& #39;t stop smiling for about a year.
So, early in the year before it became apparent just what a shitshow 2020 was going to be, Airfix announced a 40th anniversary version of the bomber from the cover of, well, BOMBER. I& #39;d been planning to get back into model building and this seemed perfect.
I determined to buy one when they went on sale, build it (the almost entirely black paintjob promised to be delightfully easy), take some pictures, then send them off to my brother and await his astonishment.
But, then he went and spoilt everything by up and dying on me.
But, then he went and spoilt everything by up and dying on me.
I forgot all about the "Bomber" kit in the aftermath. Forgot about it entirely until I randomly happened across a reference to it last week and was reminded.
The retailer had five units. I dithered. Next morning when I looked, they were down to one. No, not algorithm trickery. I bought the last one and now it shows "Out of stock." These things really are selling rapidly.
And today it turned up, and I looked at it, and I cried.
And today it turned up, and I looked at it, and I cried.
Absurd, but he was my brother, and I loved him, and I shall build this kit after the Vampire& #39;s done, and maybe another to get my building mojo reasonably on fleek (yes, I said that. Another term nobody will ever use again because I& #39;ve middle-aged white guyed it, like licking it).
Anyway, that& #39;s for the future. Tonight I& #39;m going to bang together the Vampire& #39;s twin tail boom assembly in preparation for joining it to the main body tomorrow. If you can contain your excitement, I& #39;ll write a bit about how it goes tomorrow.
I& #39;ll be honest, after several dry assemblies of varying exactitude (none of them good), I was expecting the final cementing to be so disastrous that I would quietly throw the whole mess away and claim a bear stole it. But, amazing all and particularly me, that worked pretty well.
It looks pretty good at first glance, but there& #39;s gaps all over that thur ol& #39; jet, hoss, and the wind whistles through them bones somethin& #39; cruel at night. I am going to get through a bucket of filler closing the gaps and the sanding is going to be tricky. So very much fun :(
INSTRUCTIONS: Glue this bit made from six atoms of plastic in. Orientation is important. The hole you stick it in won& #39;t help you; you& #39;ll have to get it right by eye.
Done it?
Cool. Now do it again with another six atoms and a different useless hole.
Arf.
Done it?
Cool. Now do it again with another six atoms and a different useless hole.
Arf.
*Checks for gaps*
*Mixes filler*
*Fills gap*
*Waits*
*Sands filler*
*Refreshes lost detail with craft knife*
*Checks for gaps*
*Mixes filler*
This is my life now. I think I may have inadvertently assigned myself to a ring of Hell whilst believing it to be a hobby.
*Mixes filler*
*Fills gap*
*Waits*
*Sands filler*
*Refreshes lost detail with craft knife*
*Checks for gaps*
*Mixes filler*
This is my life now. I think I may have inadvertently assigned myself to a ring of Hell whilst believing it to be a hobby.
This evening in "Making a Simple Construction Kit in the Most Time Inefficient Way Imaginable" I shall be dipping the transparent cockpit parts in clear gloss varnish. This fills micro-scratches with a medium of near identical refractive index, making the plastic more glass-like.
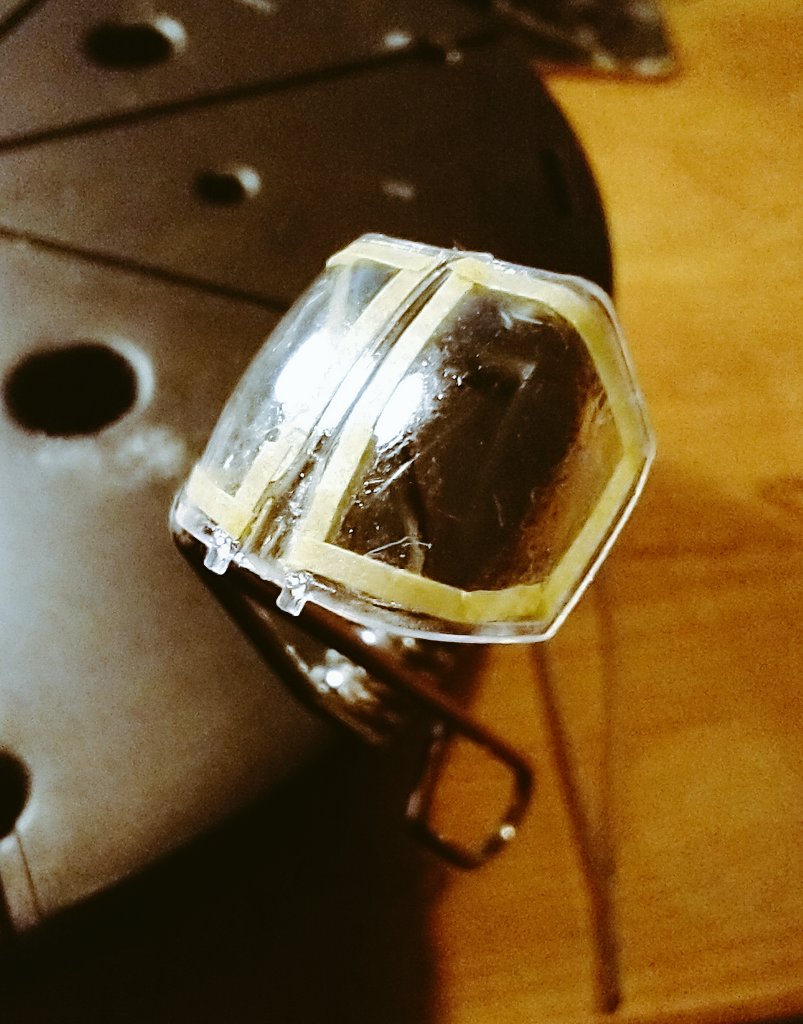
Then tomorrow, I shall spend an hour going quietly mad whilst I use 1mm wide strips of masking tape to mask off the "glass" edges (using a latex masking solution for the middles of the panes) of the cockpit in preparation for painting. Why?
Because I hate myself, evidently.
Because I hate myself, evidently.
Okay, maybe not tomorrow with the insanity-inducing masking as the varnish didn& #39;t settle evenly because SOME IDIOT forgot to wash the transparent components with detergent to get off the mould grease. When I find out who& #39;s responsible, there& #39;ll be Hell to pay, I assure you.
"To the Dettol bath with you!"
"No! No! Not the Dettol bath!"
I& #39;m hoping a 50/50 Dettol solution works on the varnish. It works brilliantly on acrylics and pretty convincingly with enamels. Just hope it doesn& #39;t fog transparencies or, well, damn.
"No! No! Not the Dettol bath!"
I& #39;m hoping a 50/50 Dettol solution works on the varnish. It works brilliantly on acrylics and pretty convincingly with enamels. Just hope it doesn& #39;t fog transparencies or, well, damn.
Well, bless. Dettol solution kindly took off the varnish and didn& #39;t mark the plastic. Under good light, the scratches on the transparencies were very obvious, however, so they& #39;ve been back in the varnish. Did a much better job of wicking off the excess this time.
When the varnish dries, it& #39;s masking time. I& #39;m a little disturbed by how vast 1mm strips of masking tape look next to this Lilliputian cockpit canopy. I hope I can do this.
Harkening back to UK vs US names for military kit, here& #39;s my eternal, real world favourite.
Air-to-air missiles.
US name: SIDEWINDER, named for a deadly venomous snake.
UK name: REDTOP, named for a bottle of milk.
Air-to-air missiles.
US name: SIDEWINDER, named for a deadly venomous snake.
UK name: REDTOP, named for a bottle of milk.
Just told a piece of masking tape insufficient to preserve the modesty of a drosophila that "Oh, no, we are not at home to Mr Fuck-Up on this occasion, laddy." I think it took the point.
If you had told me a few months ago I would be terribly irked by imperfections of a tenth of a millimetre, I& #39;d have laughed at you. I have plainly gone mad. I am surrounded by chaos, fuming at something being 0.01mm out.
Well, that took a while, but I think that& #39;s okayish. For a sense of scale, those tapes are precut 1mm widths. The 0.1mm errors I was whinging about are that the tapes don& #39;t always abut the canopy details quite as closely as I& #39;d like. But, not terrible for a first go.
(I tried shifting the tape tiny distances with a scalpel tip, and - yay - put shallow scratches in the plastic, so I stopped. I& #39;ll touch it up with a bit more varnish to make them less noticeable.)
Me: OMG Airfix are releasing a model of the H.P. 42 Heracles (although I can& #39;t help thinking the Heracles was actually an H.P. 45 *nerd snort laugh*) from a 56 yo injection mould! Must get!
All my unbuilt models: Dude...
Me: MUST GET
All my unbuilt models: Dude...
Me: MUST GET
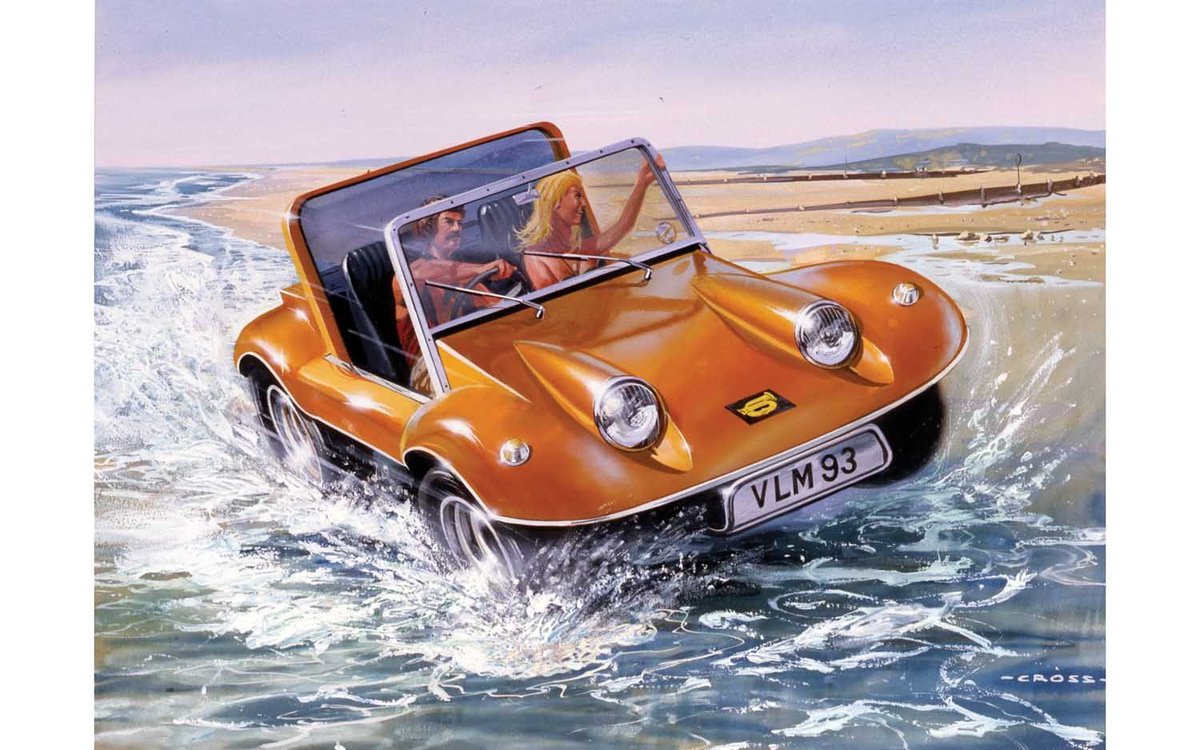
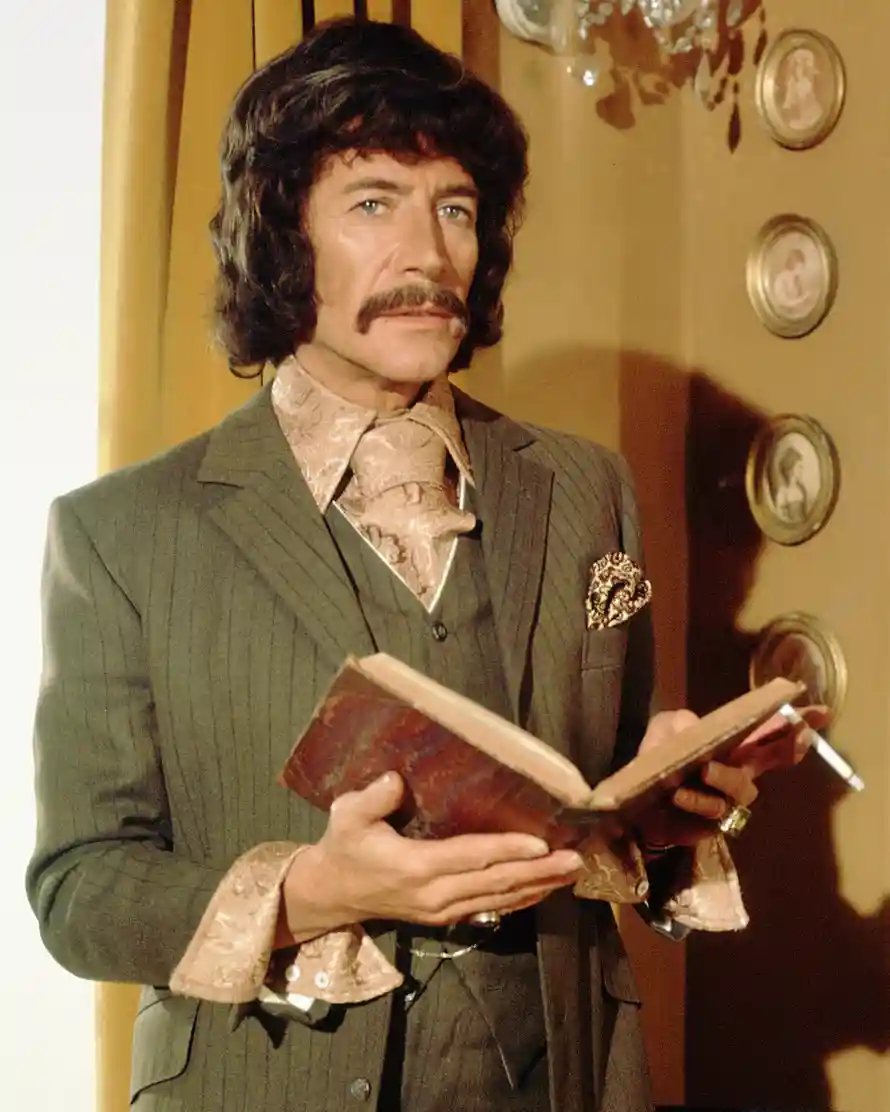
Also, they& #39;re rereleasing this little bugger from 1973. YOU GET THE FIGURES, TOO. I might not even bother with putting bikini lady in it, I& #39;ll be too obsessively recreating the glory that is Jason King& #39;s moustache.
Well, after a mere (checks calendar) forever, I& #39;m back on the De Havilland Vampire. I know you& #39;ve missed me going slowly mad working on this. I got fed up filling and sanding the wing roots before. Let& #39;s see if it& #39;s become "fun" since then! *Silly theme music plays*
I should have covered this bloody thing when I wasn& #39;t working on it. Had to give it a gentle but thorough dusting with a soft brush. There, there, my lovely. One day you& #39;ll get painted. Yes, you will.
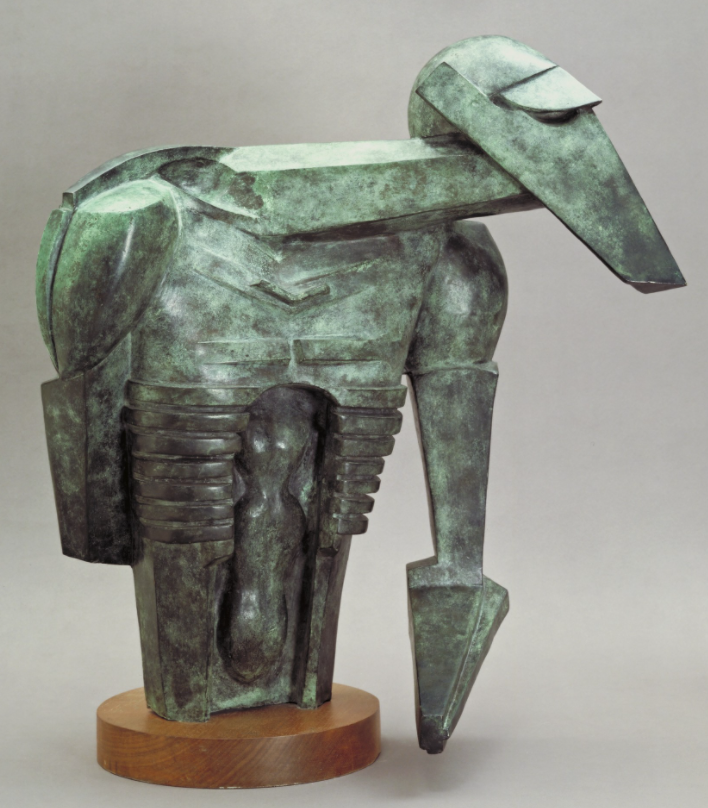
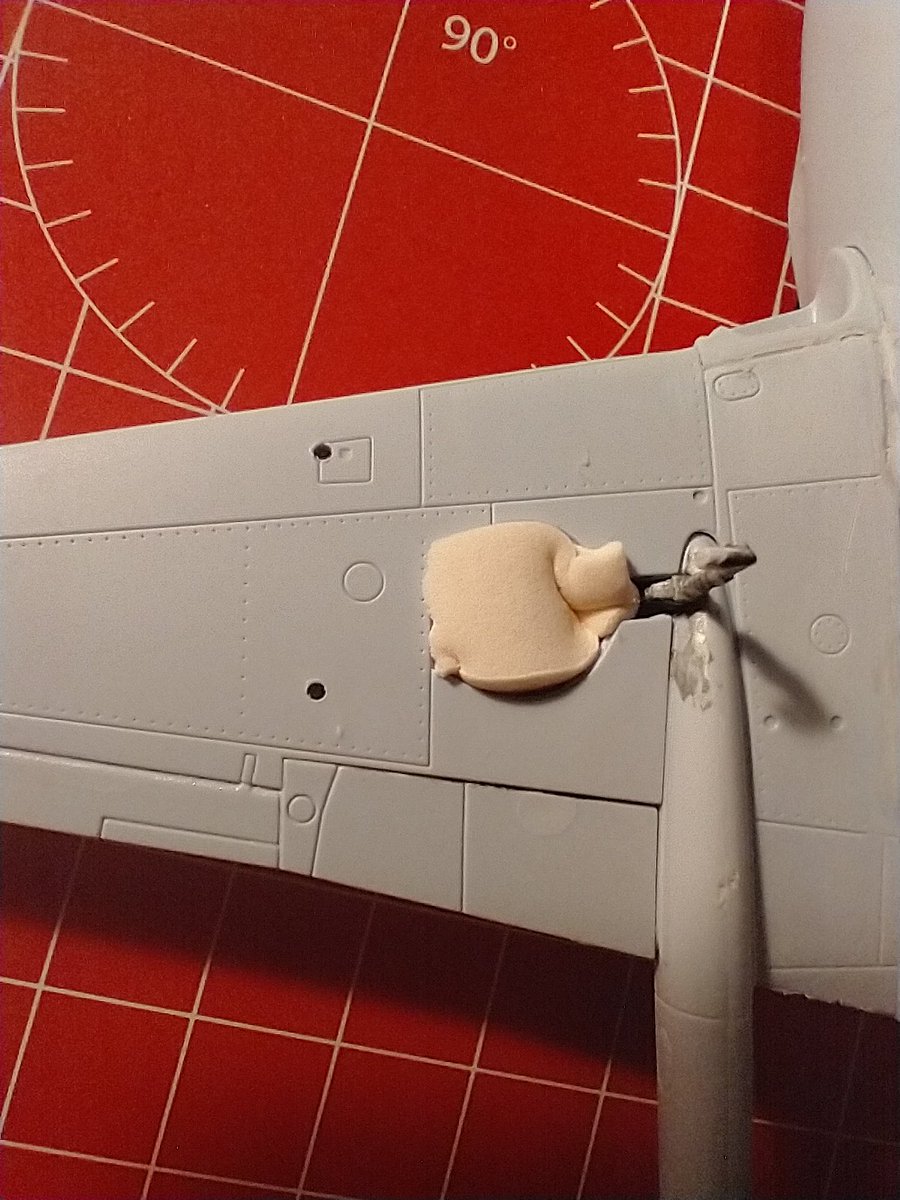
Well, that& #39;s a lot of filler. Fairly confident the model& #39;s composed predominantly of the stuff now, but I& #39;m sure De Havilland always intended the Vampire to look more like a Jacob Epstein sculpture, and were only prevented by the regressive strictures of so-called "aerodynamics."
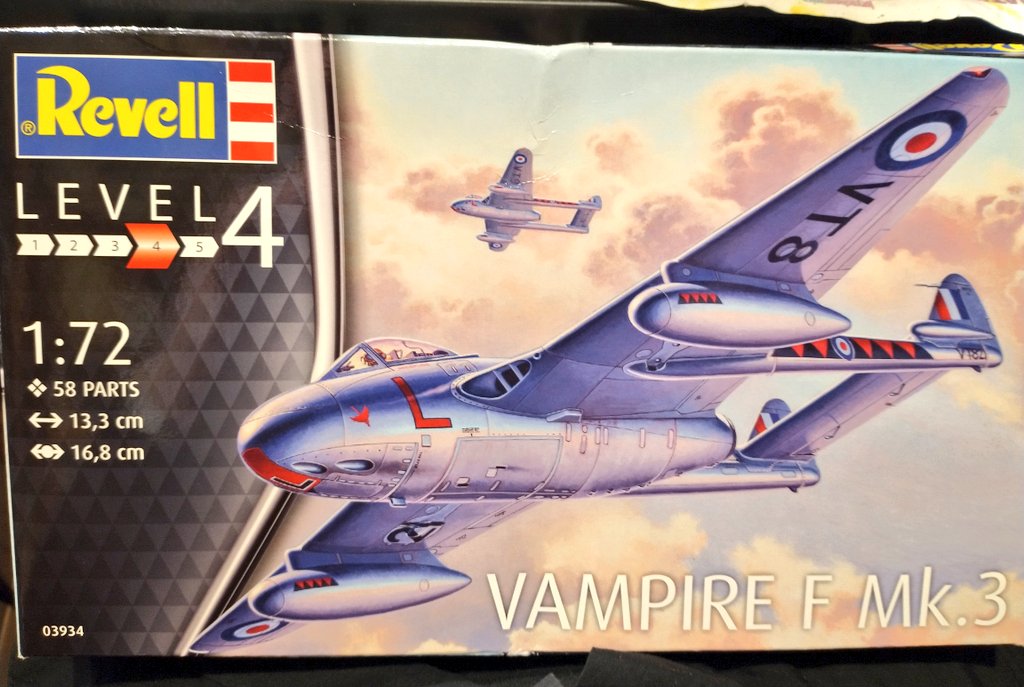
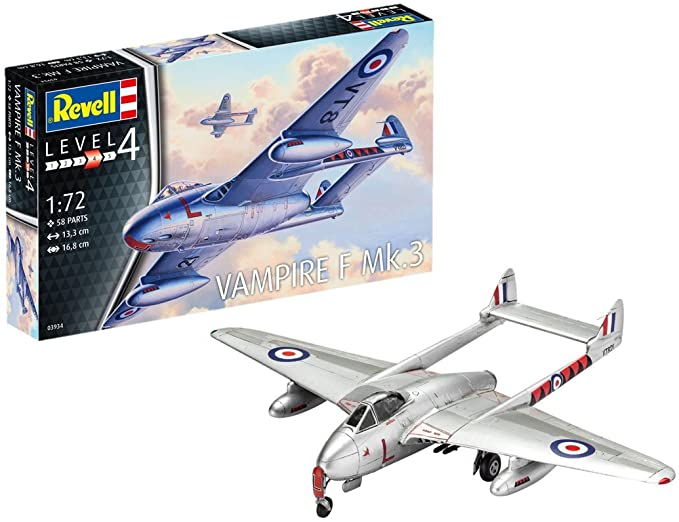
After a night to cure, I& #39;ll sand it down to a lump that no longer looks much like anything and just get on with just finishing it. After, I have the Revell Vampire F Mk. 3 in 1:72nd scale to go onto. And guess what Airfix are bringing out this summer? You& #39;ll never guess.
A DE HAVILLAND VAMPIRE F MK.3 IN 1:48TH!
HAHAHAHAHAHAHAHA I WILL NEVER STOP MAKING VAMPIRE KITS FROM ALL CONCEIVABLE COMPANIES AND IN ALL CONCEIVABLE SCALES YOU CANNOT STOP ME MORTALS
HAHAHAHAHAHAHAHA I WILL NEVER STOP MAKING VAMPIRE KITS FROM ALL CONCEIVABLE COMPANIES AND IN ALL CONCEIVABLE SCALES YOU CANNOT STOP ME MORTALS
Model kit companies like to get details right, and one of the best ways of doing that is to visit air museums and get reference at first hand. Both the Revell and the new Airfix kits feature liveries for an F Mk.3 from 601 Squadron. Want to bet VT812 is on display somewhere?
Boom! As that chap used to say in CSI NEW YORK all the damn time, long past the point where it was amusing. Him. yes.
Anyway.
Boom!
Anyway.
Boom!
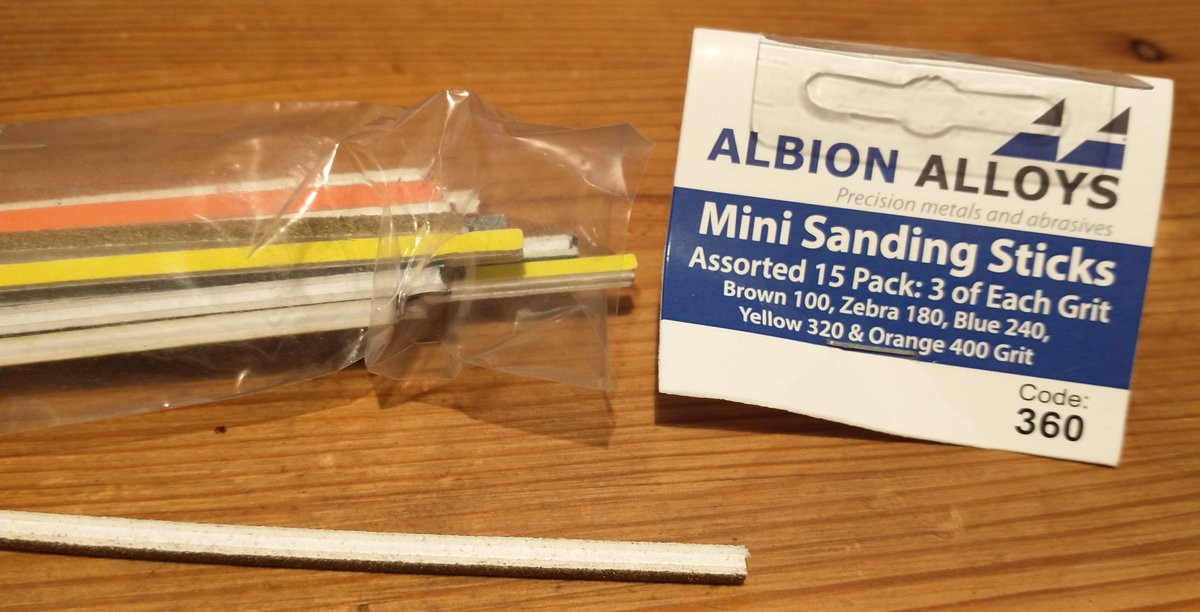
Doin& #39; sandin& #39;. Last time I did this, it didn& #39;t go well as 1:72nd model plus ginormous sanding block was not an optimal match. Now I have tinky lickle sanding sticks, which work really well.
"Makes it so smoooove!"
"Certainly removing all the surface detail..."
"So smoooove..."
"Makes it so smoooove!"
"Certainly removing all the surface detail..."
"So smoooove..."
"How& #39;s it goi... Ack! What happened to the wings?"
"Their sticky-outedness offended me."
"Okay. No, not okay. Please, for your own sake, Jonathan, step away from the sanding sticks."
"Jonathan is gone. I am Locutus of Sand. Lumpiness is futile. All shall be smoooove..."
"Their sticky-outedness offended me."
"Okay. No, not okay. Please, for your own sake, Jonathan, step away from the sanding sticks."
"Jonathan is gone. I am Locutus of Sand. Lumpiness is futile. All shall be smoooove..."
I have also, in the process of blowing away superfine plastic powder, managed to spit all over the model. It& #39;s definitely mine now, if that was ever in contention.
Well, the filling looks godawful, but at least its smoooover now. Right, wash the model off again in warm water with a drop of detergent to get rid of the accumulated finger grease (and spit), wash it clean, let it air dry, mask off the cockpit, and then... it& #39;s primin& #39; time.
The masking is going to be a hash job. Normally you& #39;d glue in the canopy and mask it, but I want the canopy open in the final model (because I& #39;m an idiot who likes making work for himself, see tweets passim). Thus... dunno. Just cover it in a bit of paper and tape, perhaps.
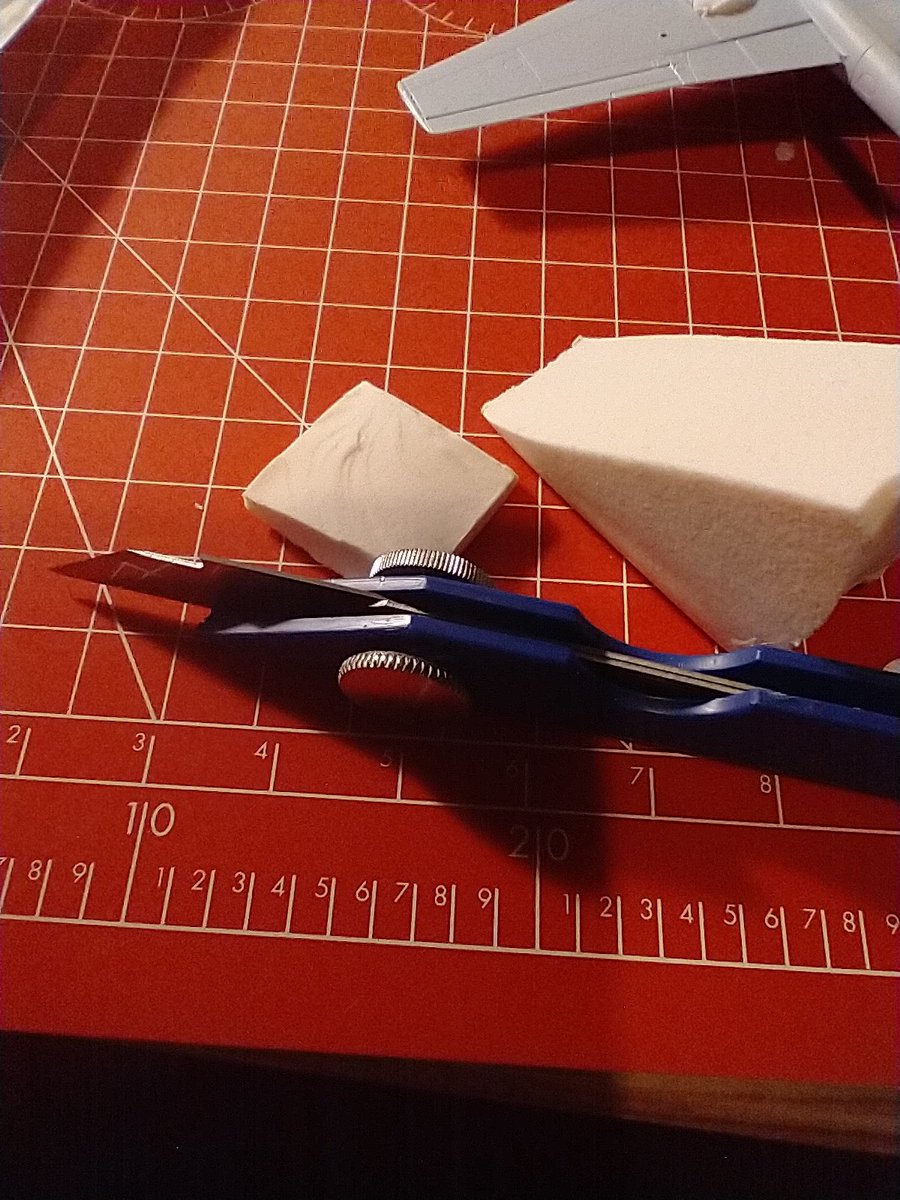
"Oh, you& #39;ve got make-up applicator sponges? Cool. It& #39;s good when a chap gets in touch with his fem WHAT THE HELL ARE YOU DOING WITH THAT KNIFE?"
"Carving little chunks to mask the wheel wells. Why, what did you think I wanted these sponges for?"
"I... You know what? Never mind."
"Carving little chunks to mask the wheel wells. Why, what did you think I wanted these sponges for?"
"I... You know what? Never mind."
*Assays the cockpit*
Okay, using the Maskol as a temporary adhesive is a good plan, just don& #39;t try and put it together with your fingers, use tweezers.
Use tweezers.
Use the... oh, gods.
No. No, it& #39;s recoverable, just...
Tweezers.
Are you even listening?
Twe--
Oh, Jesus.
Okay, using the Maskol as a temporary adhesive is a good plan, just don& #39;t try and put it together with your fingers, use tweezers.
Use tweezers.
Use the... oh, gods.
No. No, it& #39;s recoverable, just...
Tweezers.
Are you even listening?
Twe--
Oh, Jesus.
I can tell you are absolutely gasping to know what Maskol is. It& #39;s this stuff, a latex solution that dries to a translucent pinky/purple. As the name suggests, you can use it to mask for painting, peeling it off afterwards. But, not great for hard edges, hence masking tape.
On goes the 1st coat of primer. I& #39;m using Tamiya bright white as the final coats will be silver and I want to "pop" that colour. I& #39;m giving it 3 light coats, and I hope the subsequent ones improve matters because it& #39;s as blotchy as hell atm, although only on the wings. Odd.
2nd coat. Looking a bit better. Foolishly, I took the model back into the body of the house to dry, and that may have allowed dust to settle on it (haven& #39;t looked closely to check). Left it in the garage this time. Also, used a respirator mask this time, as I& #39;m fond of my lungs.
WoOOooOo I am an GHOSTY VAMPIRE
DOUBLE THREAT wOOooOOooo.
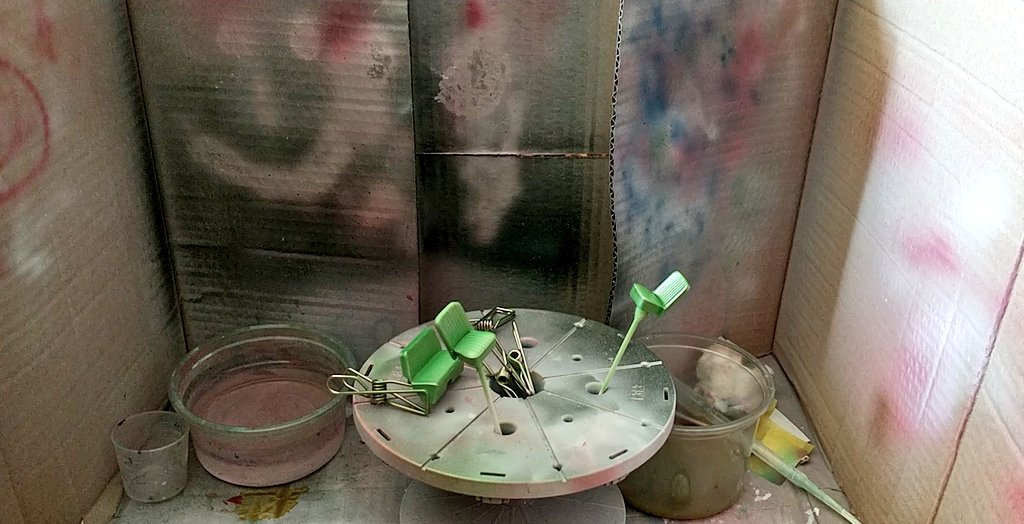
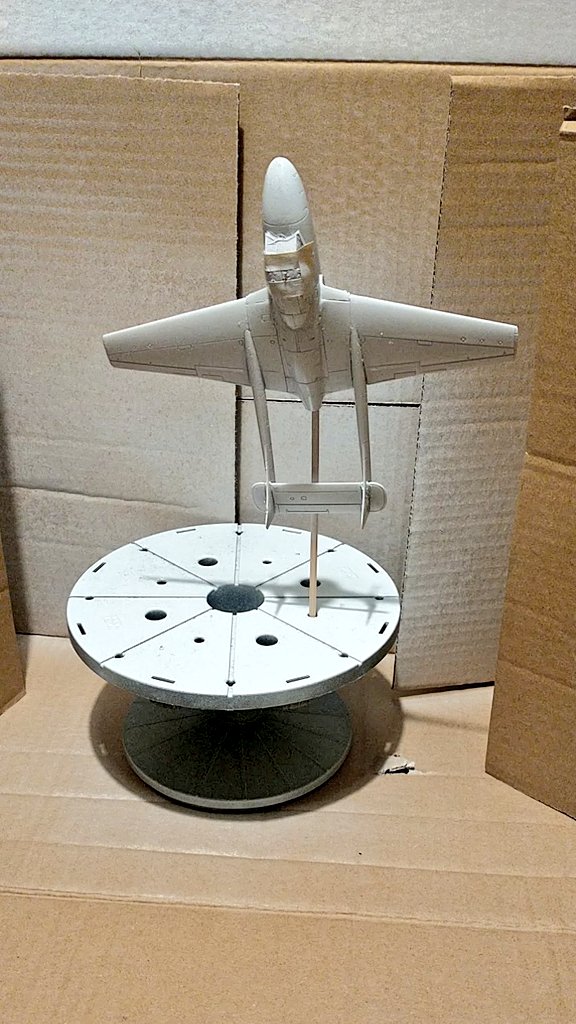
Too cold to paint in the garage (both for me and the paint) so I& #39;ve set up my fancy painting booth on my desk YES IT IS FANCY AND NOT JUST A CARDBOARD BOX. Here& #39;s the Vampire primed white before I have at it with silver.
DOUBLE THREAT wOOooOOooo.
Too cold to paint in the garage (both for me and the paint) so I& #39;ve set up my fancy painting booth on my desk YES IT IS FANCY AND NOT JUST A CARDBOARD BOX. Here& #39;s the Vampire primed white before I have at it with silver.
I shall be using this for the ensilvering. It is the cheapest airbrush in all the kingdom, setting me back a princely £20 on eBay (even full priced, they& #39;re only about £30).
I have never used an airbrush before. The opportunities for disaster are manifold and imminent.
I have never used an airbrush before. The opportunities for disaster are manifold and imminent.
If I don& #39;t survive this, please remember me as I& #39;d want to be remembered -- covered in silver paint and coughing violently.
Also, wearing my techno murder gloves. Not my classiest pair, I grant you, but silver paint& #39;s a bugger to get out of leather. Worse than blood.
Not that I& #39;ve ever murdered anyone. Even if they deserved it.
Not that I& #39;ve ever murdered anyone. Even if they deserved it.
Just spraying water to get the hang of the trigger and this is delightful! A lovely fast mist that& #39;s barely visible. I can hardly wait to get some paint in this thing.
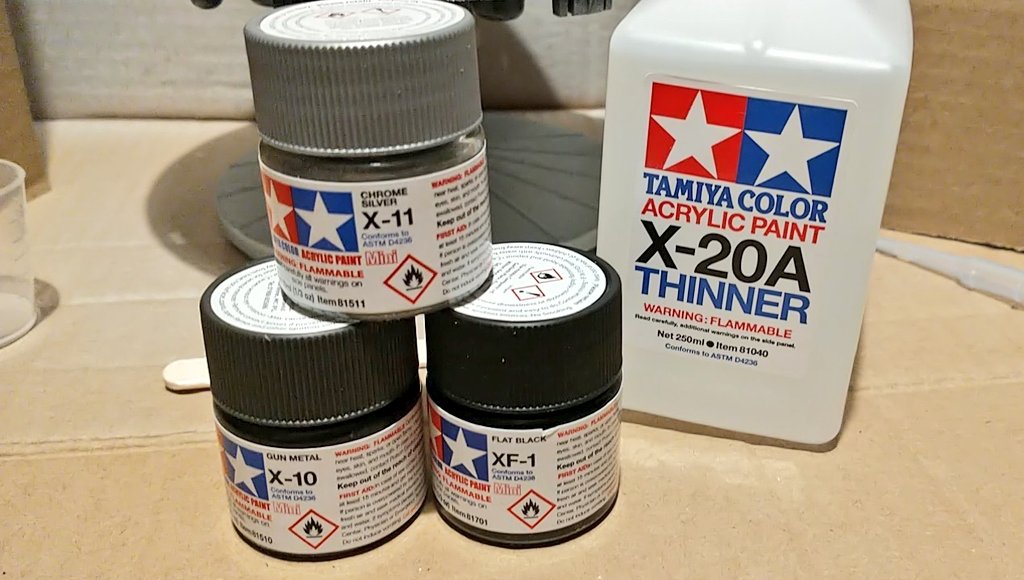
The silver I& #39;m using is possibly *too* silvery, chrome rather than a more subdued steel. I& #39;ll give it a couple of coats, and then mix in either black or gunmetal to take the brightness off, if it& #39;s too shiny.
And now... Adventure Awaits!
And now... Adventure Awaits!
Measurin& #39; solvents and getting flashbacks to my chemistry days.
SPOILER: I sucked as a chemist. "That looks about right. What& #39;s the worst that can happen?" is a poor mindset for a chemist.
Ooh, solvent fumes. Getting slightly high. Focus, Jonathan, focus.
SPOILER: I sucked as a chemist. "That looks about right. What& #39;s the worst that can happen?" is a poor mindset for a chemist.
Ooh, solvent fumes. Getting slightly high. Focus, Jonathan, focus.
The ensilvering begins. Alas, not of the model, but of me. Thankfully only a couple of small drops, and it& #39;s acrylic so it *should* wash out.
Onwards!
Onwards!
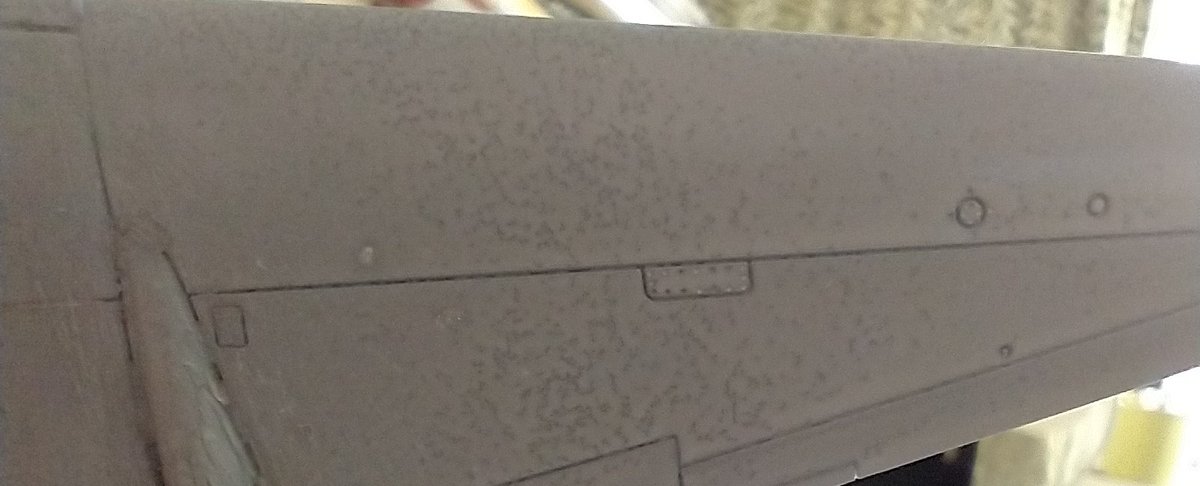
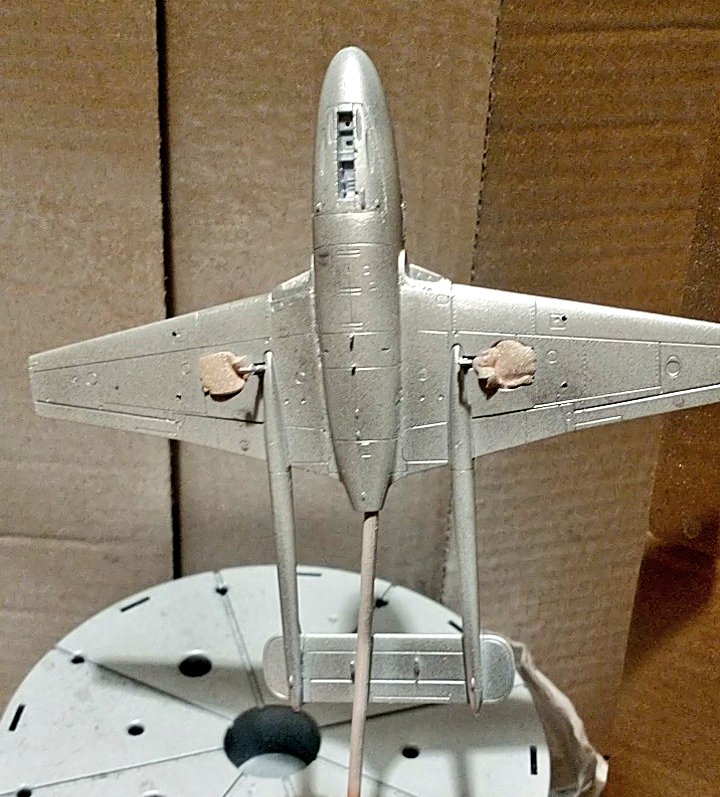
First coat. Patchy, inexpert, bad. I couldn& #39;t be prouder  https://abs.twimg.com/emoji/v2/... draggable="false" alt="😁" title="Grinsendes Gesicht mit lächelnden Augen" aria-label="Emoji: Grinsendes Gesicht mit lächelnden Augen">
The 2nd coat improved matters greatly. Still not there -- there& #39;s a shading on one wing where the primer is still making itself felt, but altogether much prettier. The filler looks *bad.* like the wings and elevators were affixed by a rhino with a welding arc, but... 1st attempt.
More spray-painting tonight, albeit sans the airbrush; i.e. priming from cans. Certain novelty to priming things white on one side (the outer, which will be silvered) and black on the other (the inner side of the open landing gear hatches).
More spray painting.
"Man, can really smell the paint tonight. What& #39;s changed? Forgot my mask. Ah. Well, I& #39;m sure my lungs will enjoy a delicate coat of primer."
*Coughs forever*
"Man, can really smell the paint tonight. What& #39;s changed? Forgot my mask. Ah. Well, I& #39;m sure my lungs will enjoy a delicate coat of primer."
*Coughs forever*
Well, I think everything that needs airbrush painting is now painted, along with a few other things that just got in the way. The front tricycle wheel and its well still need brush painting, and some dry brush work on the interior of the landing gear hatches to raise the detail.
Then the decals, then a first varnish coat to fix them, then a black wash to show up the panel lines (and my godawful filling, no doubt), add the gear and drop tanks, final varnish, fix the canopy, and... done. At last. Blimey. End of an era.
Mind you...
Mind you...
... let& #39;s just remember how many decals there are. Just shy of 90 of the fiddly little swines. That& #39;s not going to be a swift job.
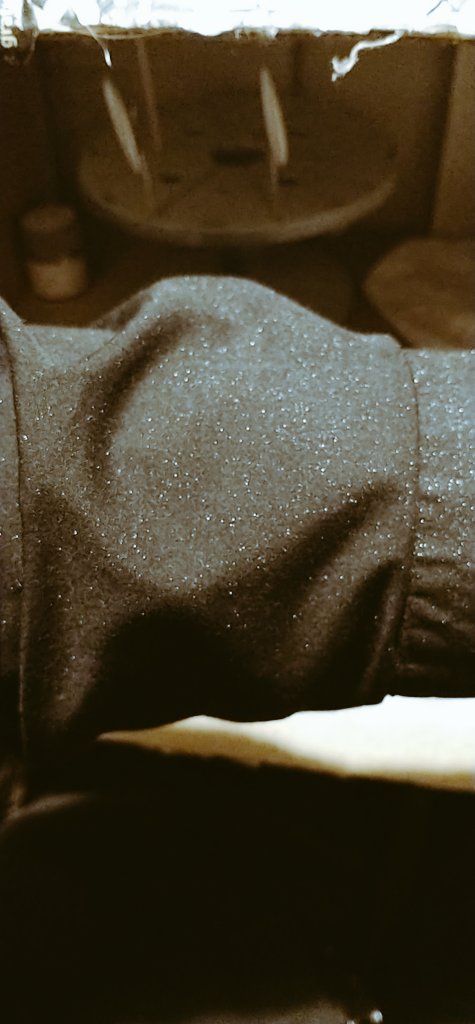
On the plus side, my black shirt has thousands of infinitesimal silver dots upon it that lend it a very subtle glitter. They& #39;ll wash out easily enough, but for the moment I feel terribly pretty (the camera really doesn& #39;t catch the sparkling at all, but at least you get an idea).
Boggled by how much joy this dirt-cheap airbrush gives me. It not only does a good job of basic coating (which is 90% of what I want from an airbrush), it& #39;s just such a pleasure to use.
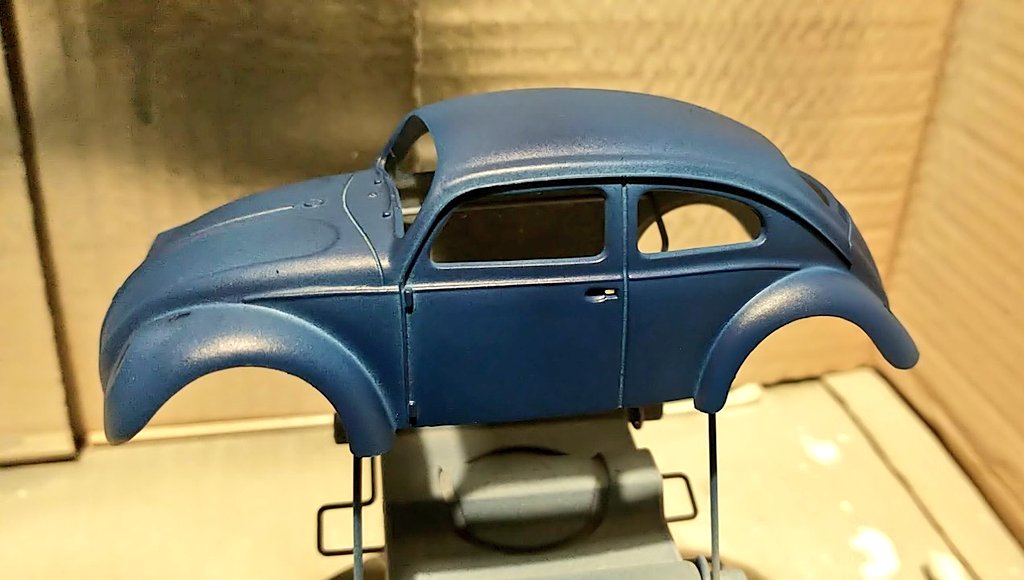
*Looks askance at the 1:32nd scale VW Beetle with the crap hand-brushed paintjob*
You& #39;re next.
*Looks askance at the 1:32nd scale VW Beetle with the crap hand-brushed paintjob*
You& #39;re next.
Another great revelation has been acrylics. Back at the dawn of recorded history just about the only modelling paints available were enamels, which give great cover and colour, but are really unforgiving. Acrylics need more coats, but I don& #39;t mind that as they dry so quickly.
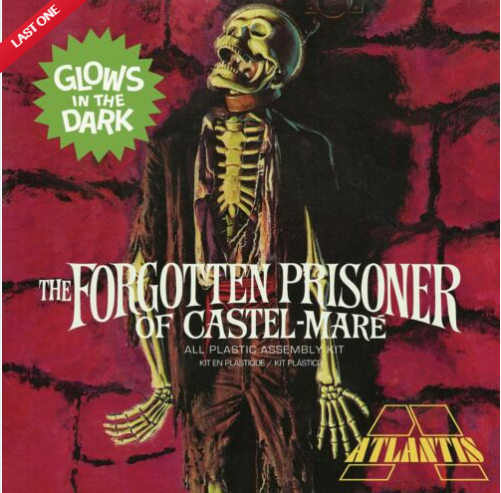
Now I& #39;m back into modelling, I have a sudden hankering to build a reissue of one of the old Aurora "Glow-In-The-Dark" Monster Kits. I had a load of these as a kid, and ... well, the paintwork probably wasn& #39;t great, although I don& #39;t think it was terrible for a primary school kid.
The kits came with luminous plastic for the heads, hands, and a few of the diorama props, but with standard plastic alternatives if you wanted to paint them. As a kid, I couldn& #39;t understand why anybody wouldn& #39;t want to use the luminous parts, but I probably wouldn& #39;t now.
I had (deep breath) "The Frankenstein Monster," "The Mummy," "The Witch," "The Creature from the Black Lagoon," and "The Phantom of the Opera." At night I had to put a shirt over them or the fierce green glow would keep me awake all night. I could see it through closed eyes.
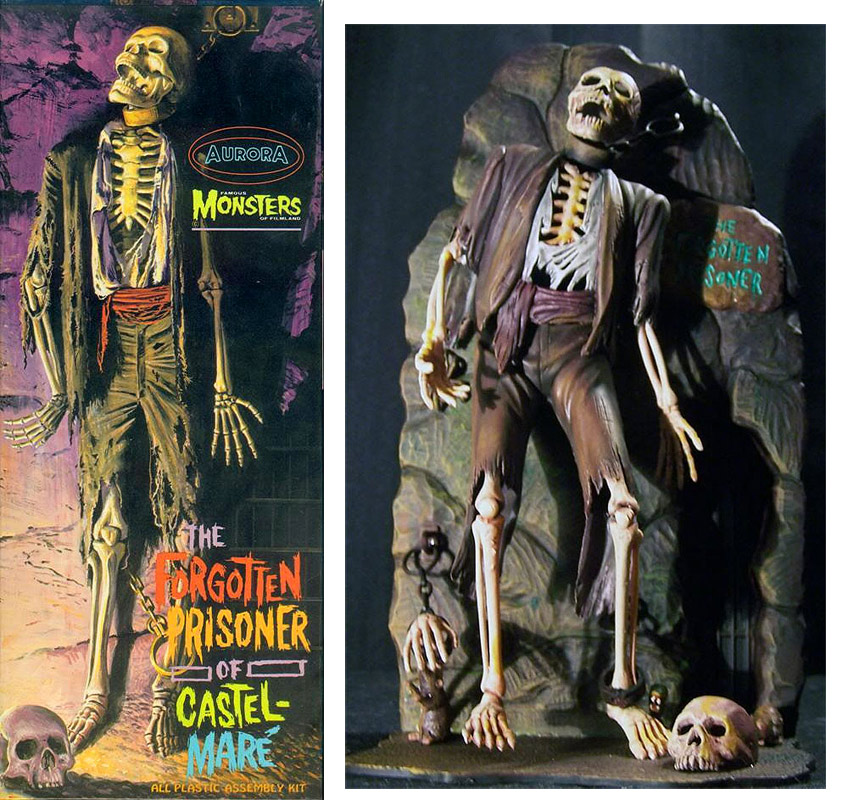
They weren& #39;t complex kits, but I remember they were pretty well sculpted and very satisfying to put together. Between myself and my friend next door, we had the whole range (I envied him Godzilla and "The Forgotten Prisoner," a skeleton chained to a wall in rags of clothing).
Yep, still have the same ungodly lust to possess a plastic skeleton that I did when I was nine. I... shall... have... it.
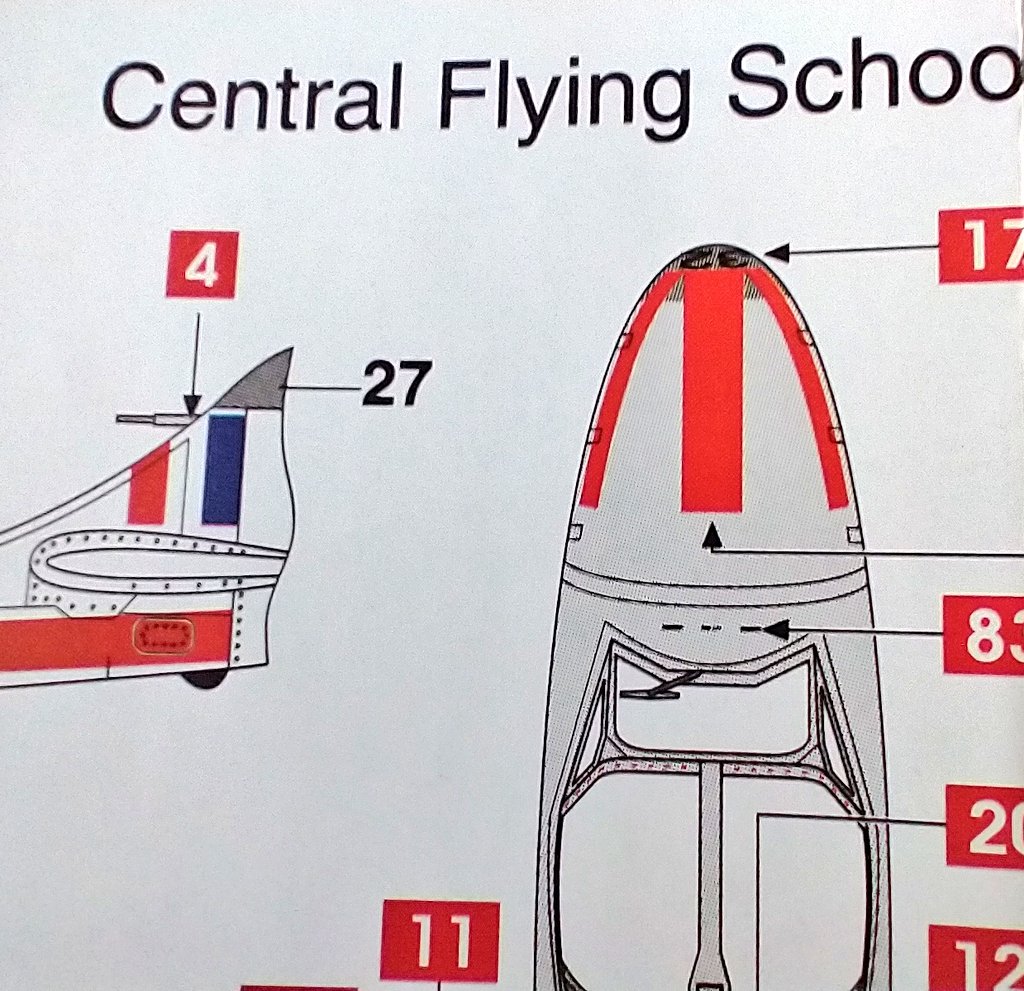
Oh, dear. Dismayed to belatedly remember these bits on the livery sheet. See that bit on the rudder tip labelled "27"? That& #39;s supposed to be painted Matt Sea Grey, a not dissimilar shade to silver. That& #39;s not a problem; the tips have clear delineation and can be hand painted.
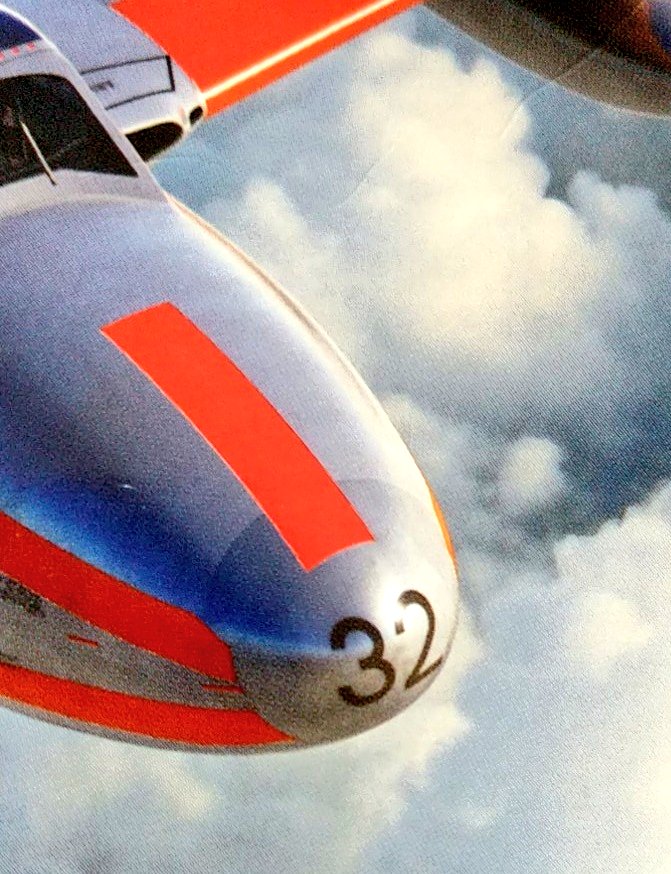
But on the right, you might be able to make out there& #39;s the same colour on the nose, and there& #39;s no handy panel line to work to there. Getting unelasticated masking tape (yes, elasticated exists) to work around a curved form is going to be a bugger. Thinking about dipping it.
Or ignoring it. That works, too. I shall drink my coffee and have a cogitation.
My son forbade me from assaying the attempt on the grounds it might hazard my mental health (he was joking, albeit not entirely). I am, alas, a bad father at least as far as this goes and have made free with teeny 1mm wide masking tape. I& #39;ll mix some grey later and... yeah.
One more coat and I& #39;ll call the grey bits done. Bit brushier than I& #39;d have liked, but it& #39;ll do, at least if the line& #39;s sharp. In hindsight, I might have primed the nose and rudder tips grey and then masked it against the silver, but I& #39;d entirely forgotten about them until today.
*Melancholy Carl Davis soundtrack*
Laurence Olivier: The line, alas, was not sharp.
But, using the tiniest brush in creation (I jest not; it& #39;s made by The Army Painter and is called "The Psycho." Look it up), I tidied it up enough for my shoddy standards.
Laurence Olivier: The line, alas, was not sharp.
But, using the tiniest brush in creation (I jest not; it& #39;s made by The Army Painter and is called "The Psycho." Look it up), I tidied it up enough for my shoddy standards.
I& #39;d hoped to start the decals today, but *shrug* I shall delay that pleasure for the morrow. I know you& #39;re excited to hear about my travails cutting out umpteen decals (many infinitesimal), soaking and placing them, but delayed gratification is good for the soul.
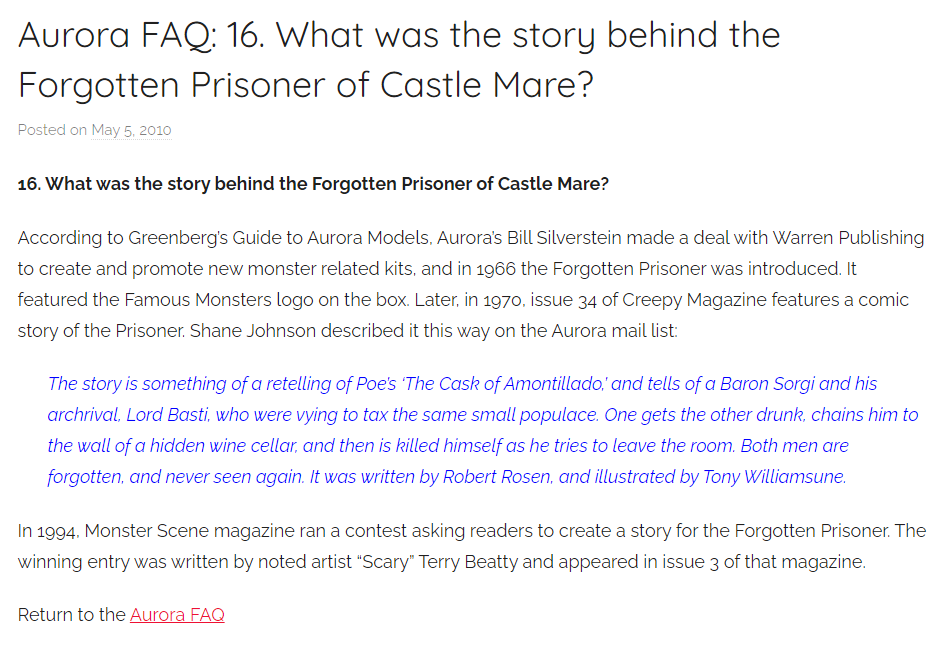
With the exception of the Witch, all these Aurora kits were associated with characters from specific stories or series. The Forgotten Prisoner was therefore an outlier, and I& #39;d assumed there was some legend it was based upon. Nope. They just wanted to do a skeleton.
Well, unexpected development. But, before I get to that, remember the saga of the tiny bits of transparent plastic I assumed must be navigation lights but turned out to be reflector sights for the cockpits? https://twitter.com/JonathanLHoward/status/1294674914495037441?s=20">https://twitter.com/JonathanL...
I was just sorting out the order the decals were to go on when I noticed a tiny detail on the livery sheet. Little bits on the wingtips were to be painted black.
Why? Because they represent the actual navigation lights. They& #39;re twice the size of the reflectors sights, but no clear plastic for them. I do not understand the logic.
Anyway, the decals, all 87 of the buggers, promised several evenings of swearing. Turns out, no. One evening.
Anyway, the decals, all 87 of the buggers, promised several evenings of swearing. Turns out, no. One evening.
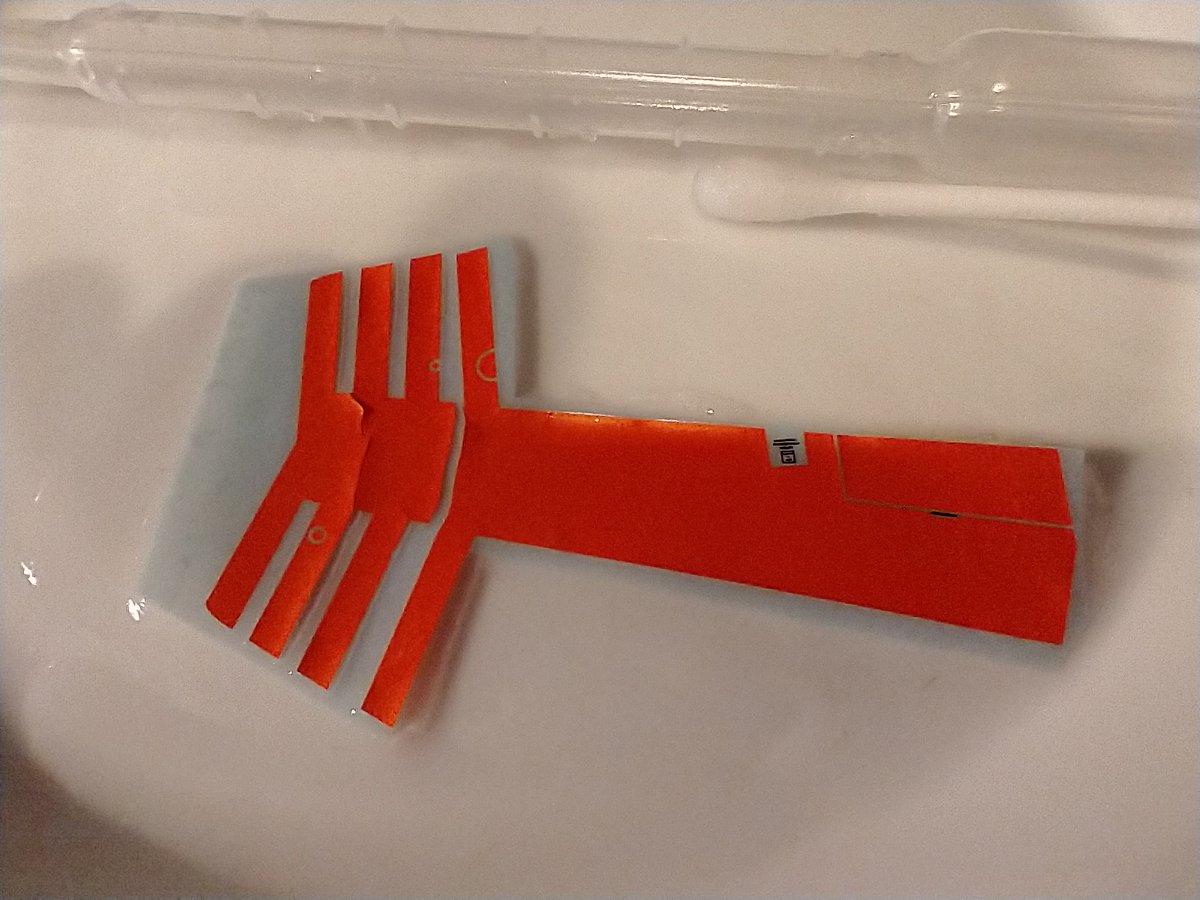
I cut out one of the orange stripey bit, soaked it in Humbrol& #39;s own DecalFix solution... and the little bastard promptly cracked into bits. The picture shows the early cracking before it all turned to tiny orange shrapnel.
I& #39;ll be frank. I& #39;m not best pleased.
I& #39;ll be frank. I& #39;m not best pleased.
This was supposed to be the slightly fiddly, time-consuming, but not actually difficult bit. Instead... ugh. I don& #39;t know, in the grand scheme of things, it& #39;s less than nothing, but I feel crestfallen out of all proportion.
Well, I& #39;ve written to Airfix& #39;s customer support to ask for a fresh (and ideally not knackered) decal sheet.
Don& #39;t know what to do while I wait.
*Sighs disconsolately*
*Faint shuffling as the VW Beetle with crap handpainted bodywork tries to hide*
O ho. Yes. Yes, indeed.
Don& #39;t know what to do while I wait.
*Sighs disconsolately*
*Faint shuffling as the VW Beetle with crap handpainted bodywork tries to hide*
O ho. Yes. Yes, indeed.
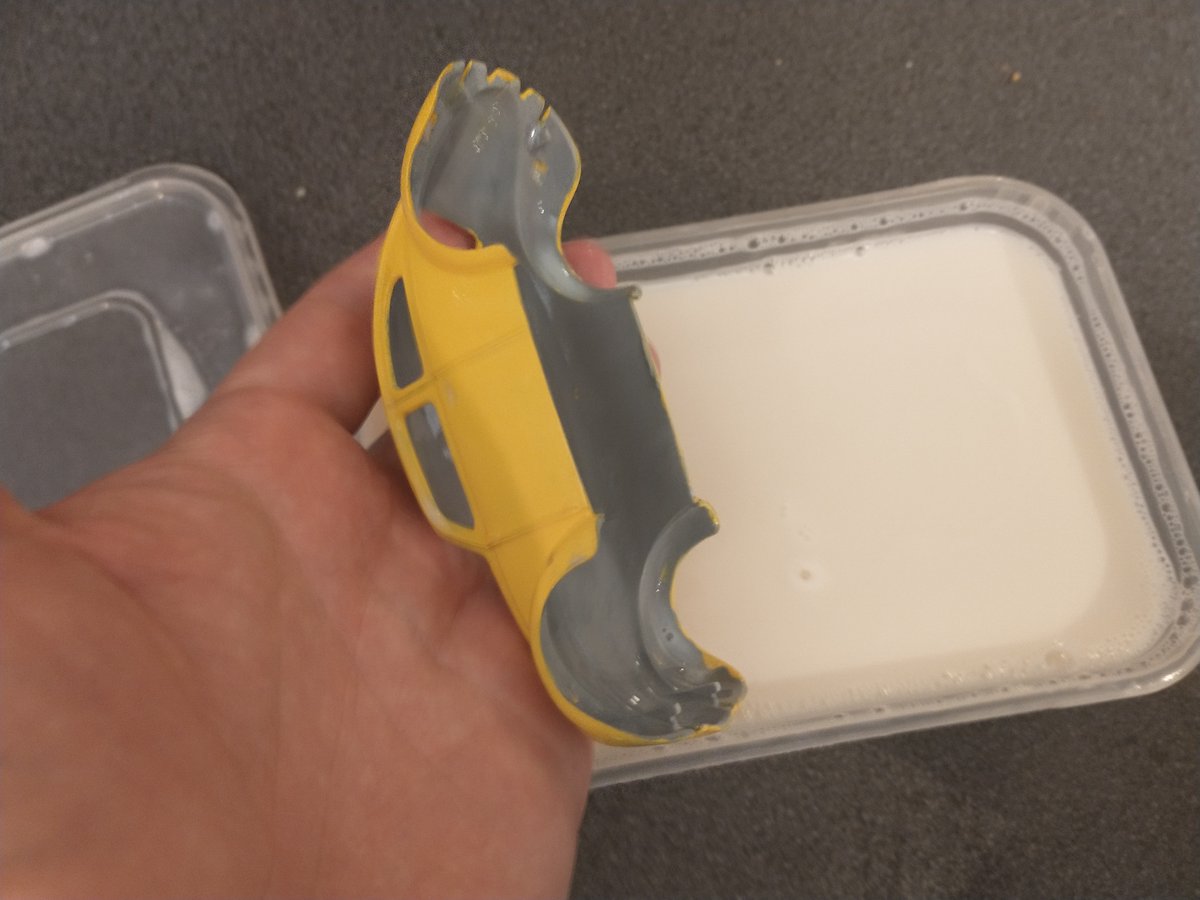
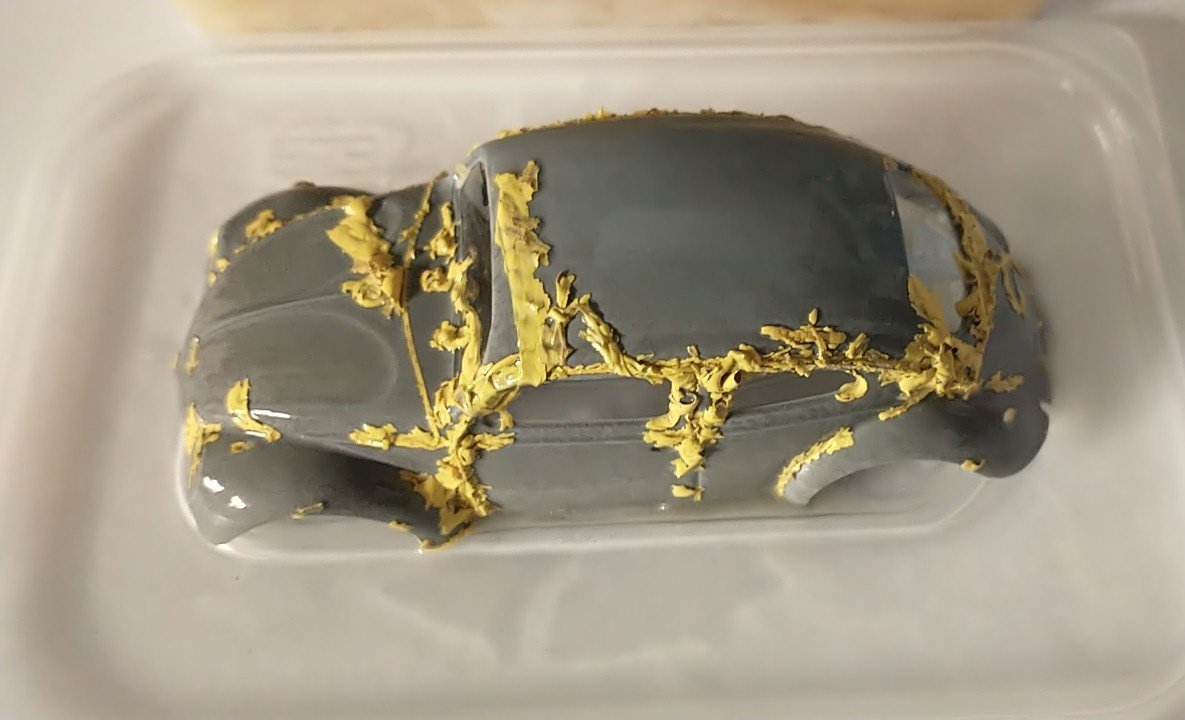
I wonder if a 50/50 Dettol/water bath will get that paint off the Beetle?
It& #39;s enamel and has been on it for months. It might not work.
But... learning from failure is the epitome of the scientific method.
PREPARE THE DETTOL BATH!
It& #39;s enamel and has been on it for months. It might not work.
But... learning from failure is the epitome of the scientific method.
PREPARE THE DETTOL BATH!
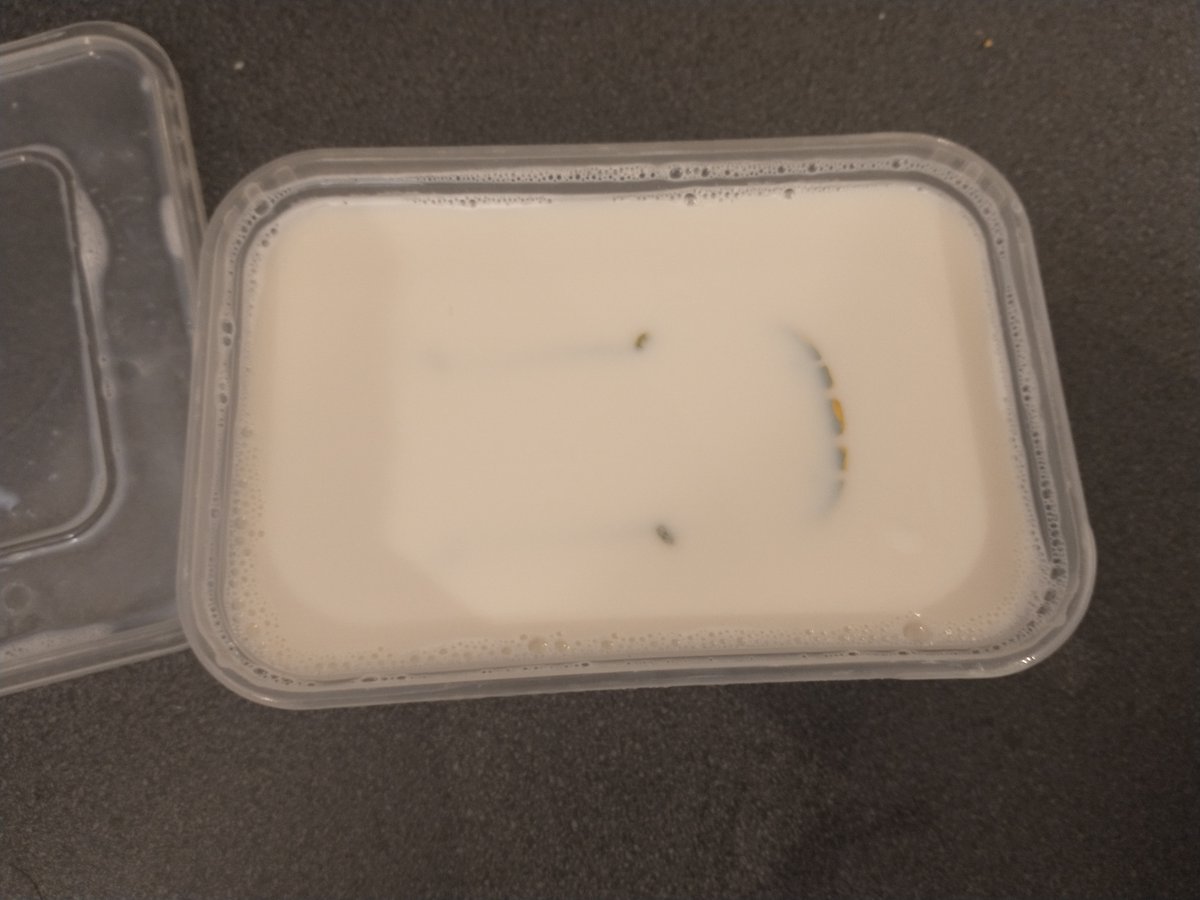
The experiment begins... but look, it& #39;s happy about it!
Anyway, it& #39;s not like I& #39;m short of models to be getting on with. I& #39;ve picked up a decent stock. Don& #39;t need to buy any more.
On the one hand, eew.
On the other hand, that& #39;s pretty impressive, considering it& #39;s enamel that& #39;s had months to cure.
On the third hand, eew.
On the other hand, that& #39;s pretty impressive, considering it& #39;s enamel that& #39;s had months to cure.
On the third hand, eew.
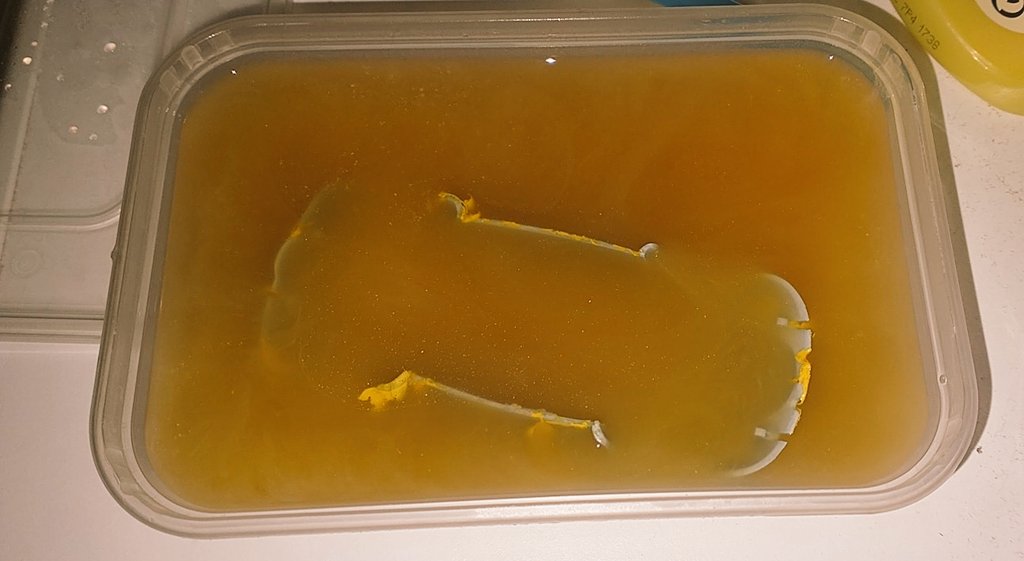
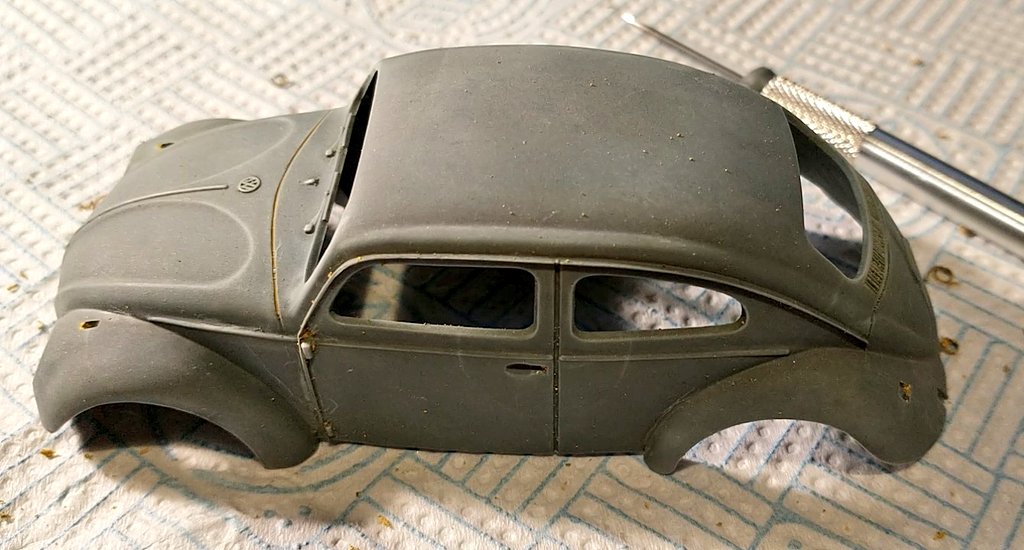
A few minutes of vigorous elbow work with a superannuated toothbrush, and we arrive at this. A few vestiges of the yellow enamel cling to it, much of it in the detail, which is expected but irksome. I& #39;ll wield craft knife and sanding stick to see if I can improve matters.
Currently delicately scraping enamel vestiges out of panel seams. I am really enjoying it.
What the hell is wrong with me?
What the hell is wrong with me?
Back in the bath to soften up more of the paint for scraping out. Tell you something a bit odd; the Dettol *didn& #39;t* remove the grey primer, which is acrylic. That *should* have come away easily.
Un mystère.
*Pretends to stroke beard*
*Realises he has a beard*
*Strokes that*
Un mystère.
*Pretends to stroke beard*
*Realises he has a beard*
*Strokes that*
Well, here we are. I remembered I have a tool described as a "scriber," that& #39;s as near as dammit a dental probe. MUCH better at getting in the gaps. Very nearly there, but for a few recalcitrant bits, notably in the deep panel line at the top of the luggage bonnet. One more bath.
Three times this thing has been painted and three times the paint& #39;s been stripped, and that means three times the filler in this sprue tear at the base of the door has been filled. I guess I have to do it again now.
#HobbiesAreFunApparently
#HobbiesAreFunApparently
Apparently, when I talk through my chemical respirator mask, I sound like "comprehensible Bane."
I& #39;ve run out of aerosol white primer!
*Chorus of astonishment*
Yes! Luckily, I have a pot of matt white acrylic (I used to work with a Matt White, y& #39;know. No, I really did, that& #39;s not a joke) and my trusty cheapo airbrush, which I& #39;ve been itching to use again. So yay!
*Chorus of astonishment*
Yes! Luckily, I have a pot of matt white acrylic (I used to work with a Matt White, y& #39;know. No, I really did, that& #39;s not a joke) and my trusty cheapo airbrush, which I& #39;ve been itching to use again. So yay!
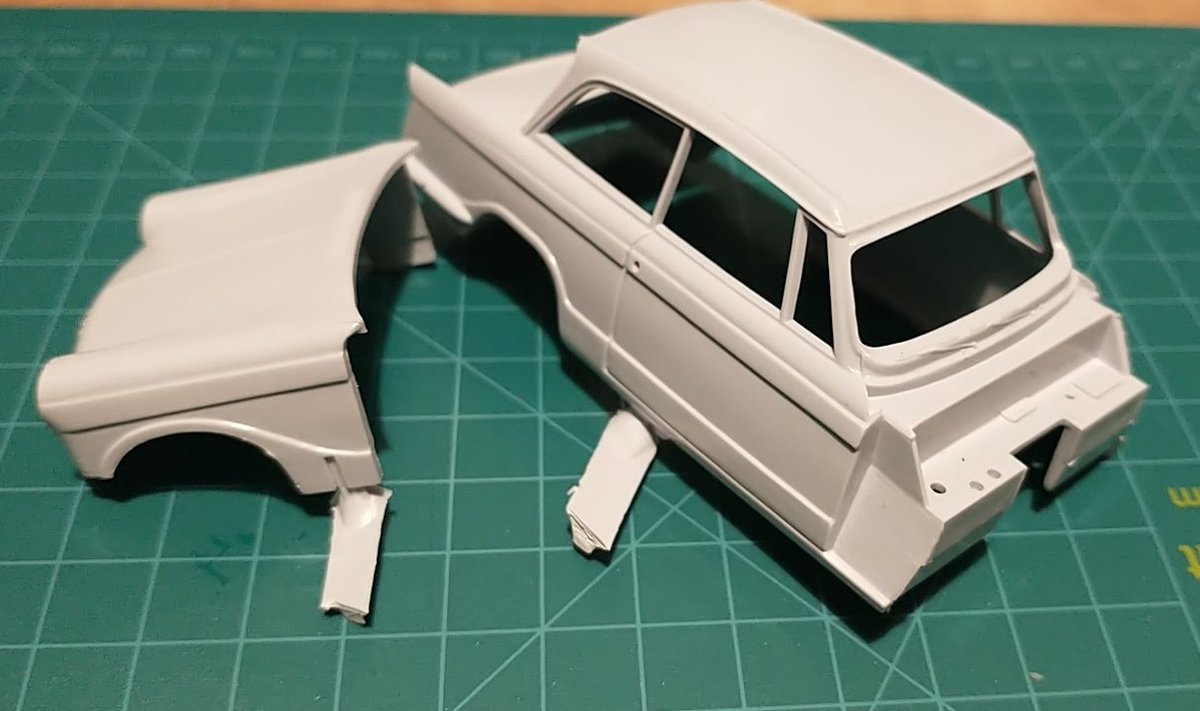
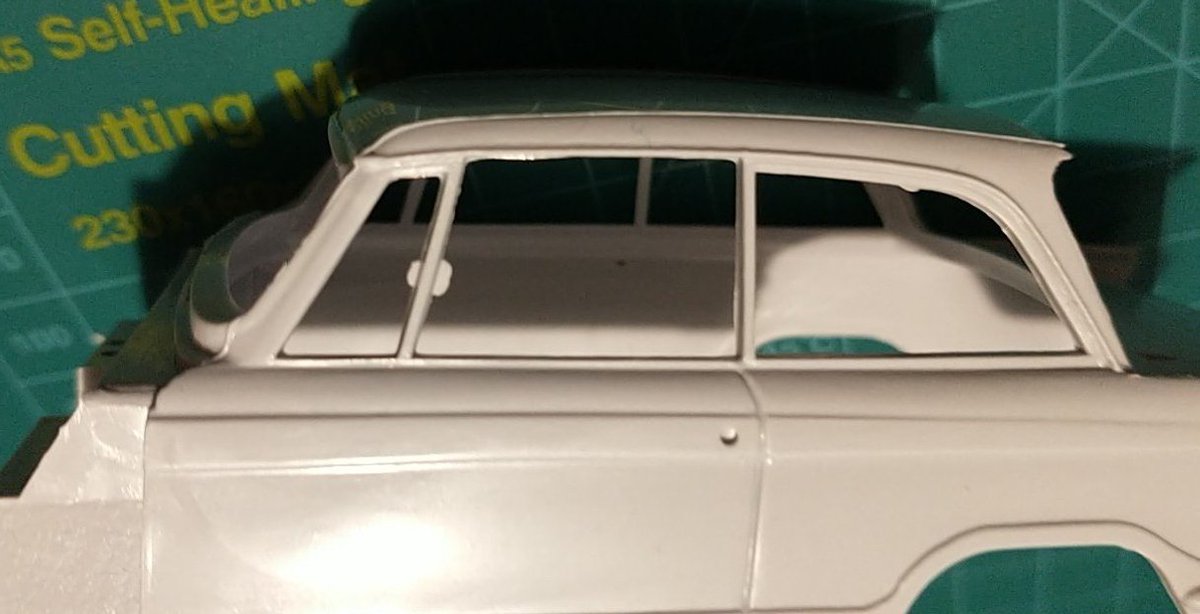
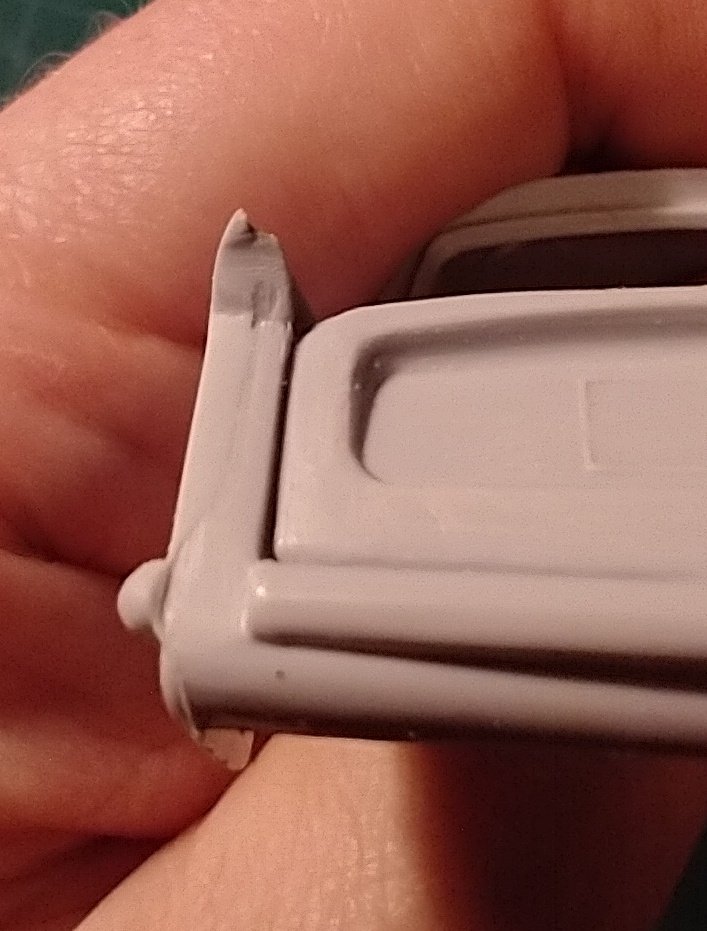
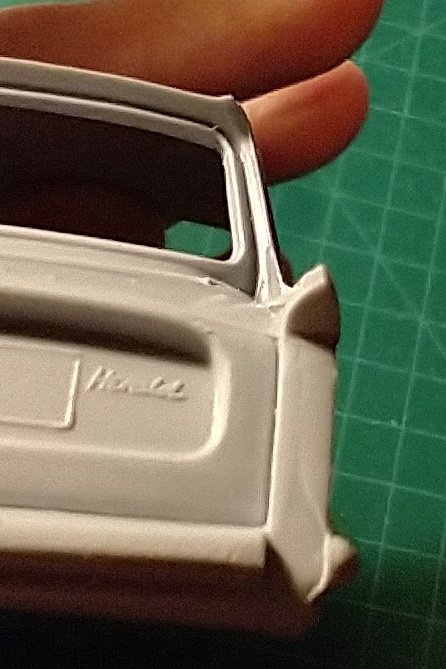
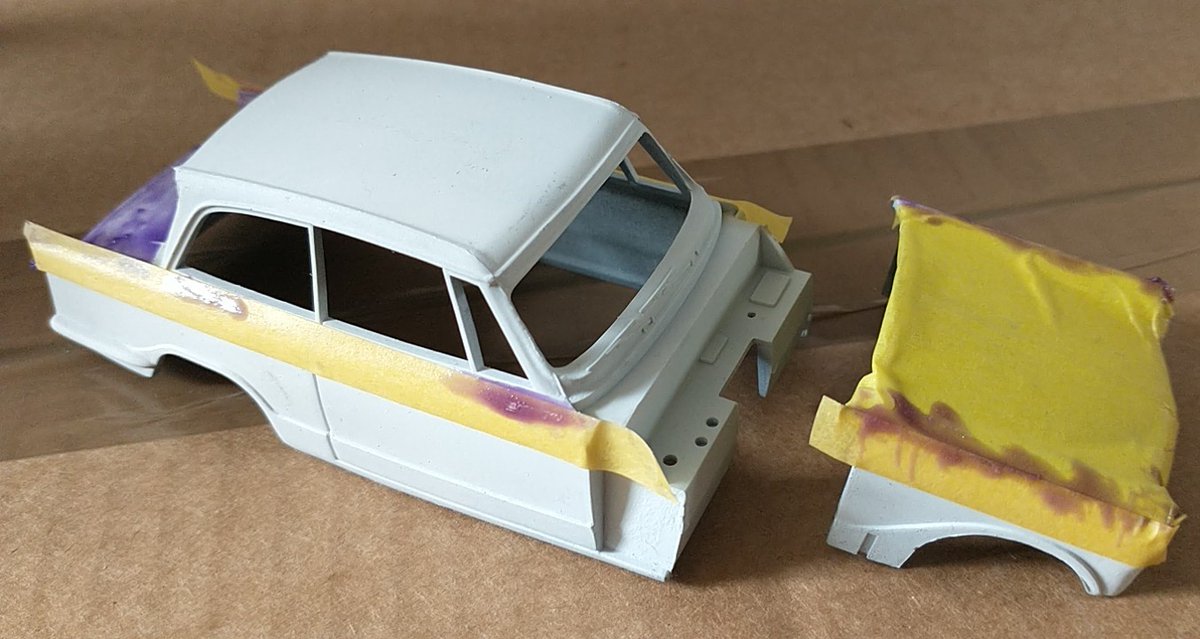
In the huge pile of "cheap models I& #39;m not very invested in so I& #39;m not too worried if I mess them up" is an Airfix Triumph Herald, apparently from the same era as the Beetle i.e. mid-& #39;70s, but my goodness, the mould& #39;s in much worse shape. Lookit! Sprue stubs! Flash (aah-aah etc)!
"I see a shitload of trimming, filling, and sanding in your near future."
Zoltan, you& #39;re uncanny!
Zoltan, you& #39;re uncanny!
"We found him like this, covered in powdered plastic and muttering about seam lines."
Man, this thing is covered in seam lines. Also sanded off 80% of a lug before I realised it was meant to be there to position a sidelight. Eh, 20% is all I need.
Man, this thing is covered in seam lines. Also sanded off 80% of a lug before I realised it was meant to be there to position a sidelight. Eh, 20% is all I need.
Rather regretting watching a video by a much more practised builder pointing out the rear right fin is minutely different from the (correct) left fin. He rebuilt it to match exactly. I think that& #39;s within my ability, but - and I think this is a justifiable perspective - fuck it.
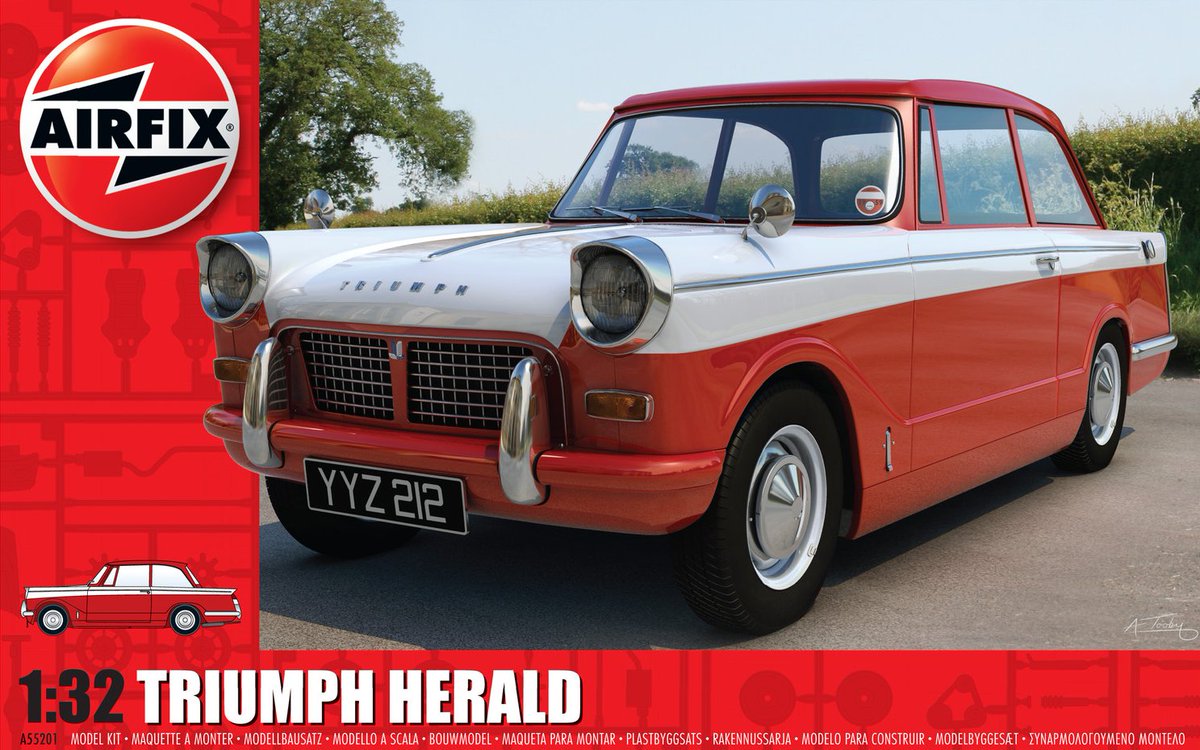
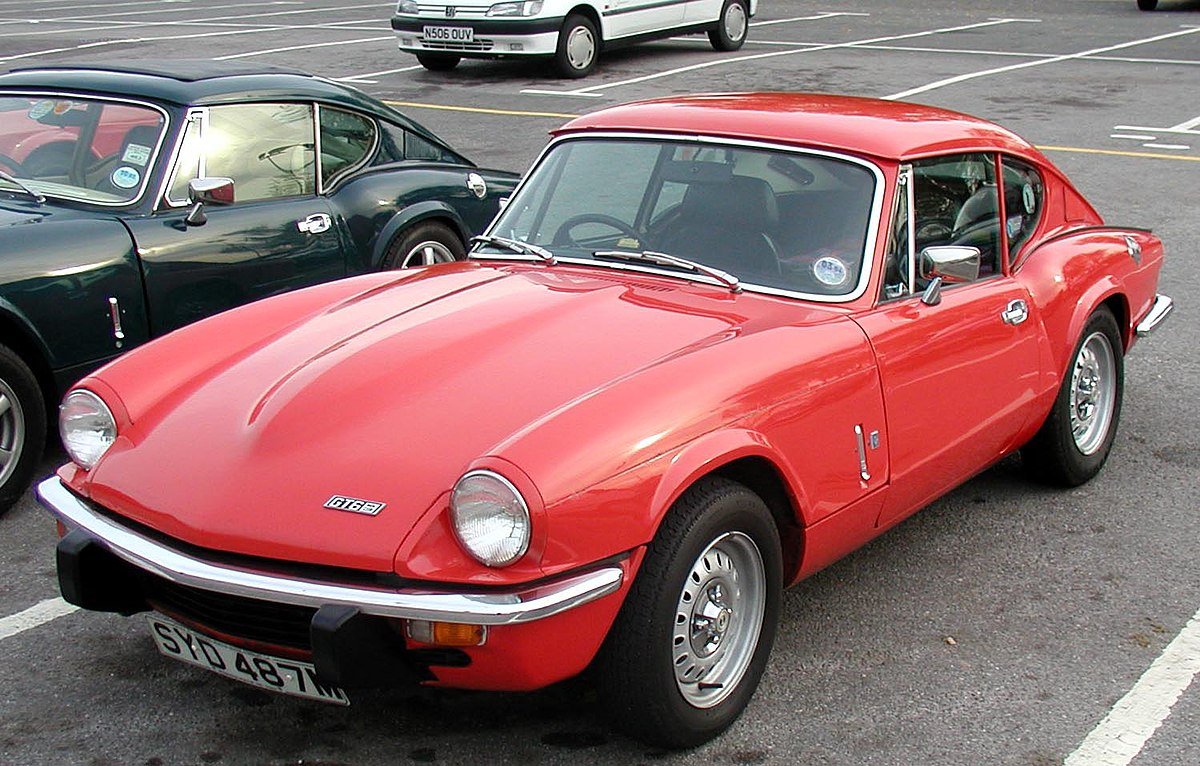
Incidentally, if you don& #39;t know what a Triumph Herald looks like, it looks much like this. Came out in 1959 and was built into the early & #39;70s, I think. Took about a day (30s) to get to 60 mph and had a top speed of 70mph.
And, yes, I& #39;m going to attempt the two-tone paint job.
And, yes, I& #39;m going to attempt the two-tone paint job.
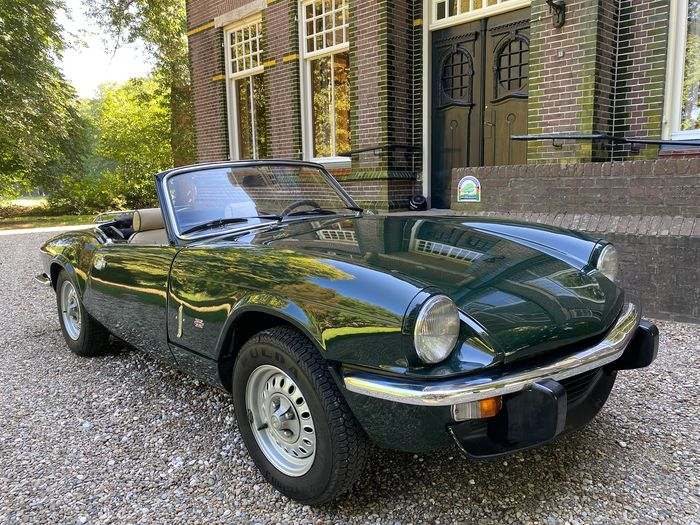
I sort of wish that, if they& #39;re going to do slightly eccentric British cars, they& #39;d do a Morris Traveller. I mean, look at the sweet thing. And, yes, that& #39;s an honest to gods wooden frame, not wood effect. Can& #39;t imagine how to paint convincing wood at 1:32nd scale.
Tonight& #39;s Lesson in Airbrushing: Hey, Jonathan, see that screw thing at the back of the brush that doesn& #39;t seem to do much? It does plenty.
It limits the trigger, so you can adjust it to spray lots or littles. I& #39;d inadvertently got put it at "2 ml of paint will last a week."
It limits the trigger, so you can adjust it to spray lots or littles. I& #39;d inadvertently got put it at "2 ml of paint will last a week."
It took a *long* time to empty the little cup on the airbrush, but I didn& #39;t mind. I found it curiously relaxing to take so long to make a really, REALLY subtle colour change. Slowly, so slowly, the stuff I was priming got paler, and the spray was so fine it was drying in seconds.
So, both the VW Beetle and the Triumph Herald are primed and ready to paint. I& #39;m doing the latter in the suggested red & white, but wasn& #39;t sure about the Beetle, so I asked an actual beetle, and she suggested doing the Beetle *as* a beetle, which is genius.
It& #39;s also well beyond my competence and what my dirt-cheap airbrush can do in terms of fine control. I care naught. I shall assay the attempt. If it all goes horribly awry...
*Looks significantly at the Dettol bottle*
1:32nd VW Beetle: Fuck, no. Not again.
Me: Fuck, yes. Again.
*Looks significantly at the Dettol bottle*
1:32nd VW Beetle: Fuck, no. Not again.
Me: Fuck, yes. Again.
Have I mentioned recently how much I love my cheap airbrush? First coat and it did this with 1ml of paint mixed 50/50 with thinner. It& #39;s darker than I was anticipating, but that& #39;s okay, I& #39;ll press on with enbeetling the Beetle. If it doesn& #39;t work, it& #39;ll still look interesting.
The other intriguing thing about an airbrush apart from the smoothness of the finish is how easy it is to accent the paintwork with paint "shadows" and highlights. It is so easy to add visual interest, it allows even a klutz like me to do a decent job.
Replacement Vampire decals turned up, but I& #39;m chary about starting with them; I was surprised by how upset the last lot disintegrating made me. If this lot fall to bits, too, not sure how I& #39;ll take it. You& #39;ll appreciate by this juncture that there& #39;s an emotional aspect for me.
Instead, I& #39;m working on the faintly ridiculous Triumph Herald. I& #39;m starting to understand acrylic, in this instance just how fragile it is. Thus, I& #39;m getting into the habit of locking coats down with a coat of protective varnish. Just gave it a misting. Tomorrow... THE MASKING.
Misting & Masking, by the way, were the names of a folk duo in the early & #39;70s, charting with such hits as MY BLUE-LIPPED ROSE and THESE WELTS SHALL NEVER HEAL. Misting joined a Shropshire cult that worshipped eggs, and Masking became a Tory MP, later eaten by Margaret Thatcher.
Disconcerting when I try something -- e.g. cleaning a brush full of dried Maskol latex solution in white spirit -- and it not only works, but brilliantly so.
*Braces self for karmic retribution, for I must be punished a 1000 times over for anything that goes right in my life*
*Braces self for karmic retribution, for I must be punished a 1000 times over for anything that goes right in my life*
It begins. Something rolled off the table. I reflexively slapped my legs together to catch it.
Remember that unconscionably sharp probe gadget I used to clean the paint out of the details of the VW Beetle?
Yeah.
And now I& #39;m bleeding.
Remember that unconscionably sharp probe gadget I used to clean the paint out of the details of the VW Beetle?
Yeah.
And now I& #39;m bleeding.
Wish I was exaggerating, but I& #39;ve done myself a mild mischief here. The wretched thing went deep enough to stick. The wound& #39;s nothing, if a bit ready with the claret, but one worries about tetanus. Or one would, except I had my booster about three years ago. Huzzah for vaccines!
Ridiculously excited to be spraying this daft thing up tonight. I shall make a mess of it, I don& #39;t doubt, but I shall have fun doing so.
Still faintly boggled that somebody in the & #39;70s reckoned the market was desperate for a 1959 Triumph Herald construction kit.
"It& #39;s a classic!"
"It& #39;s a classic!"
I mean, if the reason was they& #39;d done a licensing deal with Triumph, why not do a kit of their Spitfire? I& #39;m baffled.
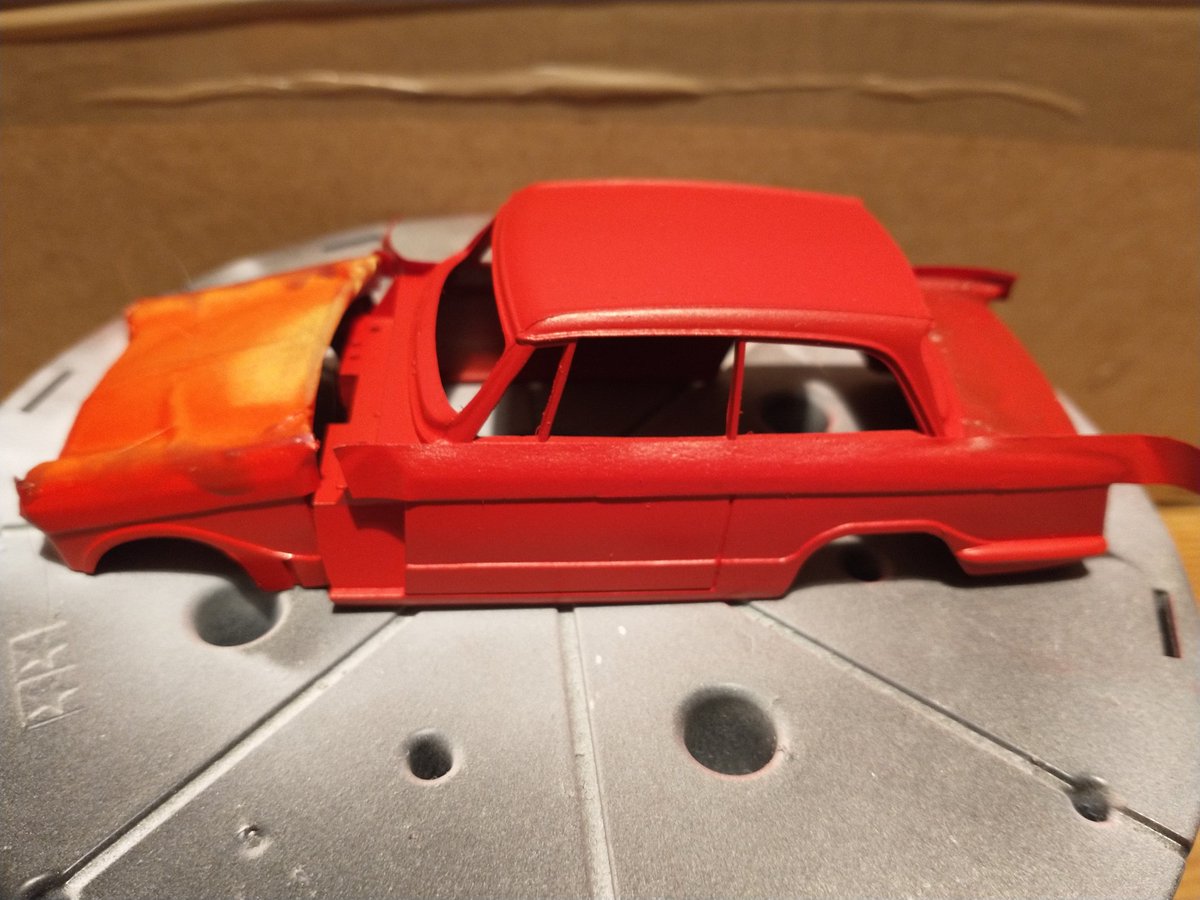
Well, here she lies after two coats. The picture doesn& #39;t do a great job of communicating the colour, which is more of a crimson. Tamiya X-7 Red& #39;s strictly a tiny bit dark for accuracy, so I might use the supplied Humbrol Red acrylic as a final coat to lighten it a bit.
Being of an observant and curious mind, you& #39;re no doubt wondering why the bonnet is a separate bit. Well, because Triumph really liked the idea of being able to get at the whole engine, so they designed it to do this...
The kit does indeed come with its internal engine compartment bits, and you can lift the bonnet to glory in that magnificently underpowered cluster of cylinders, rendered in timeless plastic to enjoy in the comfort of your own home.
Just stopping for a minute for a breather, which is a very relative term when you& #39;re wearing a respirator and can& #39;t be bothered to take it off.
Just stopping for a minute for a wheezer.
Just stopping for a minute for a wheezer.
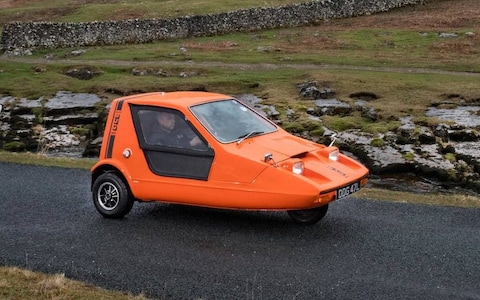
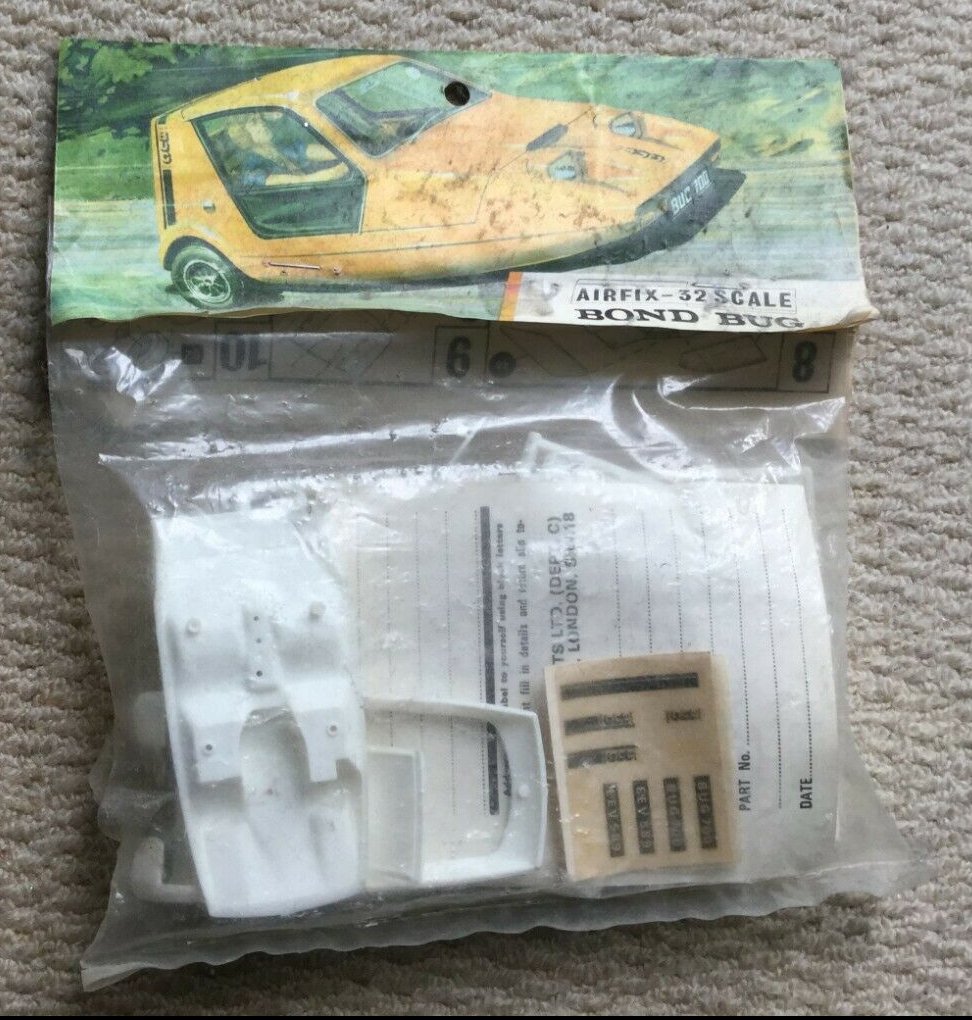
Much of the photo reference I& #39;ve found for Heralds has been taken at enthusiasts& #39; conventions, and bless folk for finding joy where they can, even in odd little runabouts from 1959. Once saw a Bond Bug con at a rugby ground, loads of & #39;em. What& #39;s a Bond Bug, you say? Well...
Got lots of odd little Humbrol paintpots that hold maybe 3cc of acrylic, so -- with misgivings -- I made 2cc of "19" red and Tamiya thinner. The airbrush wasn& #39;t fond of it, but it didn& #39;t splutter and it& #39;s actually given the Tamiya base coats a really nice finish. Unexpected.
Speaking of finishes, I have inured myself to the truth that I& #39;ll never get a flawless finish in my current workspot; the house is small and I& #39;m surrounded by storage boxes. Dust will *always* mar the paintwork. It& #39;s a nuisance, but I& #39;m building for fun, not competition.
I shall perform the unmasking this evening, while lightning flashes and thunder rolls around my mountaintop keep and torch-bearing peasants tell me what I& #39;m doing is "against God and Nature."
I may be overselling this.
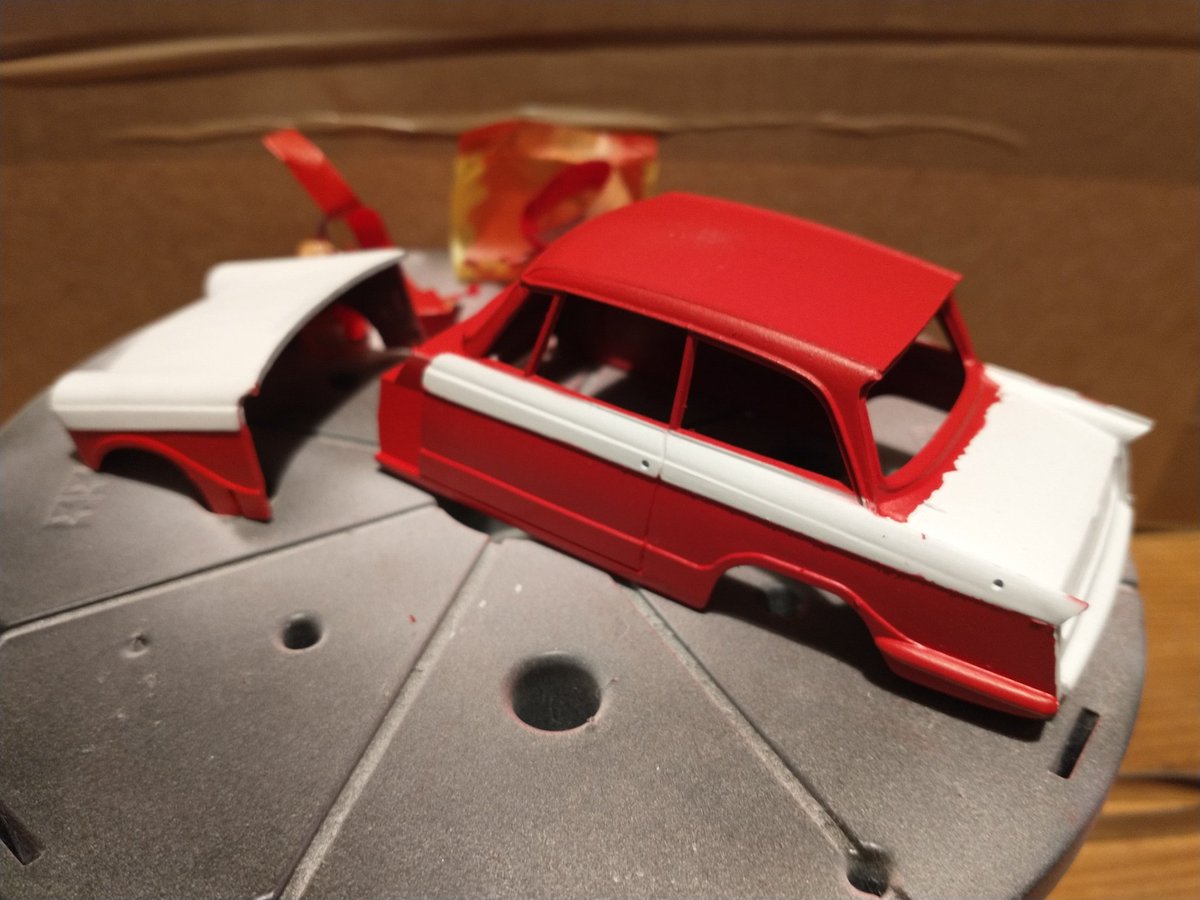
(Mildly frit I ballsed the masking and paint has got in)
I may be overselling this.
(Mildly frit I ballsed the masking and paint has got in)
Well, fancy that. After mentioning Bond Bugs, I had a vague recollection there might have been a model kit back in the & #39;70s and, blow me down, there was. This an Airfix original from a toyshop closure, on eBay for £280 :C
Hey, @Airfix, any chance of a Classics reissue?
Hey, @Airfix, any chance of a Classics reissue?
As expected, not an unalloyed victory, but, where it worked, it worked well. The top of the boot is a disaster, though. Memo to myself: on masking, better to mask more than less. Easy to paint dark on light, but where the red& #39;s leaked onto the white, it& #39;ll be a bugger to cover.
Well, I& #39;d better get competent with masking, as I& #39;m planning to do the Revell DH100 Vampire F.3 in utterly ahistorical (for the Vampire) dazzle camouflage, and that project is going to be masking city.
. @AdamRosserRadio reckons he has a "Pile of Shame" i.e. unbuilt models. Piff! It is as a child& #39;s! Let me share with you what lurks in mine. So these are kits I haven& #39;t started on at all.
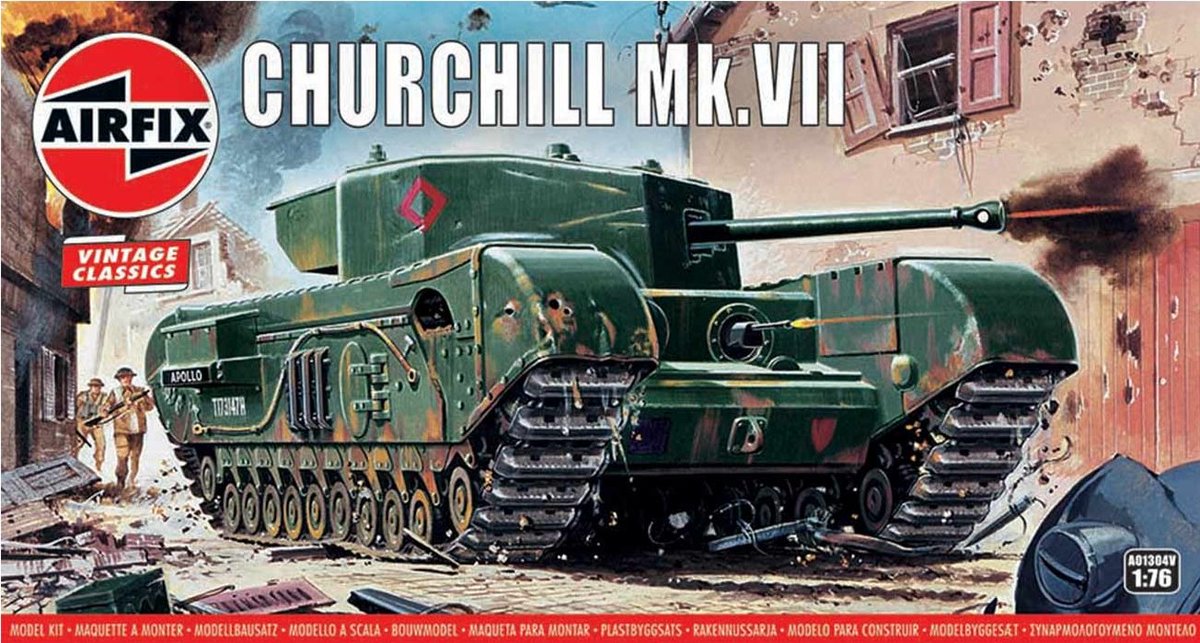
Churchill Mk.VII x 2
Focke Wulf Fw190 A8
Bristol Beaufighter TT.10
De Havilland Vampire F.3
Churchill Mk.VII x 2
Focke Wulf Fw190 A8
Bristol Beaufighter TT.10
De Havilland Vampire F.3
-Heinkel He111 H-6 "Motörhead" edition
-Nakajima B5N2 "Kate" "Surrendered" ed.
-"Forgotten Prisoner"
-Shinkai 6500 research submarine
-GITS SAC Tachikoma
-Kriegsmarine S-Boat
And, providing they weren& #39;t destroyed in house moves...
-"Colossals" Mantis
-Little Nelly gyrocopter
-Nakajima B5N2 "Kate" "Surrendered" ed.
-"Forgotten Prisoner"
-Shinkai 6500 research submarine
-GITS SAC Tachikoma
-Kriegsmarine S-Boat
And, providing they weren& #39;t destroyed in house moves...
-"Colossals" Mantis
-Little Nelly gyrocopter
The first things on that list are two Churchill MkVII tanks. Identical kits. I don& #39;t know why I have two. When my dad died, I wanted a way to do a thing that reminded me of him. He was co-driver in a VII in WW2, so I thought I& #39;d make a kit of one. Never got around to building it.
When we moved house in & #39;17, I found the kit during packing, put it to one side, went into another room... and there on the windowsill was the kit I& #39;d just put aside. I was baffled, but picked it up, put it where I thought I& #39;d put it... and there was already. Two identical kits.
To this day, I& #39;m baffled as to where the other one came from, and how it ended up on the windowsill. I distinctly remember buying one right down to where I found it on the shop shelf. The other? I have no memory of buying it. It still freaks me out a bit.
Ah, and add a Mini Countryman WRC to the list. So, 12 kits altogether, 14 if the "Colossals" Mantis and Little Nelly have survived several house moves.
It comes with a little Brandenburg Gate and its own weenie bit of the Berlin Wall. WHY MUST YOU TORMENT ME LIKE THIS, CASUAL BROWSING?
I have to tell you... well, I don& #39;t, but I& #39;m going to... I don& #39;t have much interest in cars as vehicles, but they fascinate me as artefacts. I& #39;ve discovered that I really like building them. I think it& #39;s that they have broad areas to paint, and that& #39;s a satisfying thing to do.
Sports cars don& #39;t engage me very much, though. They have to have character or I& #39;m not very interested. Ferrari Testarossa...? Whatever.
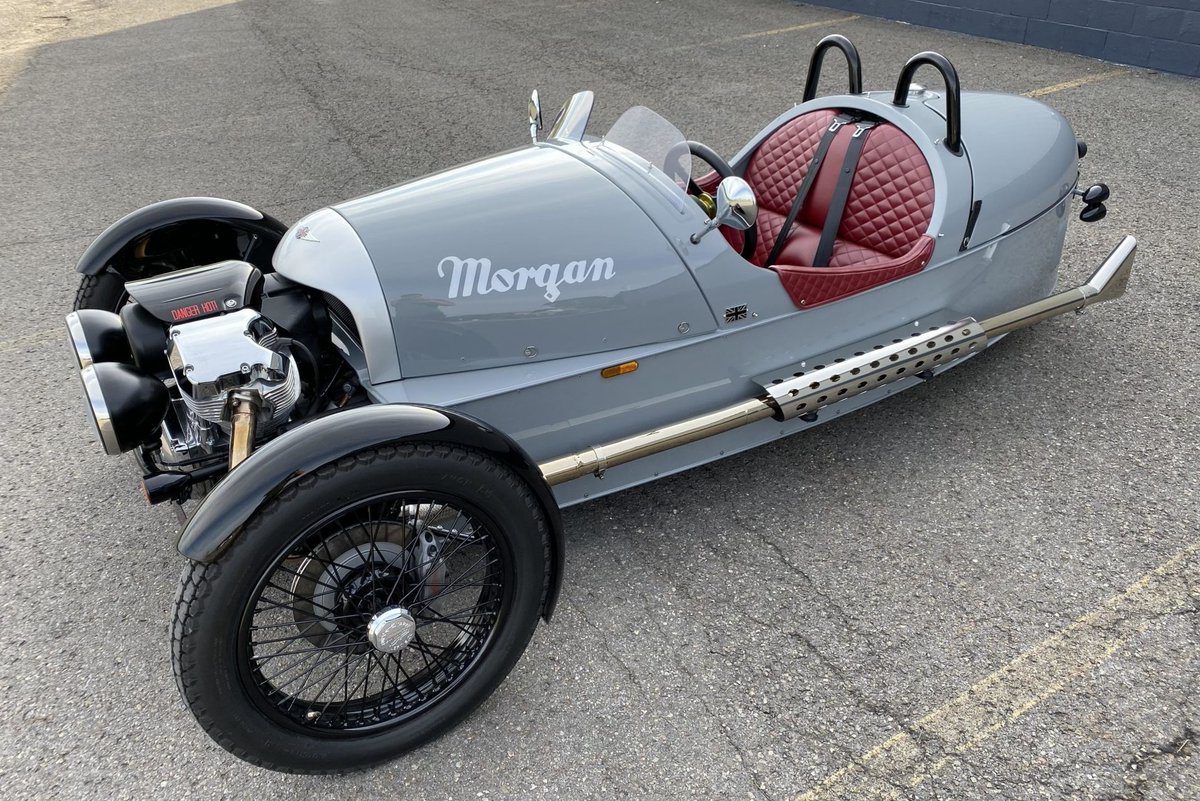
Morgan Three-Wheeler...? Ah, now we& #39;re talking.
Morgan Three-Wheeler...? Ah, now we& #39;re talking.
Anyway, it& #39;s late now and I& #39;m tired. I& #39;m not going to get excited by
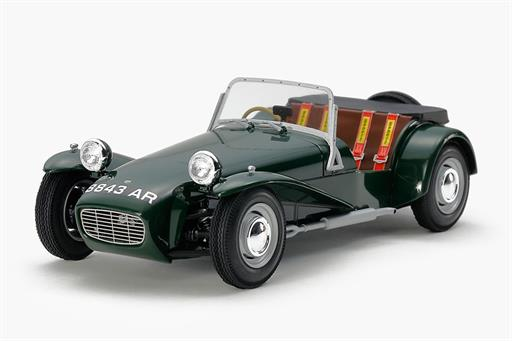
ZOMG TAMIYA DO AN S2 LOTUS SUPER 7 THAT& #39;S NUMBER 6& #39;S CAR OUT OF THE PRISONER ZOMG ZOMG ZOMG GIVE IT TO ME
*reaction sets in*
*passes out*
ZOMG TAMIYA DO AN S2 LOTUS SUPER 7 THAT& #39;S NUMBER 6& #39;S CAR OUT OF THE PRISONER ZOMG ZOMG ZOMG GIVE IT TO ME
*reaction sets in*
*passes out*
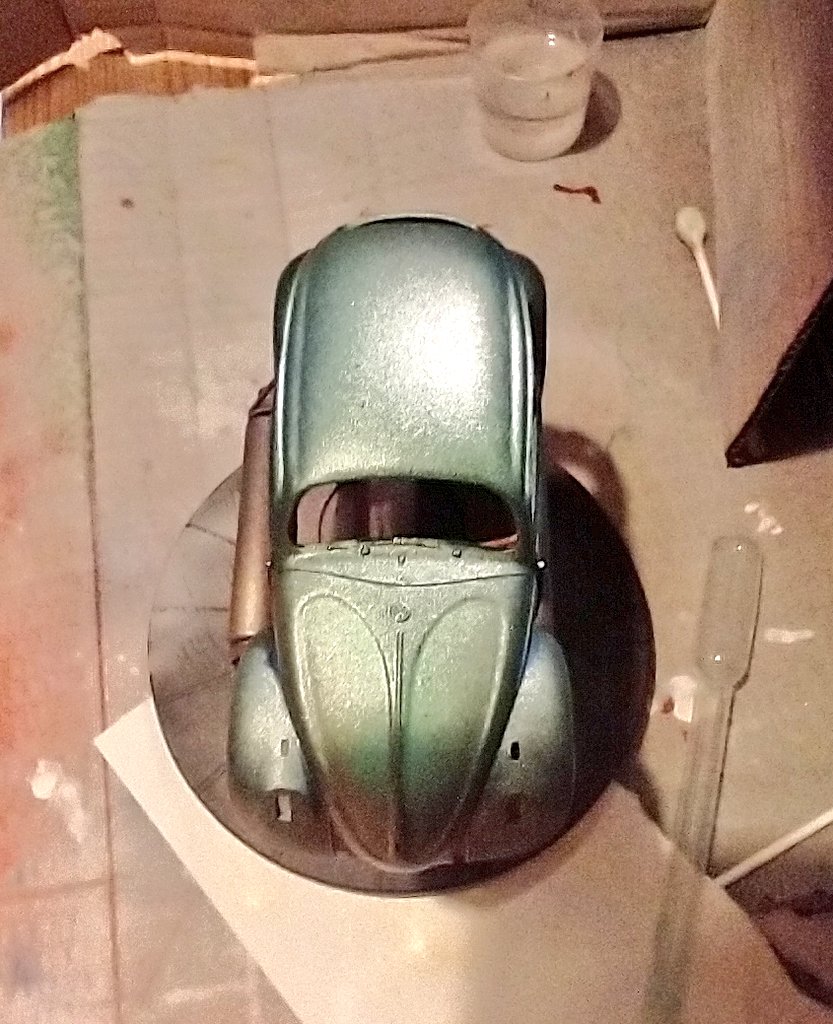
& #39;Tis the Magic Beeptle Beetle, in all its iridescent glory. I don& #39;t actually have any iridescent paints; this is the product of an ungodly number of very thin coats of translucent paint interspersed with light dustings of chrome silver and gold flake paint. It& #39;s taken ages.
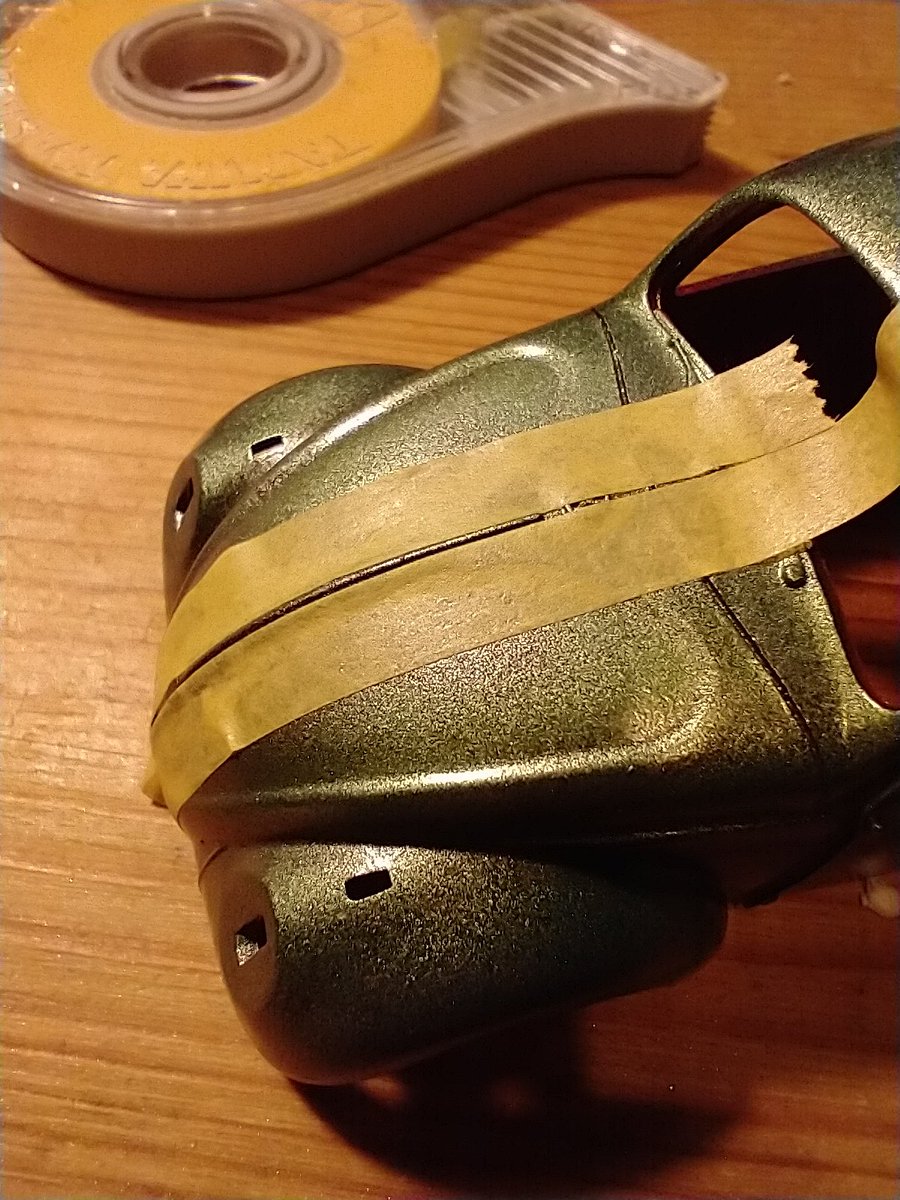
Next step is to lock down this paintjob with a coat or two of gloss varnish, then use a dark green wash to lift the detail (and go some way towards concealing the shortcomings of the masking), then a nerve-wracking hour putting painting the chrome strips on the bonnet and sides.
Varnished and, hey, guess who forgot to put his filter mask on?
*Coughs in fluent idiot*
*Coughs in fluent idiot*
I& #39;ve washed me sprues in warm, soapy water.
In keeping with the iridescent coleoptera-hippiness of the exterior, I& #39;m giving the VW blue carpet, a red interior, pale wood dashboard, and park green seating with golden sporkles. That might sound headache inducing to you, but an interior like that would make me happy.
An experiment in using a wash to pull up the detail in the dash was a failure; it just ended up looking dirty. But, I cleaned it up a bit, left a "shadow" of wash along the upper edge, and will dib chrome on the control knobs. Good enough for an obscured inner feature.
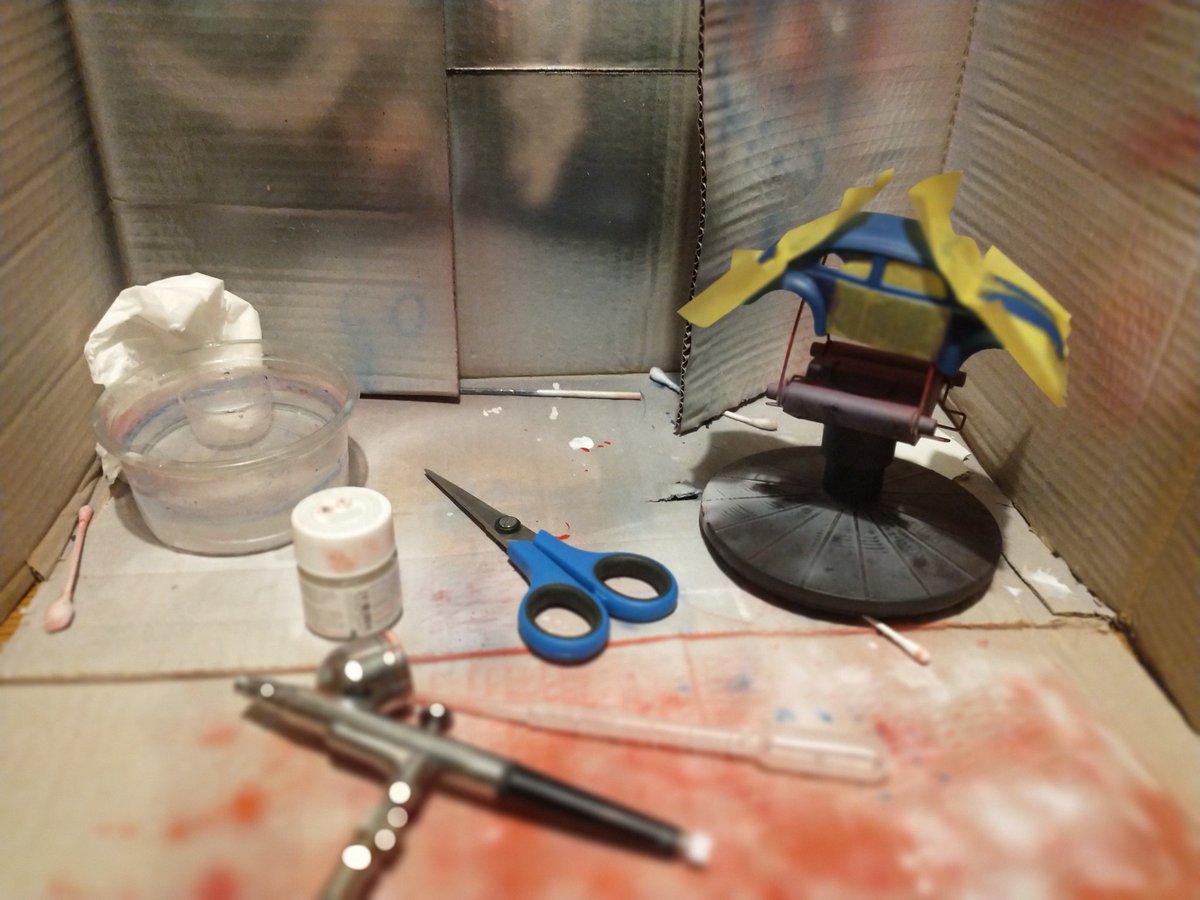
My top-end, state-of-the-art painting cabinet (an old Amazon box) is looking a bit weary. It& #39;s given sterling service, but I think it& #39;s about time to find a replacement so this one can go to that Great Recycling Centre in the Sky.
Also, I think this is quite a pretty still life.
Also, I think this is quite a pretty still life.
When I am World Emperor, all* upholstery shall be in green with a golden sheen. So nice.
*Unless you& #39;re weird and want it in a different colour, in which case okay. I& #39;m not going to execute people for making bad furnishing decisions I shall be a very tolerant World Emperor.
*Unless you& #39;re weird and want it in a different colour, in which case okay. I& #39;m not going to execute people for making bad furnishing decisions I shall be a very tolerant World Emperor.
That bit in a rural horror film where the townie protagonists stumble into a clearing in the woods where there are a load of assorted totems and fetishes and weird markings, and they finally realise how deep in the shit they are.
Me: I& #39;m really happy with this paintjob. Now to add the <1mm chrome strips.
Also me: ARE YOU COMPLETELY INSANE YOU& #39;RE A KLUTZ YOU& #39;LL RUIN IT
Me: I& #39;ll mask it.
Also me: YOU? YOU ARE TERRIBLE WITH MASKING IT& #39;S TOO DELICATE YOU CANT DO IT
Me:
Also me: ARE YOU COMPLETELY INSANE YOU& #39;RE A KLUTZ YOU& #39;LL RUIN IT
Me: I& #39;ll mask it.
Also me: YOU? YOU ARE TERRIBLE WITH MASKING IT& #39;S TOO DELICATE YOU CANT DO IT
Me:
Well, that didn& #39;t work perfectly, although not a total disaster. I was applying the chrome using a Molotow pen, but the ink is dissolved in alcohol, which - ever so amusingly - dissolves varnish and paint very effectively. Slight damage to the finish, but I can live with it.
One thing model building has reminded me is that perfection is the enemy of getting owt actually finished. Every mistake teaches me something, and I will get better. So, slight damage to the paint, but at least the blue beneath was unbreached and melds with the upper green.

 Read on Twitter

 " title="respec mah authoritayYeah, yeah, me and my thirst traps. See you in your dreams https://abs.twimg.com/emoji/v2/... draggable="false" alt="💕" title="Zwei Herzen" aria-label="Emoji: Zwei Herzen">" class="img-responsive" style="max-width:100%;"/>
 " title="Just put the cockpit in and dry assembled the fuselage to make sure it all goes together. You will note that it& #39;s literally impossible to see the forward bulkhead (it& #39;s behind the instrument panel). Soooo glad I spent time painting the invisible thing https://abs.twimg.com/emoji/v2/... draggable="false" alt="🤨" title="Gesicht mit hochgezogener Augenbraue" aria-label="Emoji: Gesicht mit hochgezogener Augenbraue">" class="img-responsive" style="max-width:100%;"/>







 " title="First coat. Patchy, inexpert, bad. I couldn& #39;t be prouder https://abs.twimg.com/emoji/v2/... draggable="false" alt="😁" title="Grinsendes Gesicht mit lächelnden Augen" aria-label="Emoji: Grinsendes Gesicht mit lächelnden Augen">" class="img-responsive" style="max-width:100%;"/>

