Waterproofing lesson spurred on by @lacrosse_al
https://twitter.com/lacrosse_al/status/1292934593855672320?s=20
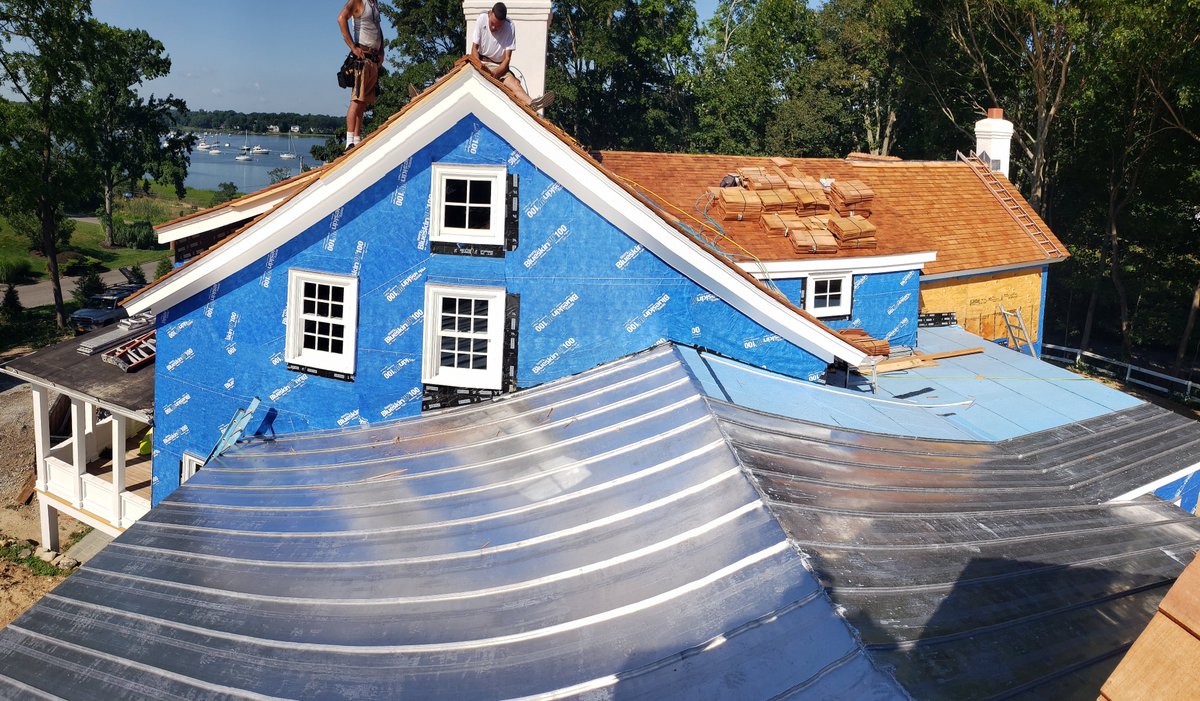
Some">https://twitter.com/lacrosse_... of you know I& #39;ve been involved in renovating a house built in 1720 in the village of Poquotte NY. The homeowner is also a builder and insists on very high quality so I get to show off my skills.
In this thread we will learn the proper way to install flashing around a chimney in the middle of a pitched roof.
The type of roofing is irrelevant to the flashing details-which has everything to do with keeping the water out.
It can be asphalt shingles, wood like here, or metal.
The type of roofing is irrelevant to the flashing details-which has everything to do with keeping the water out.
It can be asphalt shingles, wood like here, or metal.
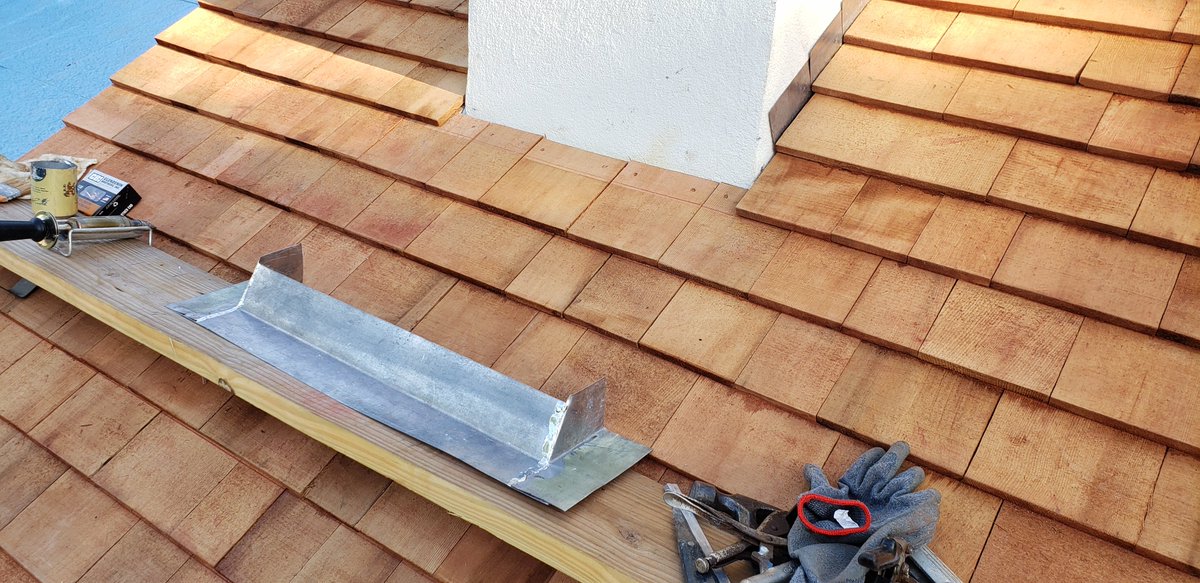
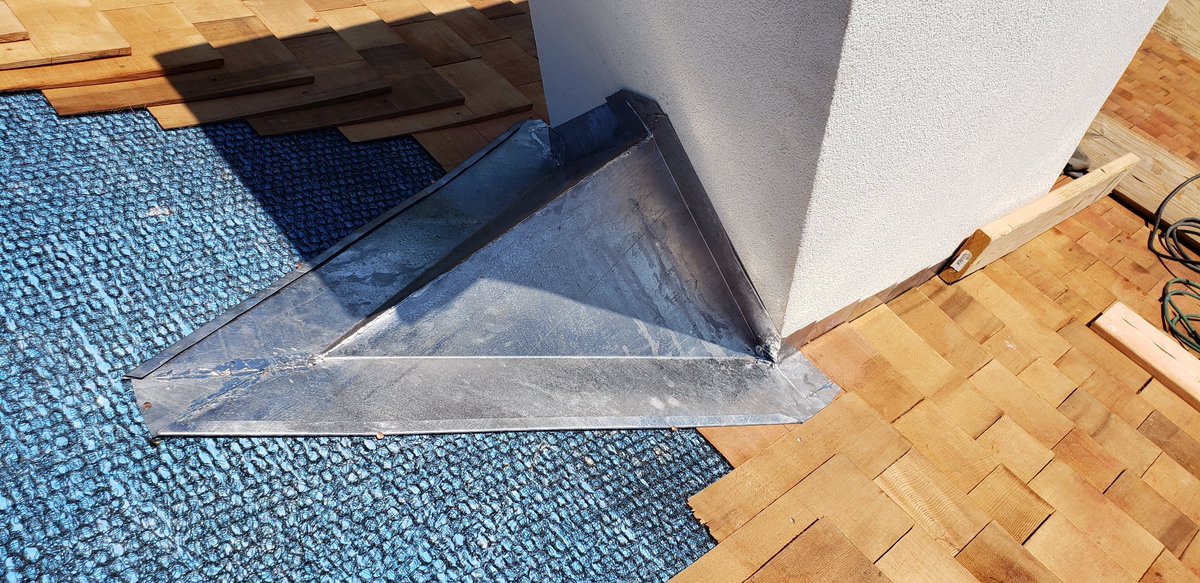
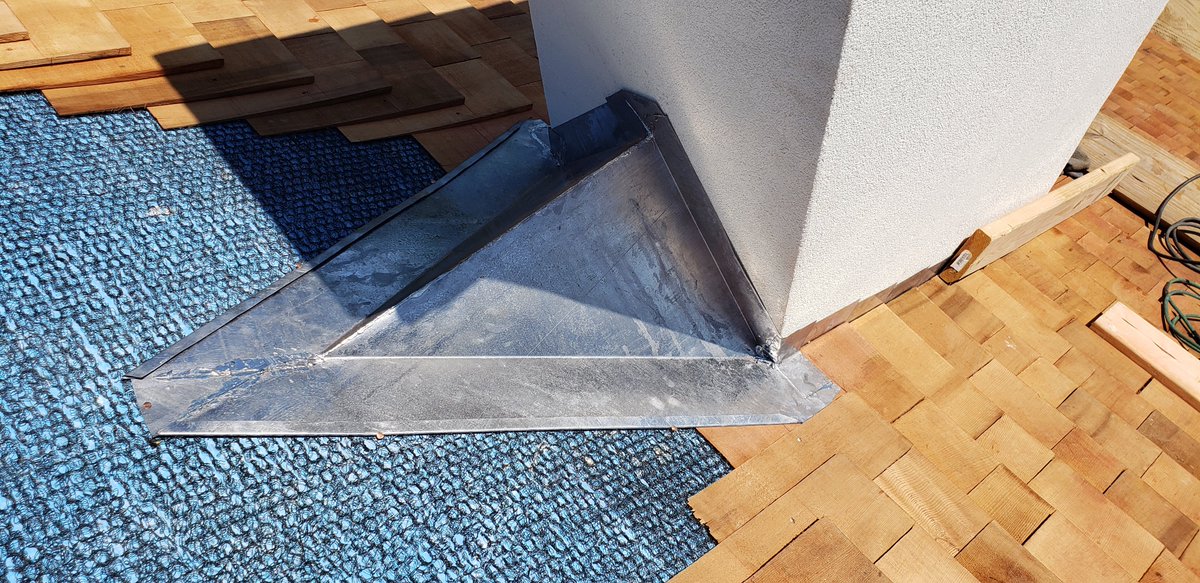
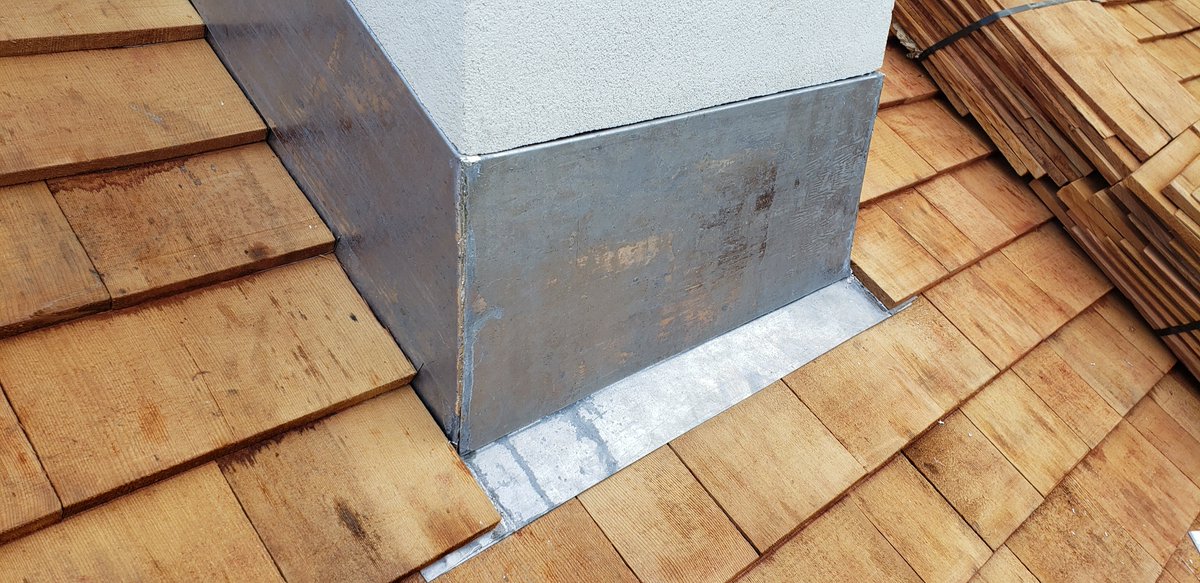
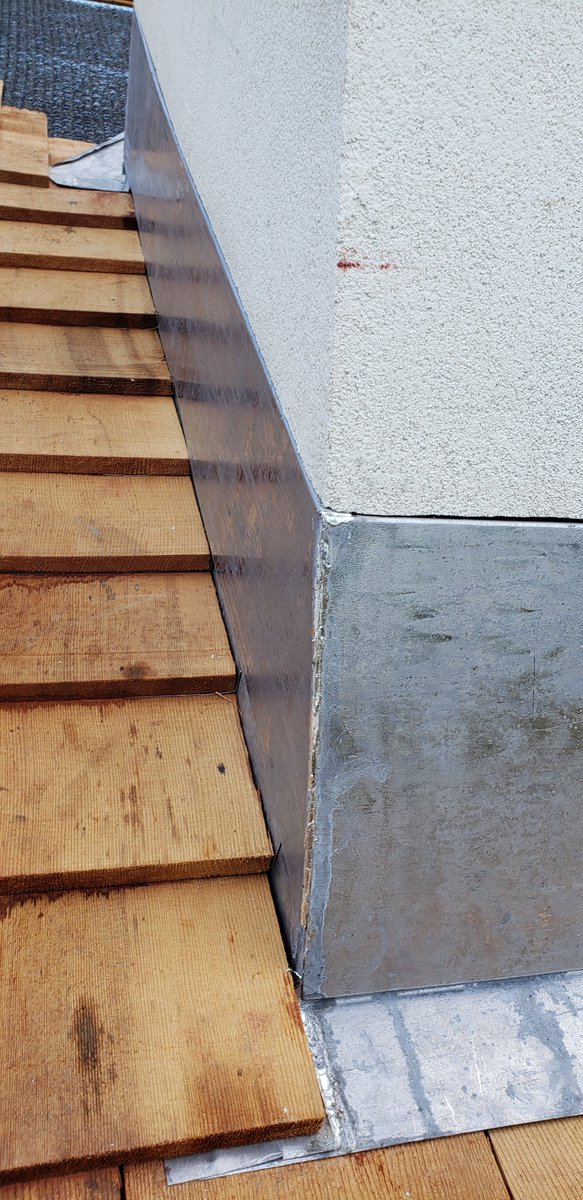
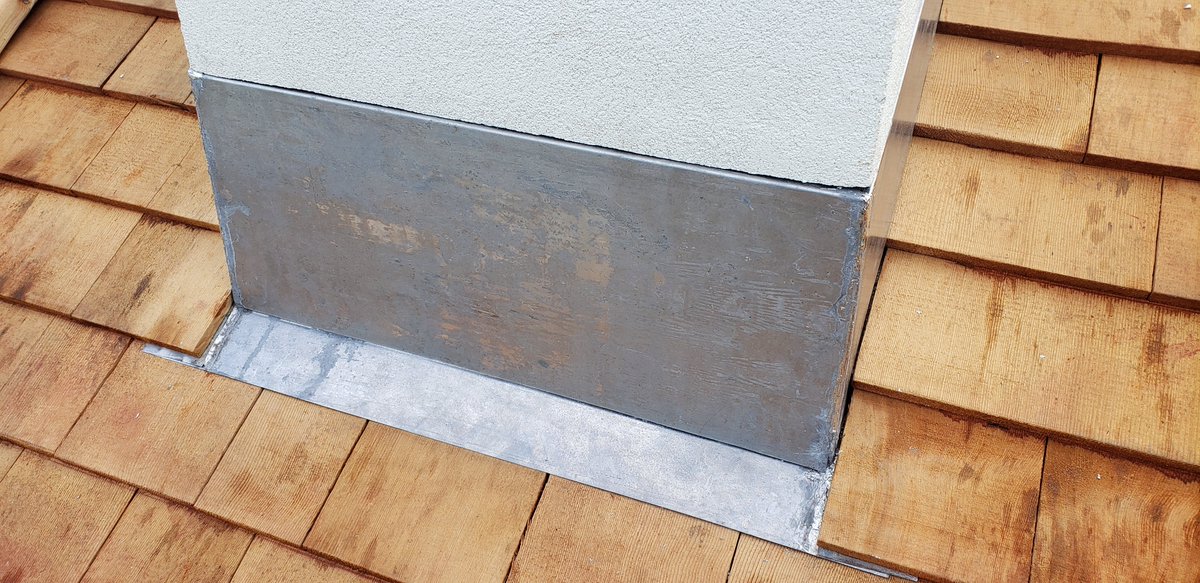
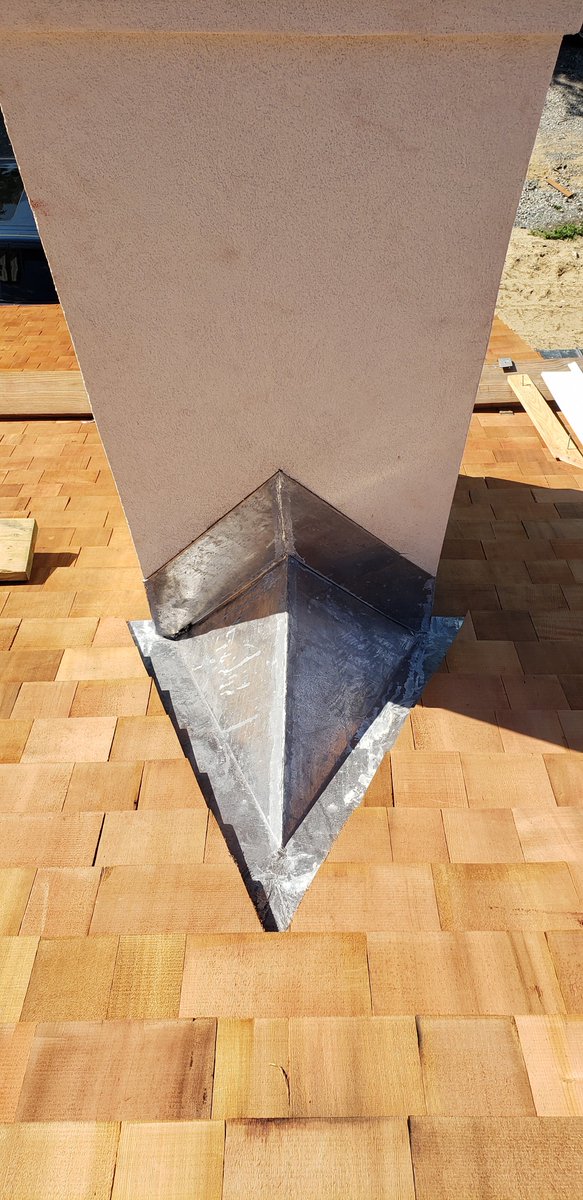
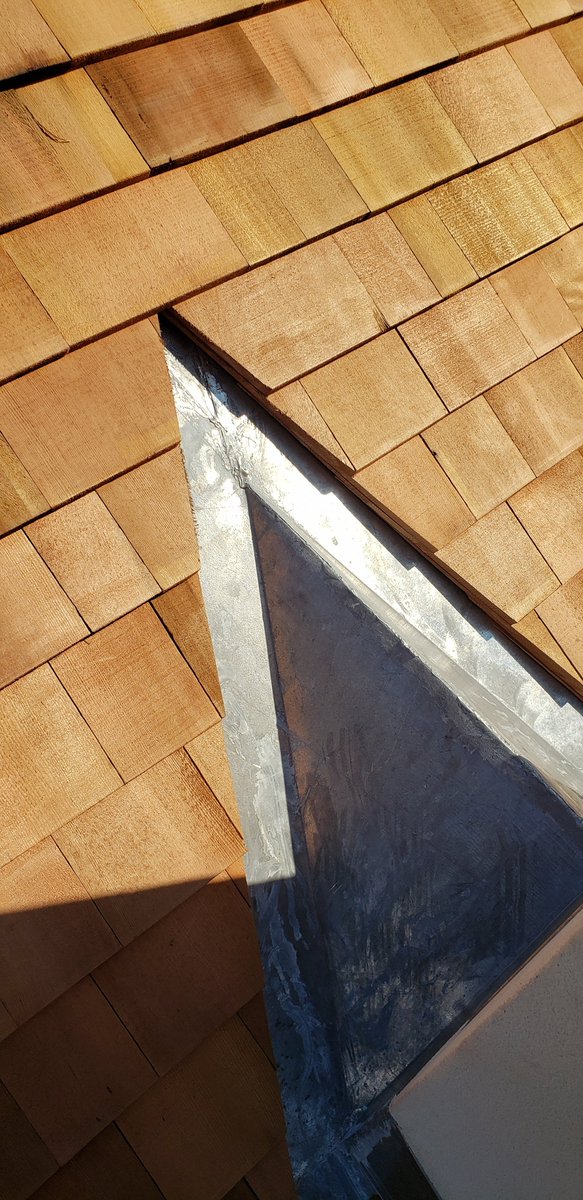
Starting with the apron flashing at the bottom. The metal (lead coated copper) is made in 3 pieces- 1 apron and 2 step flashings soldered together to make 1 solid apron flashing. It is cut and installed with the wood shingles but not nailed. We slid it out to solder the corners.
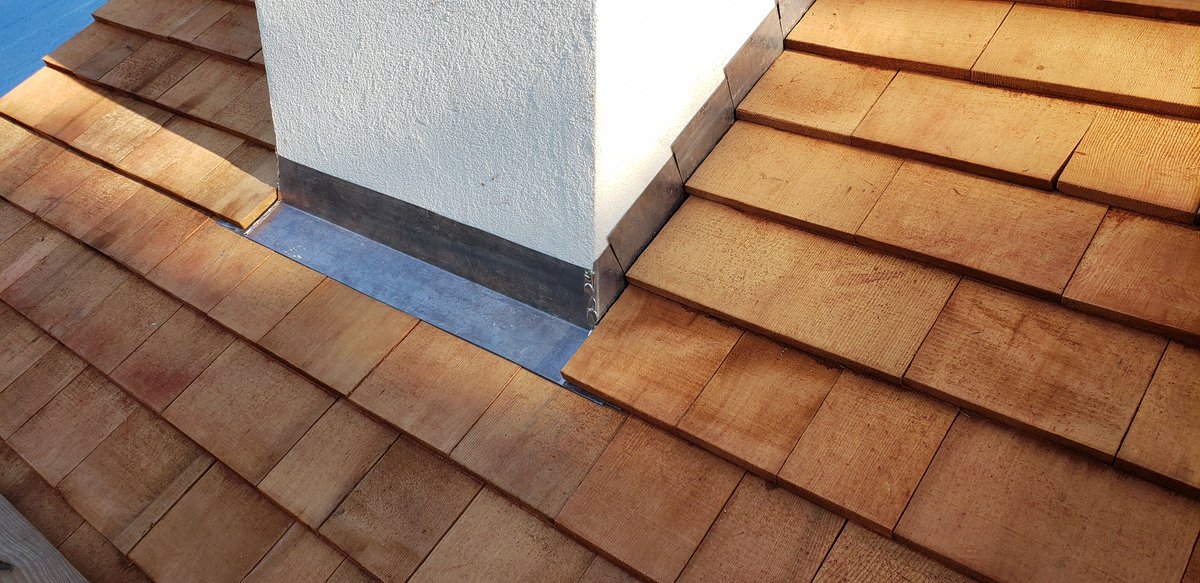
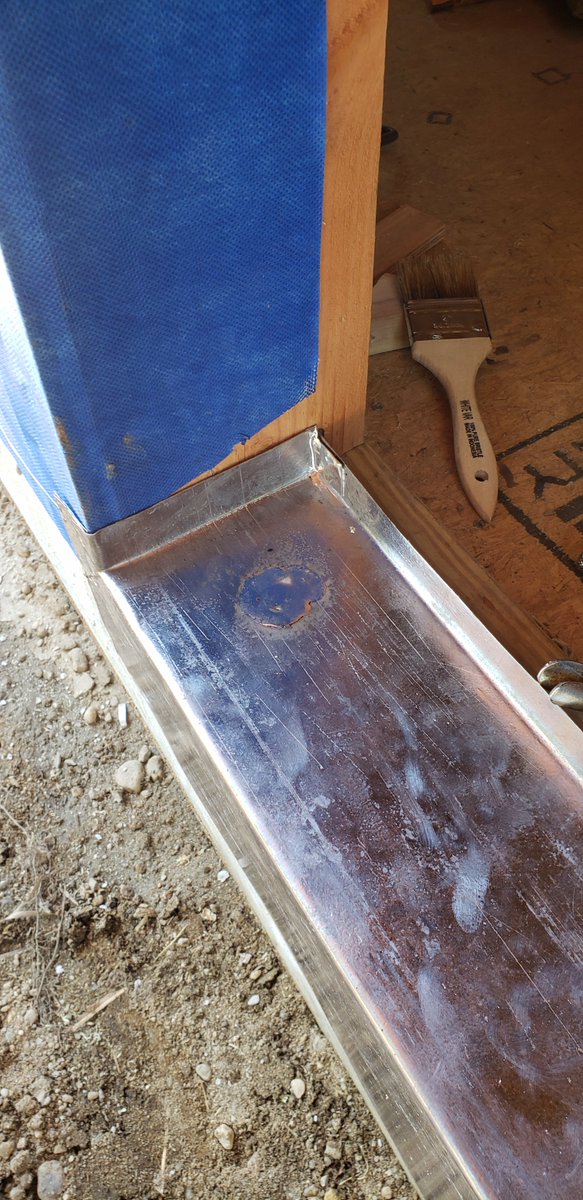
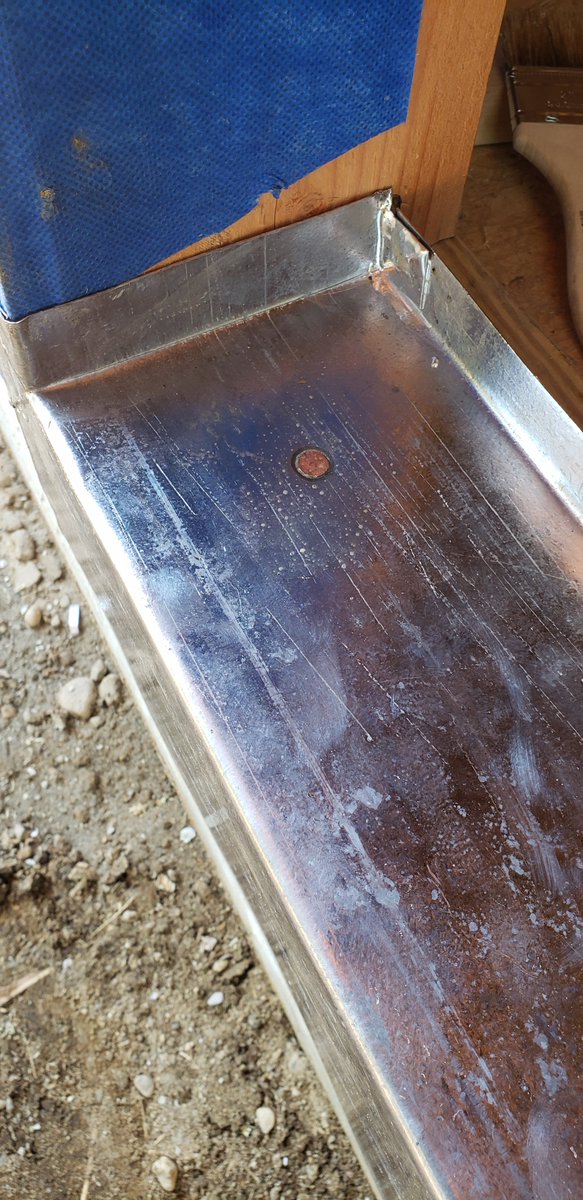
Once installed we face nail the exposed flange and solder over the copper nail heads to seal them forever. If you use any metal other than copper (or lead coated) the only way to seal the metal is with caulk that is guaranteed to eventually fail- a major source of leak damage.
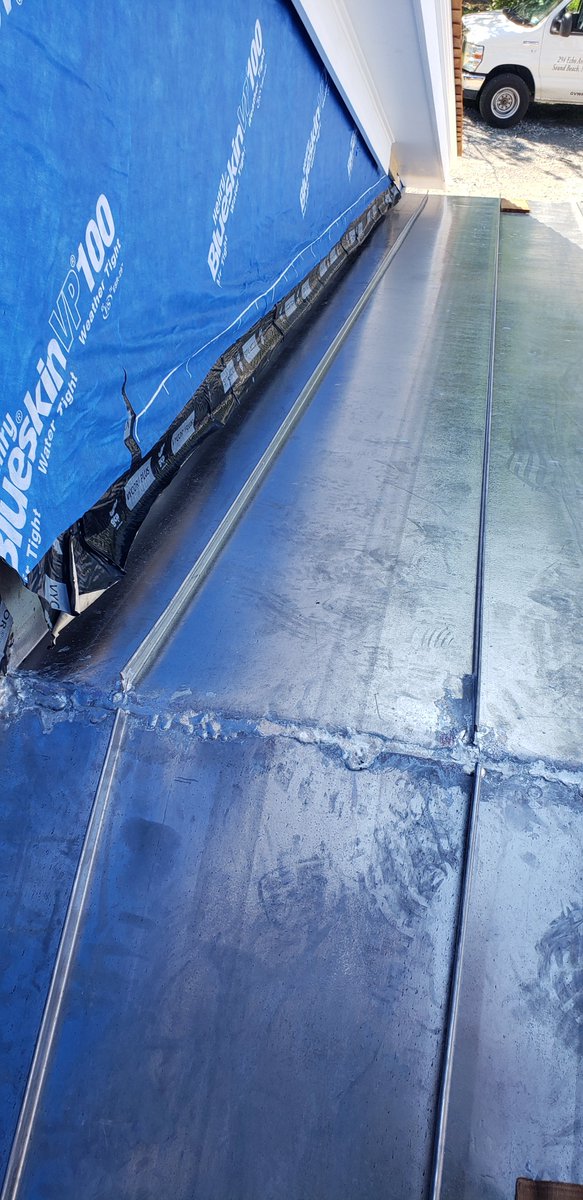
The last 2 pics are from a pan installed under a new door that show the copper nails being sealed. Door saddles are a major source of water infiltration after many years of use. The seals fail where the jambs meet the saddle and without a pan under, water gets to the framing.
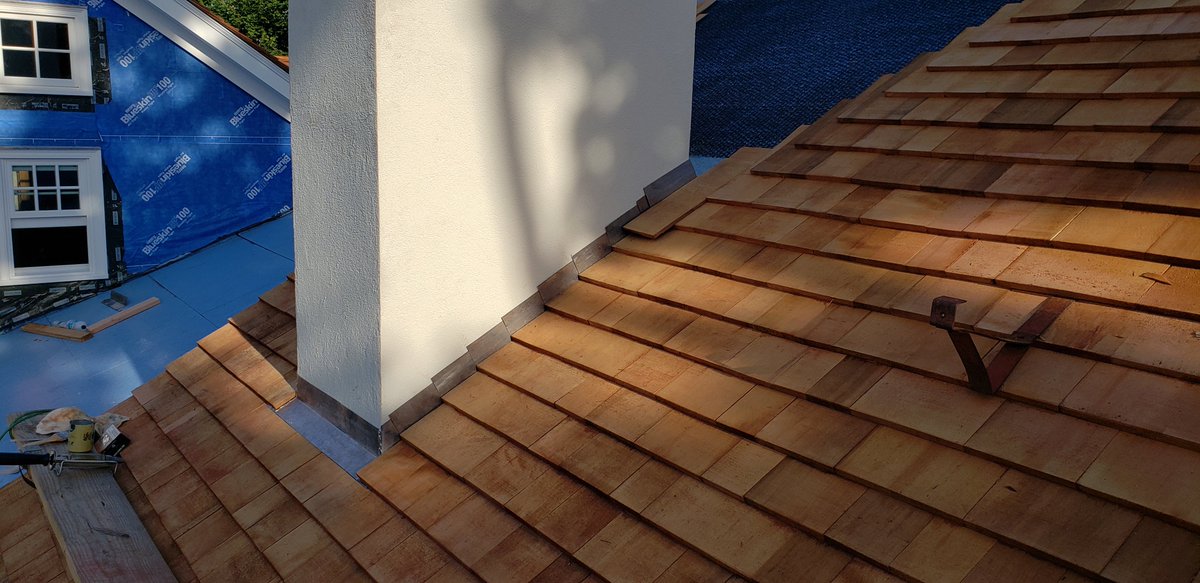
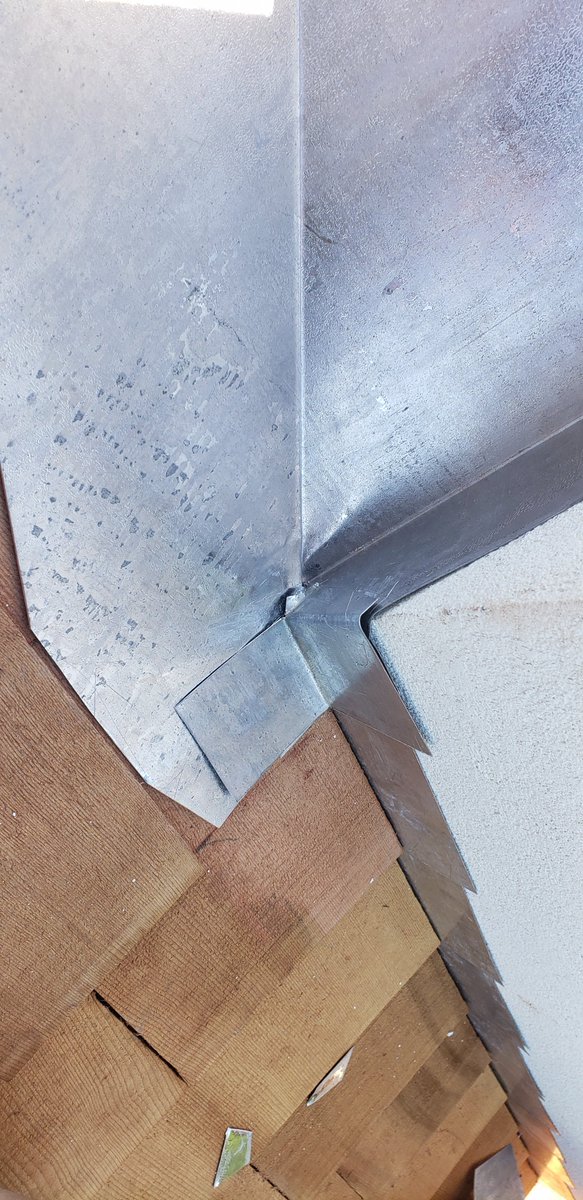
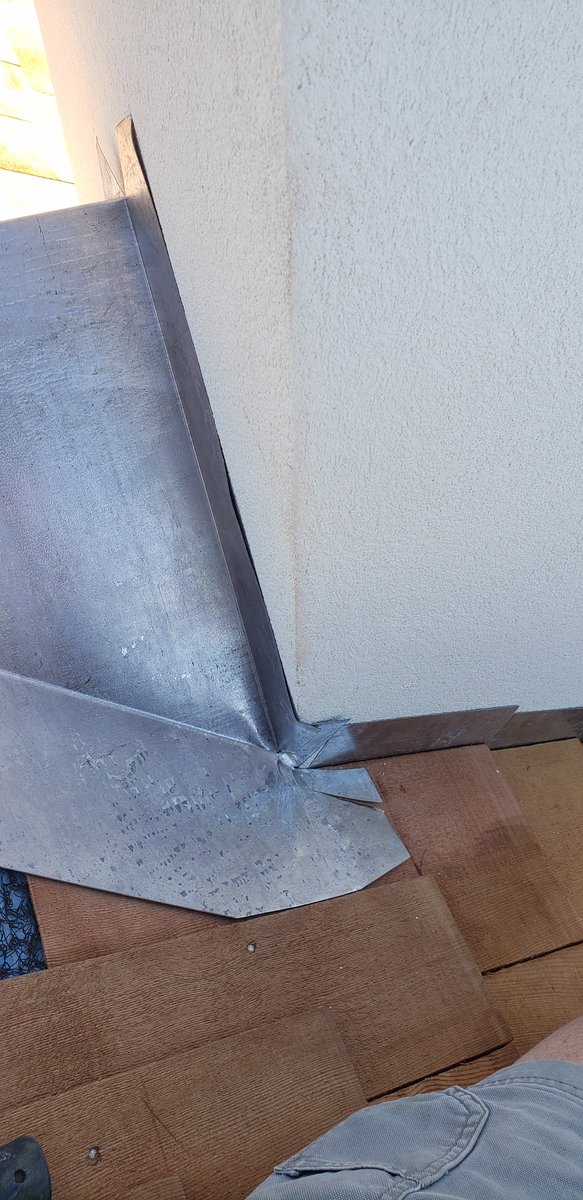
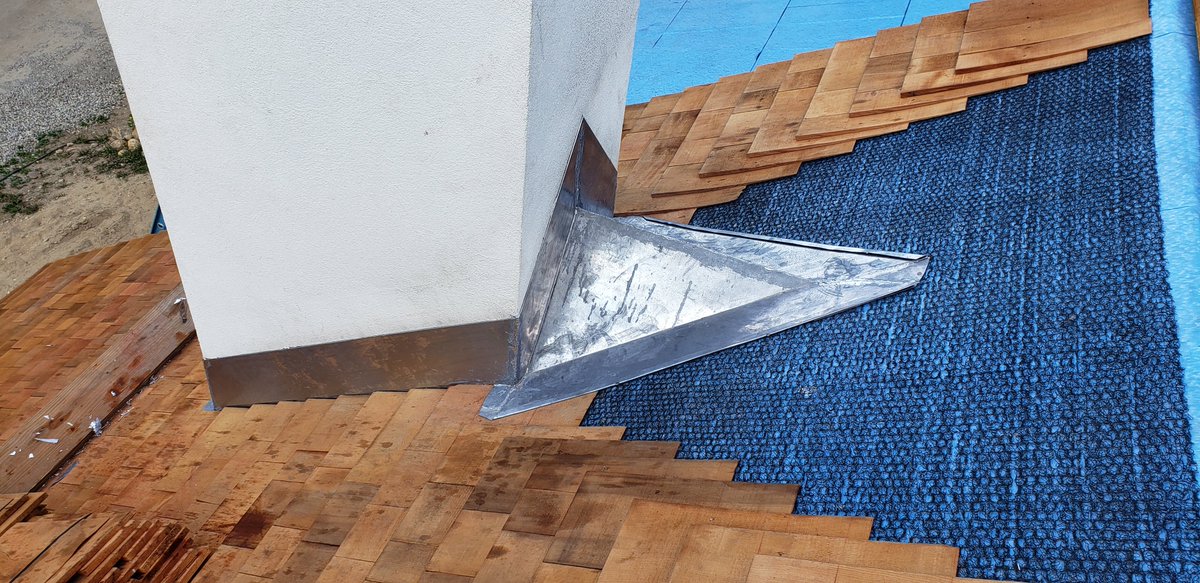
But I digress. In the 1st pic below you can see at the back of the chimney- our cricket is not yet installed. A cricket is a mini roof behind the chimney that diverts the water around it so it won& #39;t puddle up. In our case, we made it out of plywood and covered in metal.
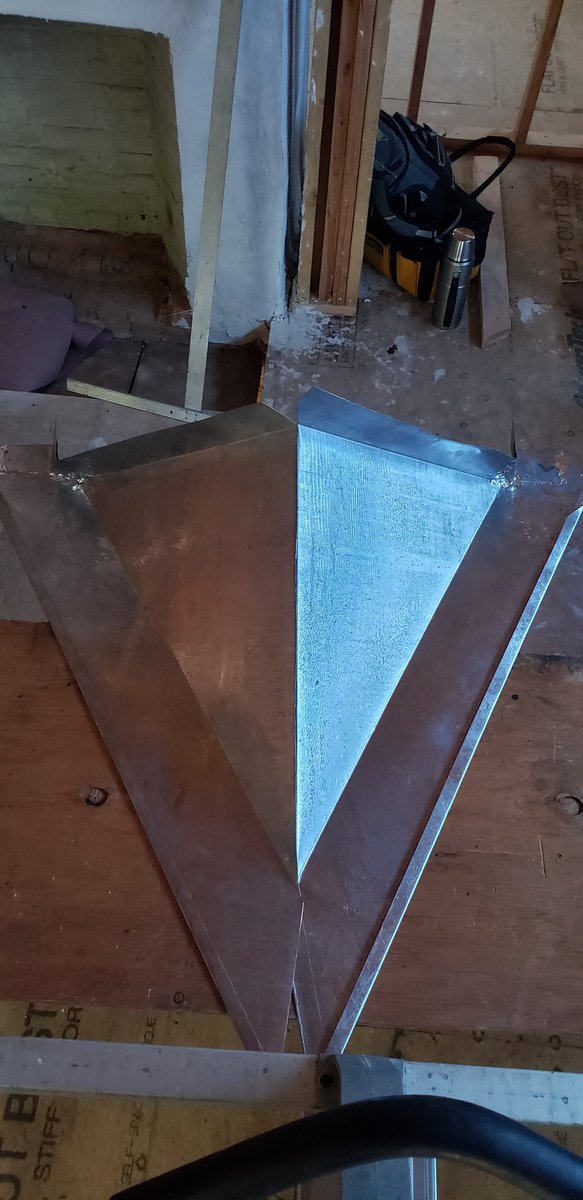
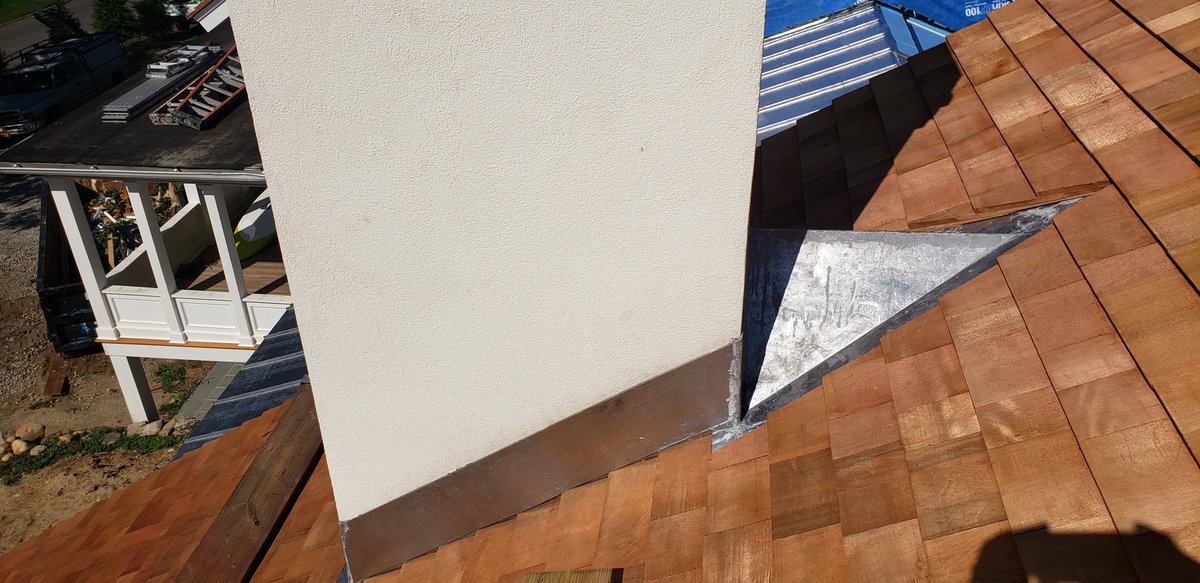
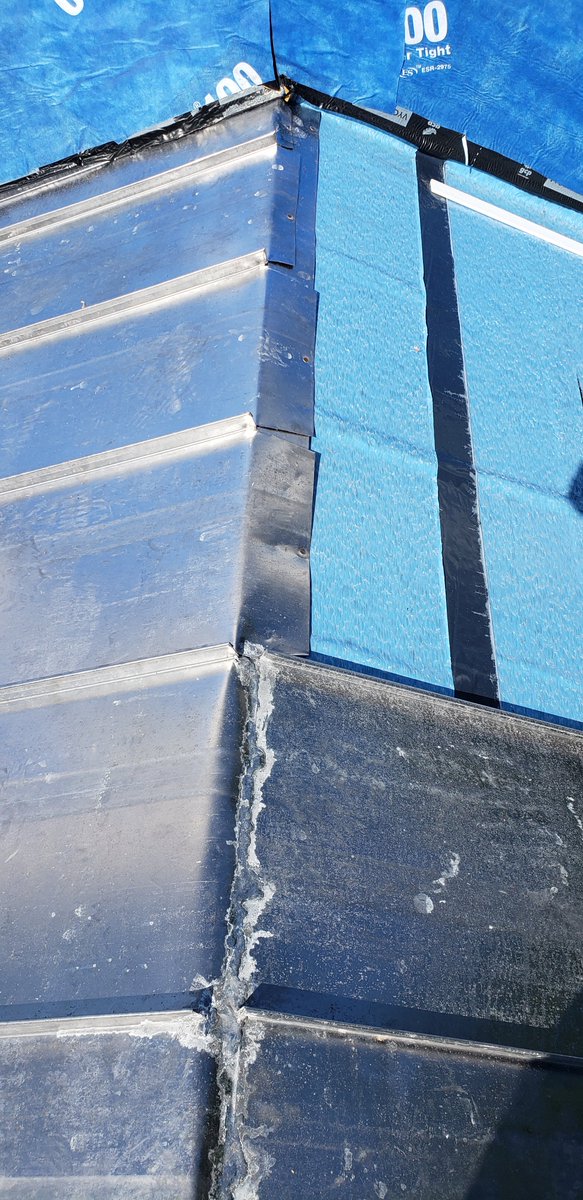
Whenever you bend metal and try to wrap it around something, you must make relief cuts and seal them up. that very large and complicated cricket metal was 1st shaped, then wrapped around the corners, then soldered.
That cricket flashing also has to be installed at the exact course line of the wood shingles or the layers won& #39;t sit correctly. Once done, the wood shingles can continue. But we& #39;re not done with flashings yet. See that top edge of all those nice pieces, they are all vulnerable.
No chimney flashing is complete without a counter flashing to prevent water from just going behind all that great work. On this job, we cut a groove into the chimney to set our counter flashing (know as a reglet). We used a 2x6 as a guide to keep our cut looking straight.
Once cut all around, we install the counter flashing and solder all the corners. Remember that apron flashing we started with? I never face nailed it because I realized the counter flashing in this case will prevent it from ever sliding out so no issues.
The groove that the reglet metal went in will get a tiny bead of silicone caulk. It wouldn& #39;t leak without it but we do it anyway because why not? Looks good also.
One of the keys here is that there is no relying on sealants that can fail. As long as the water flows down, all good
One of the keys here is that there is no relying on sealants that can fail. As long as the water flows down, all good
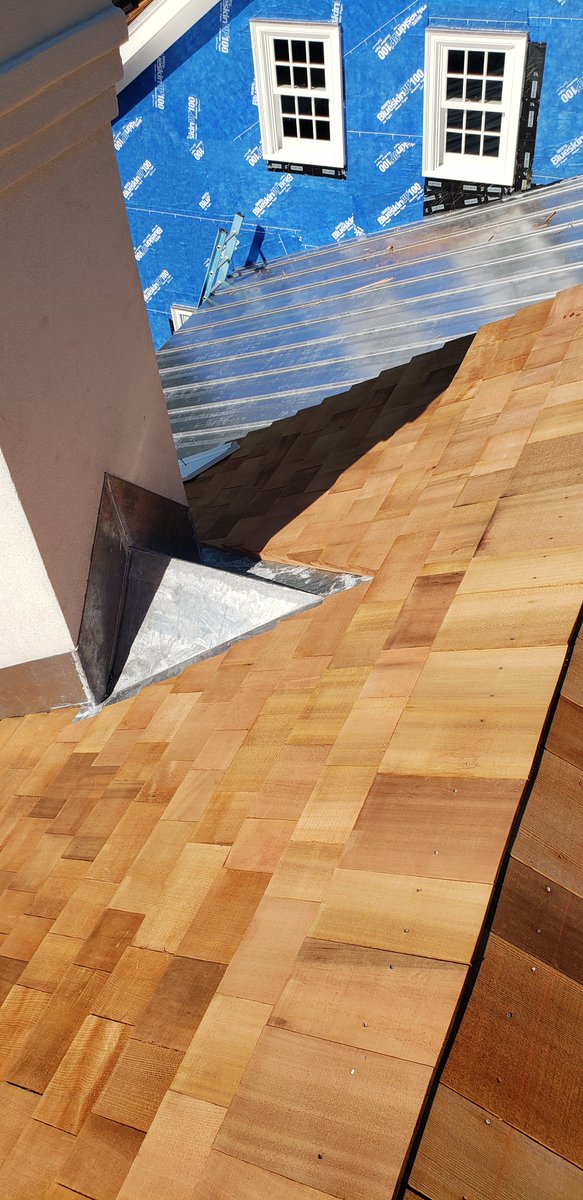
Bonus metal work.
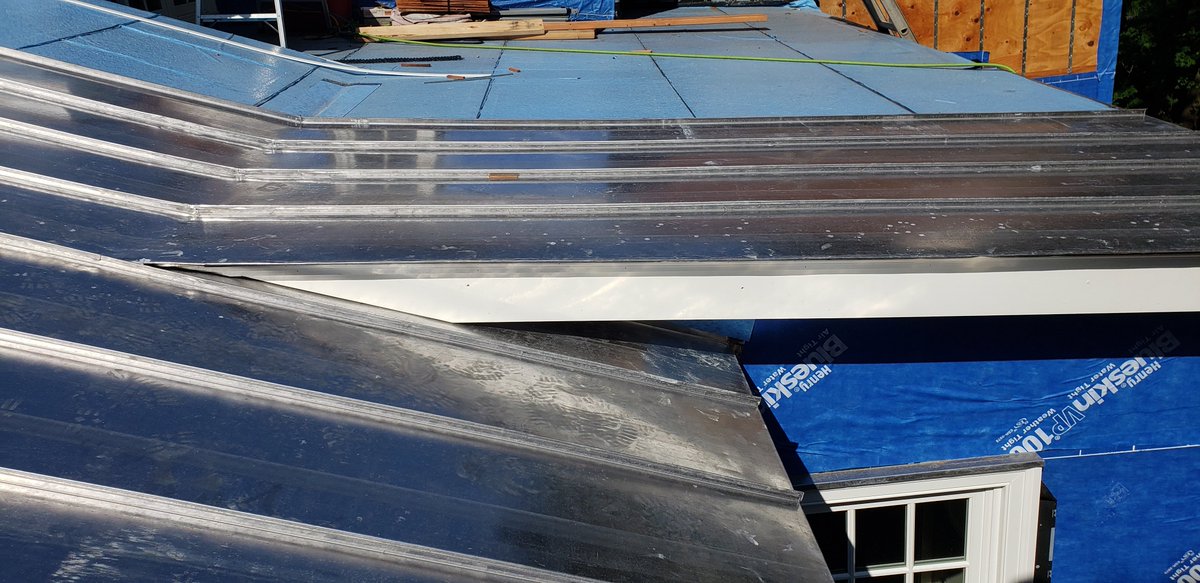
We have some serious metal work on other parts of the roof- all of it lead coated copper (very expensive but among the best roof you can have). Unfortunately the metal roof guy can& #39;t solder for shit. Luckily it will never leak & you can& #39;t see it from the ground.
We have some serious metal work on other parts of the roof- all of it lead coated copper (very expensive but among the best roof you can have). Unfortunately the metal roof guy can& #39;t solder for shit. Luckily it will never leak & you can& #39;t see it from the ground.
Hit me up with any construction questions and I& #39;ll do my best to steer you in the right direction. I hope you all had fun learning about metal flashings. I& #39;m sure you had nothing better to do today anyway so... thanks for your participation.  https://abs.twimg.com/emoji/v2/... draggable="false" alt="😁" title="Grinsendes Gesicht mit lächelnden Augen" aria-label="Emoji: Grinsendes Gesicht mit lächelnden Augen">

 Read on Twitter