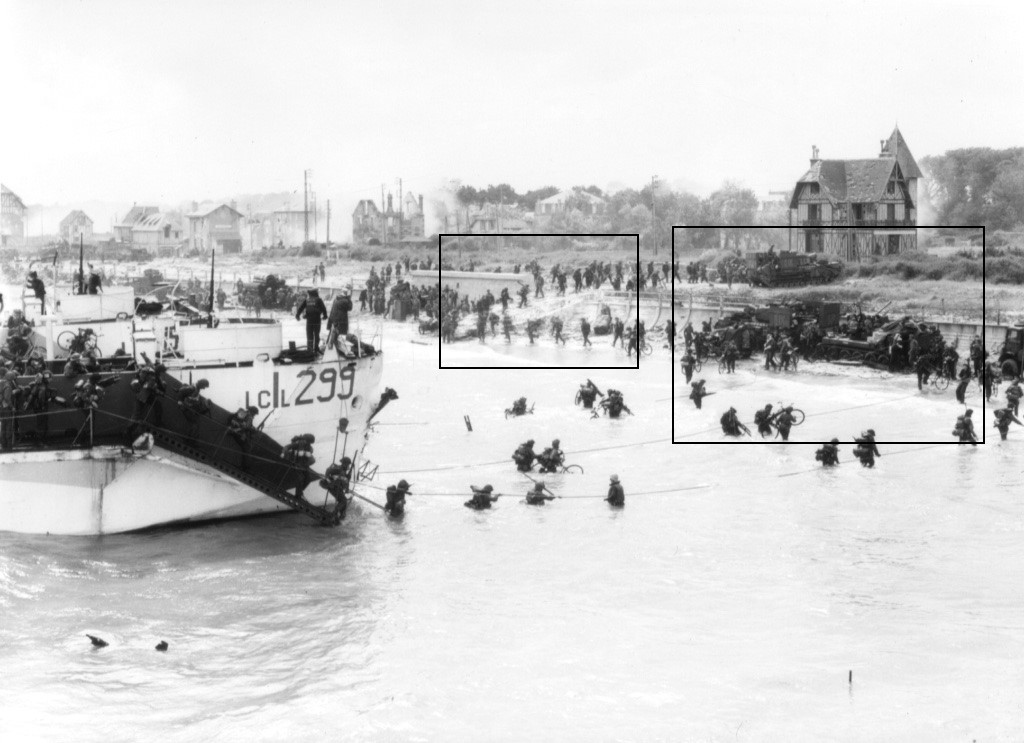
One of the more famous pictures from D-Day, looking east along & #39;Nan White& #39; on Juno, showing the 9th Canadian Infantry Brigade landing at about 1140. Some may be unaware that the picture also reveals evidence of a drama that took place 3 hours earlier, marked by the boxes. 1/12
1 Troop 80 Assault Sqn Churchill AVREs, with a 22nd Dragoon Sherman flail, were to clear an exit from the beach west of Bernieres. The plan was to flail to the 5 foot high seawall and place the SBG against it. A ditch beyond this would need to be filled with a fascine. 2/12
The LCT (1408) was loaded to reflect this task – Flail, AVRE with log carpet, AVRE with SBG, AVRE with fascine. 1408, touched down at 0815, 30 minutes later than planned. (A Company of the Queen’s Own had landed a few minutes earlier to the west and B Coy to the east). 3/12
Water surrounded the obstacles and there was enemy fire but the LCTs manoeuvred between the obstacles and landed safely. The lane commander, Lt Saunders in the log carpet AVRE, ordered Cpl Cavill in his Crab to flail to the seawall. 4/12
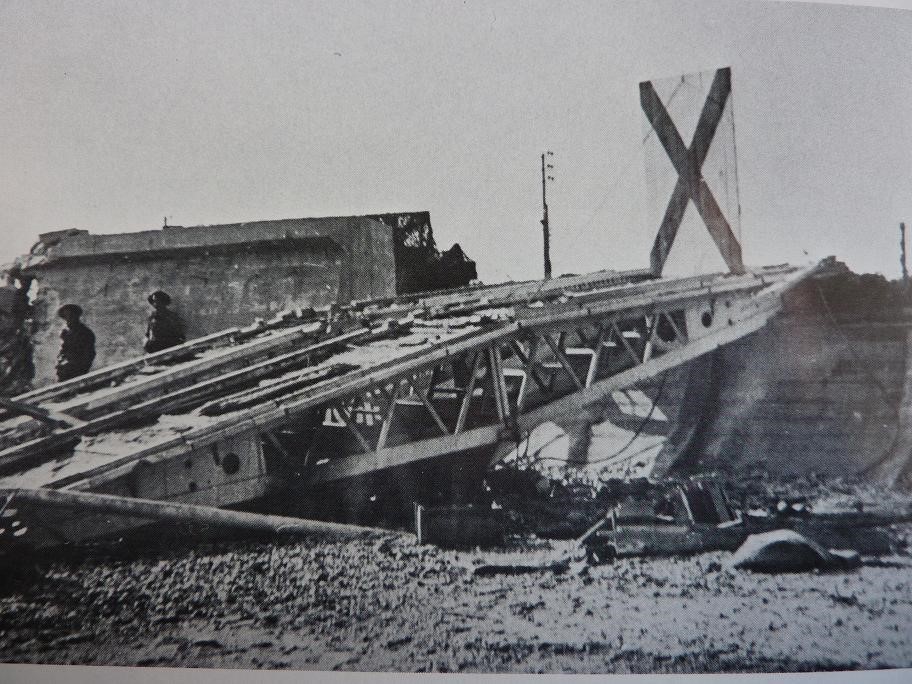
Lt Saunders saw there was no need for his log carpet and dropped it. Sgt Smith in the bridge AVRE (1E) followed the Crab and dropped his bridge against the wall. This is a picture of the bridge in place, and it can be seen in the famous first photo in the left-hand box. 5/12
Sgt Smith climbed the bridge, but his AVRE struck a mine, blocking the exit. Luckily, part of the seawall had broken down to the left of the SBG. A second LCT (1408) had now landed and flails beat their way up to the seawall and managed to climb up the debris to the top! 6/12
The flails cleared a path at the top of the seawall, and the AVRE with the fascine managed to get up and dropped it in the ant-tank ditch beyond. The D7 Bulldozer then scrabbled to the top and pushed AVRE 1E out of the way from the top of the bridge. 7/12
However there were still numerous mines on the beach and above it that needed to be removed before the exit could be declared clear. Sgt Smith’s crew from 1E, and Lt Oxtoby’s (AVRE 1F, from 1408) dismounted and did this job. 8/12
Sadly, after the D7 parked, the driver, Sapper Scott, dismounted but stepped on an anti-personnel mine and was killed, Sgt Smith from AVRE 1E being wounded by the blast (Sgt Smith received the Military Medal for his mine clearance work). 9/12
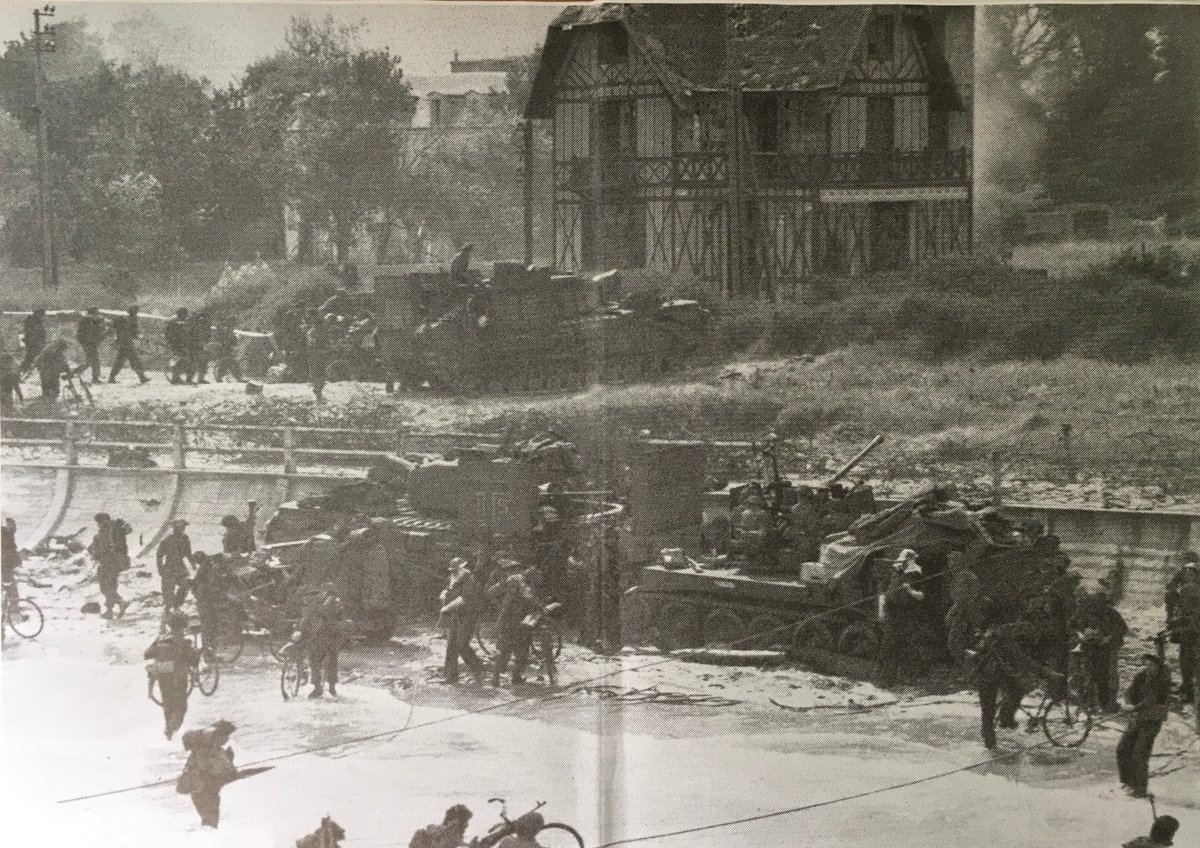
Eventually the mines were cleared and the bridge used for an exit. AVRE 1E and the D7 were at the top of the seawall and Lt Oxtoby’s AVRE 1F on the beach, with a Centaur AA tank that had landed. All this can be seen here, in the right hand box of the famous 9 Bde photo. 10/12
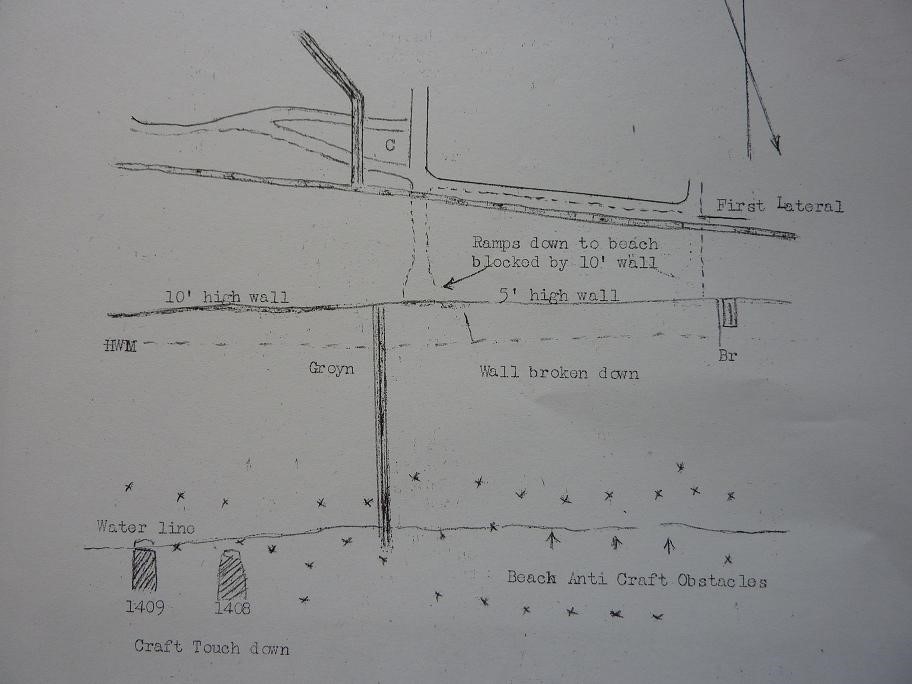
So this was an example of one of the gapping tasks that did not go smoothly, but as elsewhere the gapping team adapted and cleared an exit; the broken down seawall was also used as a second exit. This is a map drawn by Lt Saunders of the 1 Troop landing on Nan White 11/12

 Read on Twitter