#OTD in 1944 Op Switchback was launched by 3rd Cdn Inf Div to clear the Breskens Pocket. It was an audacious plan developed by LGen Guy Simonds which, combined with attacks on Walcheren and Beveland, led by 2nd Cdn Inf Div, would open the port of Antwerp.
A thread...
1/15
A thread...
1/15
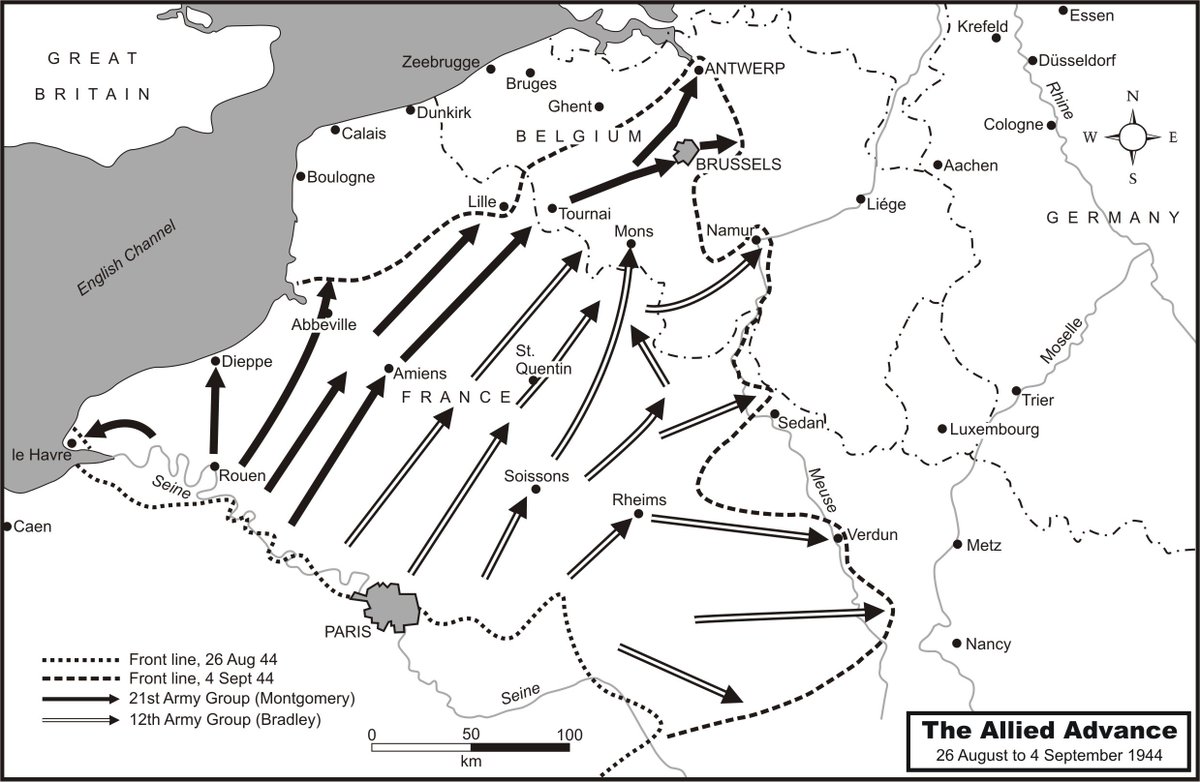
Montgomery, and the resources of 21 AG, were firmly focused on Op Market-Garden after 10 Sept, but 1st Cdn Army was ordered to clear the Channel Ports and the Scheldt Estuary to open Antwerp, the biggest port in Europe, which was essential for Allied logistics.
2/15
2/15
Antwerp and its undamaged port was captured by the British 11th Armoured Division with support from the Belgian resistance on 4 Sept. This was terrible for the Germans, but not fatal as they still controlled both banks of the 50-mile long Scheldt Estuary leading to Antwerp.
3/15
3/15
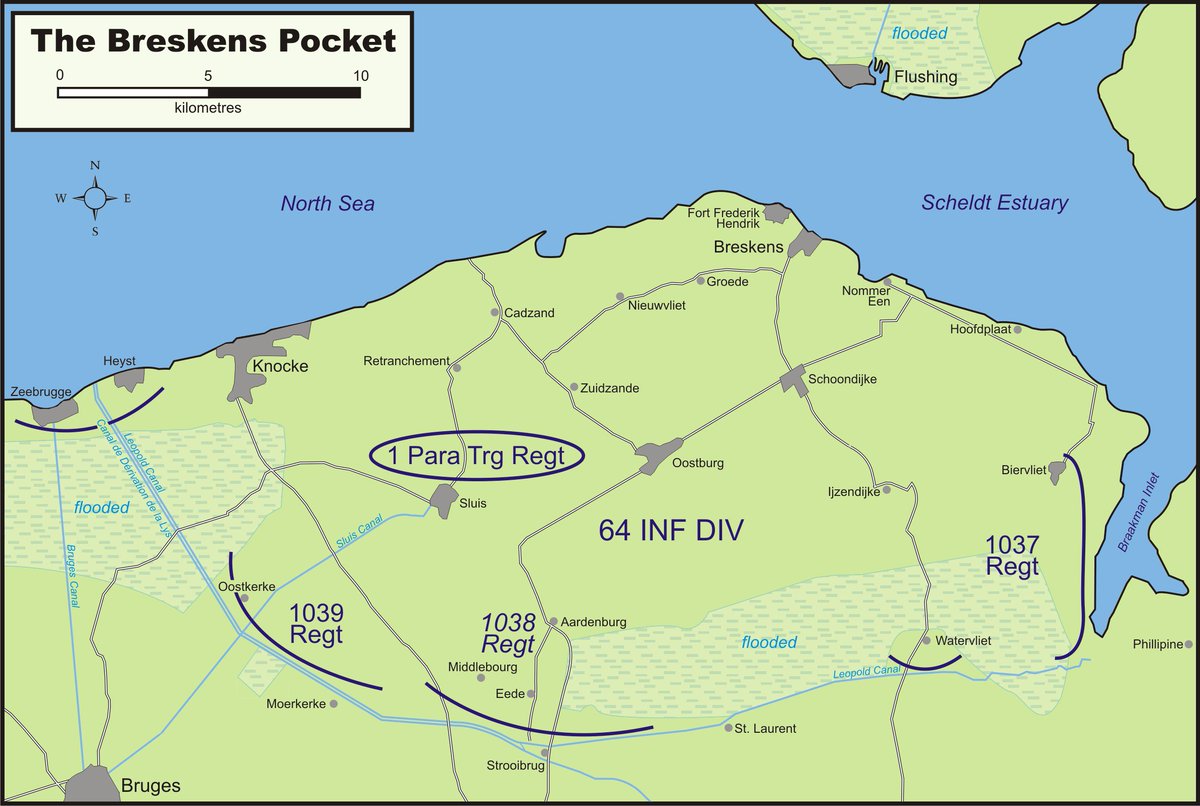
The Germans created 2 new defensive areas to guard the approaches to Antwerp. Fortress South Scheldt (Breskens) and Fortress North Scheldt (Beveland and Walcheren). Each area received a full division of troops (64th & 70th respectively) amply supplied with weapons and ammo.
4/15
4/15
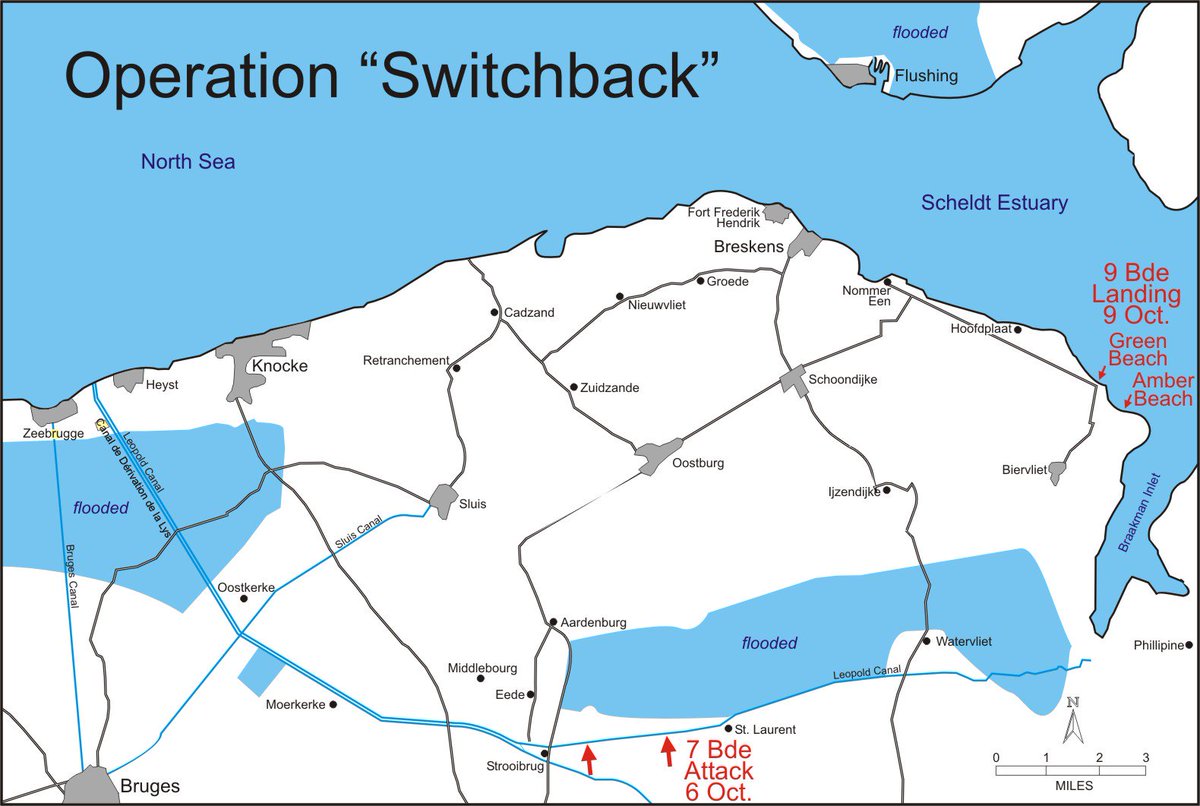
The Breskens Pocket was essentially an island, surrounded by the Leopold Canal, North Sea, Scheldt Estuary, and Braakman Inlet. There was only a narrow land bridge into the pocket through flooded terrain. It's capture would require a creative solution.
5/15
5/15
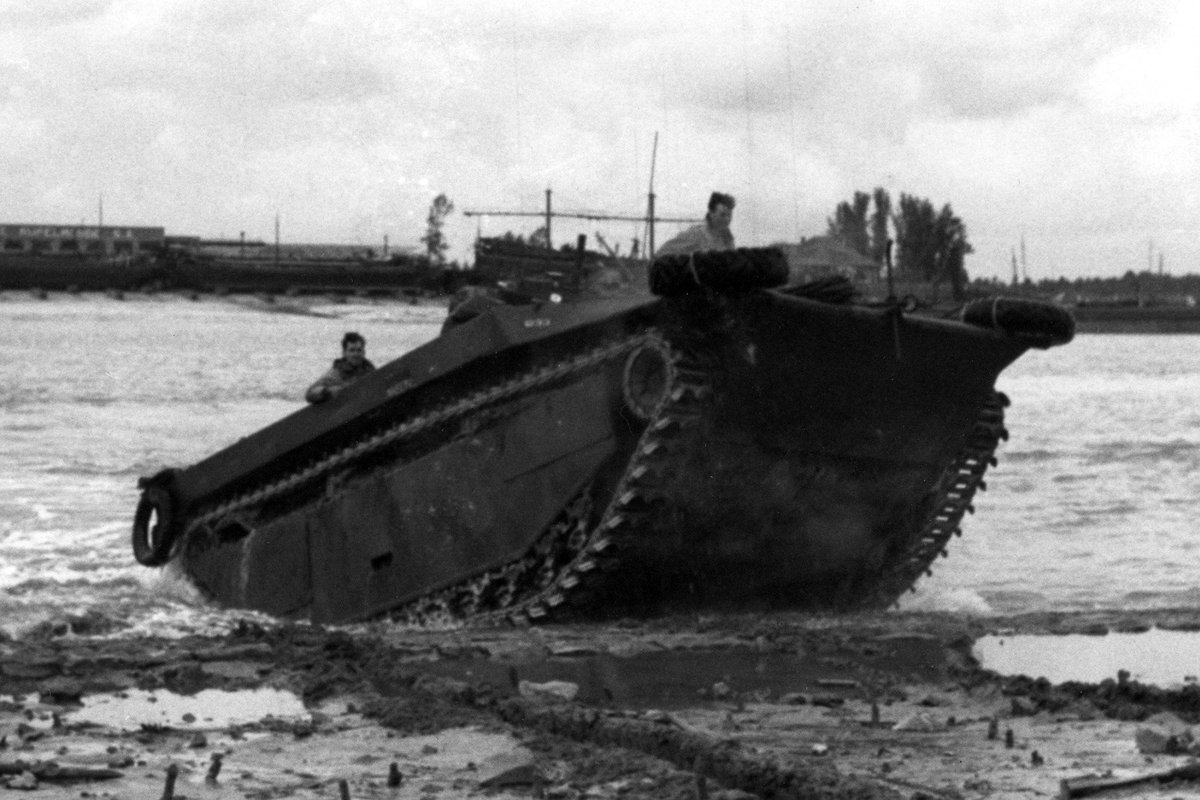
Simonds' answer was to launch an amphibious attack in the rear of the pocket using a regiment of Buffalos (LVTs). Brig John Rockingham's 9th Cdn Inf Bde was ordered to land just north of the Braakman Inlet. This attack was scheduled for 8 Oct.
6/15
6/15
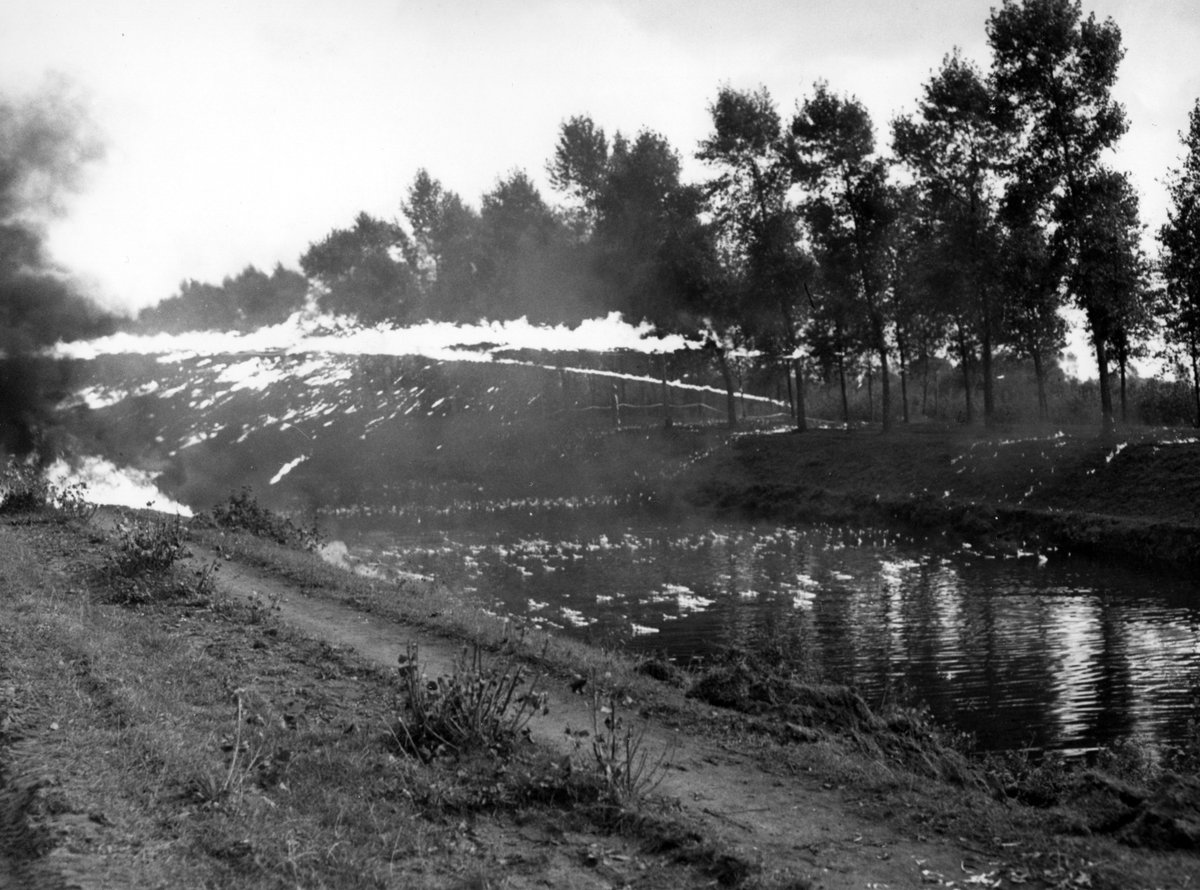
Two days prior to this landing Brig Jock Spagge's 7th Cdn Inf Bde was to attack across the Leopold Canal in the SW corner of the pocket to distract the Germans. This attack would make generous use of mortars and artillery as well as close support from Wasp flamethrowers.
7/15
7/15
Another feint was made by 4th Cdn Armd Div which was holding the sector near the Braakman. On 22 Sept Algonquin lost a platoon in an attempt to break into the pocket across the narrow land bridge. They renewed their attack on 5 Oct as a diversion to the main 7 Bde effort.
8/15
8/15
7 Bde assaulted on 6 Oct.
27 Wasps opened fire at 0525. The flame attack lasted for 5 minutes before the infantry crossed in boats. Two coys of the Cdn Scot Regt crossed successfully near Oosthoek, while a coy of the Royal Montreal Regt crossed on the left.
9/15
27 Wasps opened fire at 0525. The flame attack lasted for 5 minutes before the infantry crossed in boats. Two coys of the Cdn Scot Regt crossed successfully near Oosthoek, while a coy of the Royal Montreal Regt crossed on the left.
9/15
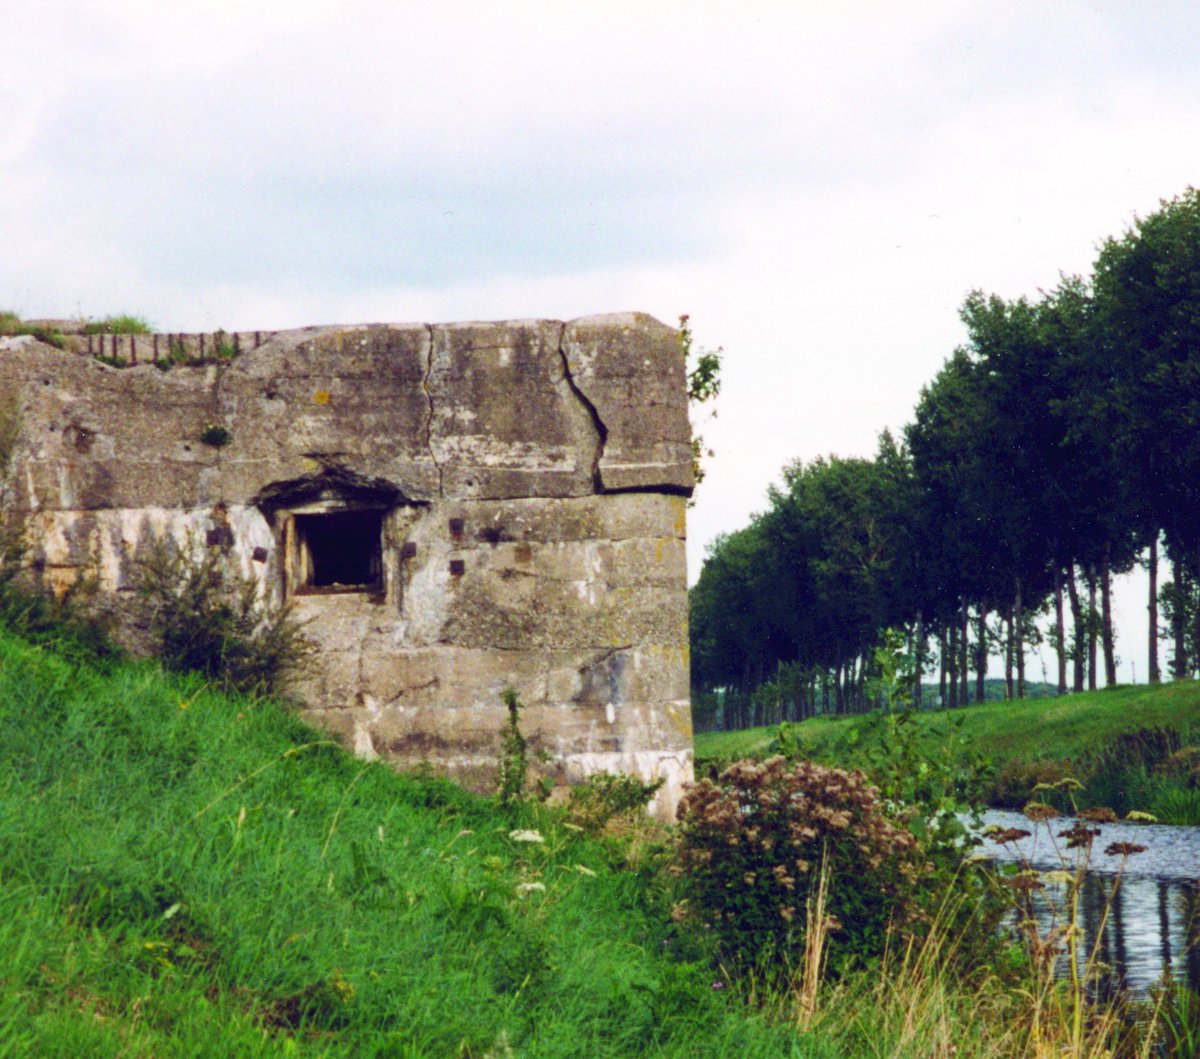
In the middle of the Cdn sector, a company of the Regina Rifles ran into intense MG fire from a German bunker on the far bank of the canal. It was eventually silenced by PIAT bombs but not before causing heavy casualties.
10/15
10/15
The men of 7 Bde successfully crossed the Leopold but they had no where to go. The land to the north was largely flooded and all they could do was hold on to draw the Germans onto their position until 9 Bde made their assault in 2 days.
11/15
11/15
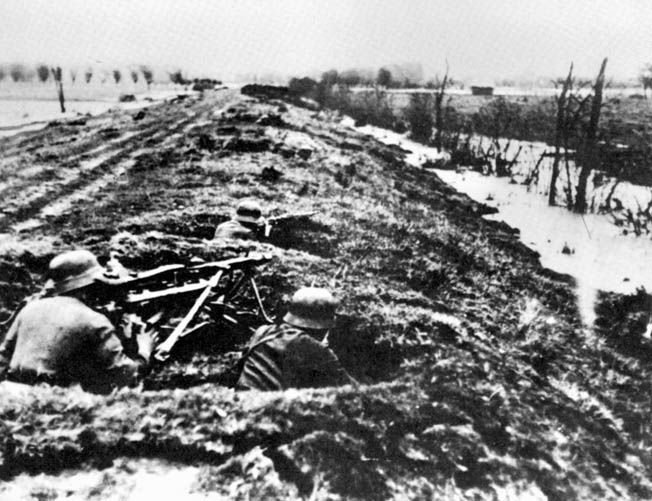
The flooding helped the Cdns since German reinforcements and counterattacks also had to cross the limited dry areas. The road from Eede became a killing zone as Cdn artillery inflicted heavy casualties on the attacking enemy.
(Photo of memorial in Eede.)
12/15
(Photo of memorial in Eede.)
12/15
It was a miserable and costly experience for the Canadians. Over 100 men were killed and more than 400 wounded in a week of combat. The intensity can be seen in the nearly 200 cases of battle exhaustion treated during the battle.
13/15
13/15
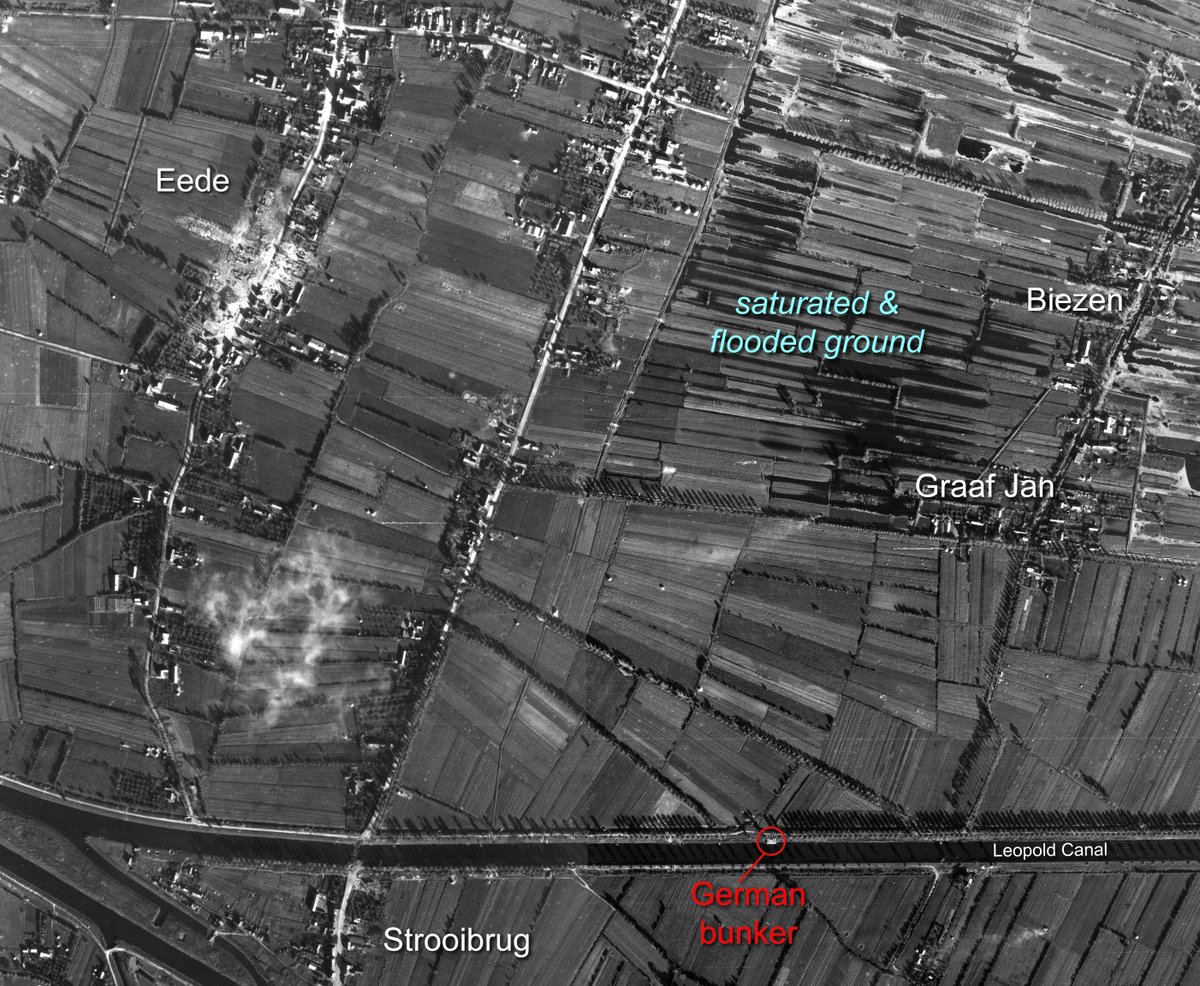
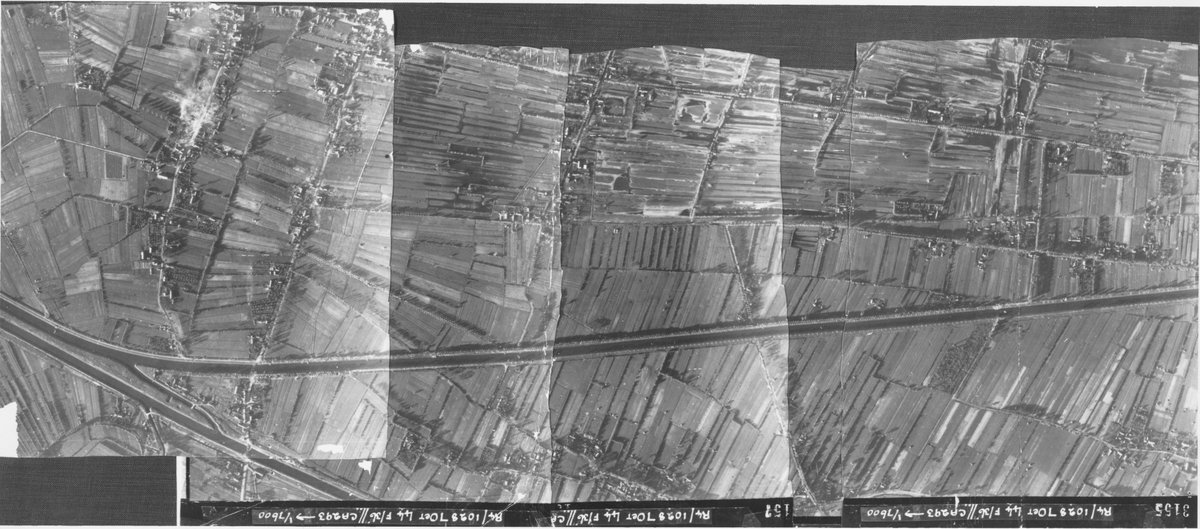
This composite air photo, taken on 7 Oct 1944, shows the entire front attacked by 7 Bde. The narrow triangle of ground north of the canal is dry, but above that it is flooded.
Eede is the town in the top left corner where you can see smoke from burning buildings.
14/15
Eede is the town in the top left corner where you can see smoke from burning buildings.
14/15
The only salvation for the men of 7 Bde would come from the amphibious attack by 9 Bde. It was scheduled for 8 Oct but would be delayed.
But more on that later!
15/15
But more on that later!
15/15

 Read on Twitter